The Vectric user forum is a goldmine for software tips and advice, not only that it’s jam packed full of creative inspiration. This is where we found the stunning work of Scott Plaisted, a VCarve Pro user who is definitely pushing his artistic boundaries. After an accident at work back in the 80’s Scott’s spinal cord was injured and now uses a wheelchair to get around, but this hasn’t limited his work, in fact it looks like it has made him more passionate than ever before about creating stunning projects. Before we look at what caught our attention on the Vectric forum, we had to ask Scott how he got into woodworking - and this story is incredible.
I studied Architecture for a year at a vocational school until I learned that architects were not needed for buildings under 5,000sf and I really wanted to work on more iconic buildings. At about that time my settlement came in from my accident so I designed my own house for wheelchair accessibility, and then built it with a highly skilled 3-man carpentry crew. This house was a very customized super insulated passive solar home with influences by Frank Lloyd Wright, and the Craftsman Movement.
We paid particular attention to the heavy joinery on the outside and inside, as one of the rules was as few exposed fasteners as possible. This is when I grew to love wood with that carpentry crew over 3 years with all the hardwood interior joinery. We bought every tool we needed as we went, and I spent a lot of time at hardwood suppliers picking almost every board by hand and learning from them as well. Another bonus of this was that I got pretty good with oil finishes, as all interior wood was oil finished.
I first discovered modern CNC when my dad wanted to buy a $1,000 Chinese kit machine, and he asked me for an opinion - thus began my research into small CNC's for his projects. He had sold his now big modern CNC shop to the Belgians for mid-7 figures, and had signed a 5-year non-competitive clause which basically meant nothing metal...so he decided on wood. He knew nothing about wood, but because of my house, he started asking me to do small projects and research for him and to pick a machine for him.
By this time I had picked a ShopBot Desktop, and it came with Vectric's VCarve Pro and PartWorks 3D (Cut3D), and he asked if he could deliver it to my house, and if I would set up machine, do prototypes, tweak the files for ease of use, and then train up a machine operator....at which point the machine would be taken North and my job would be done - as you can see I was gradually being dragged in further and further into this until ultimately I now have a customized Shopbot Desktop equipped with VCarve Pro and PartWorks3D (Cut3D) in my own shop.
Before my time with CNC I was mainly a power tool and hand tool traditionalist and considered a CNC “cheating” at first. After using the machine, I was blown away by the accuracy, and eventually my cut quality came up to the standard I envisioned. This was brilliant for me as my hand carving skills for fonts and shapes are abysmal it unlocked a lot of types of woodworking I had never gotten into before!
Prior to this I had virtually no CNC experience, and zero software experience. If it weren't for Vectric's excellent tutorials and both of the Vectric and ShopBot Forums, I would have been totally adrift!
With a background like that and all those tools at his dispense it’s safe to say that Scott has an abundance of woodworking experience and that CNC machining was the next step in his evolution in craftsmanship. It’s no surprise now that Scott’s work has been a major hit on the Vectric forum and with the team here at the Vectric HQ, we had to ask why and how he made this…
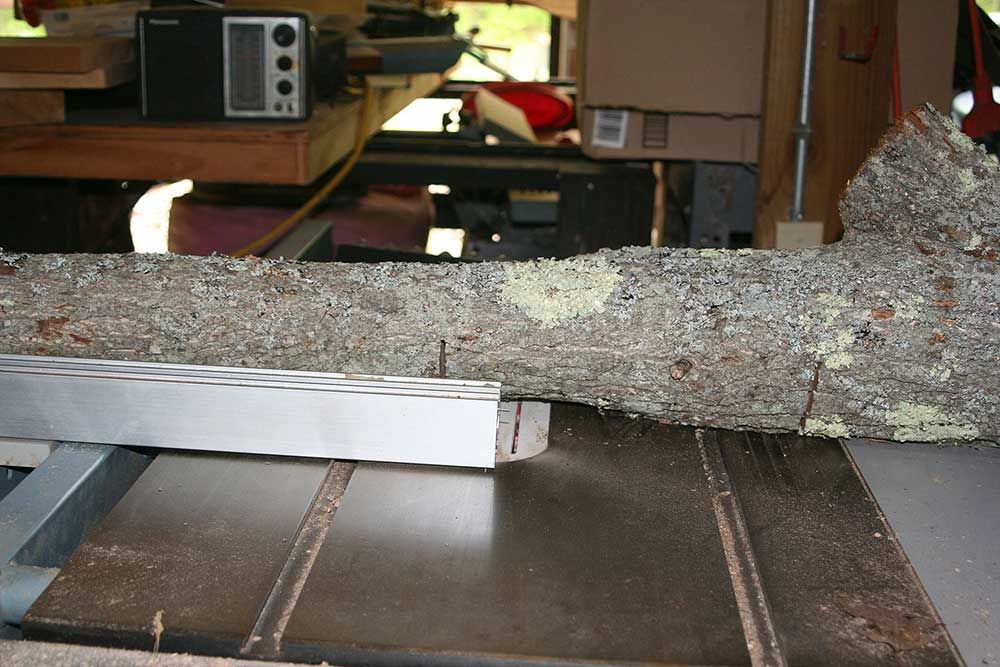
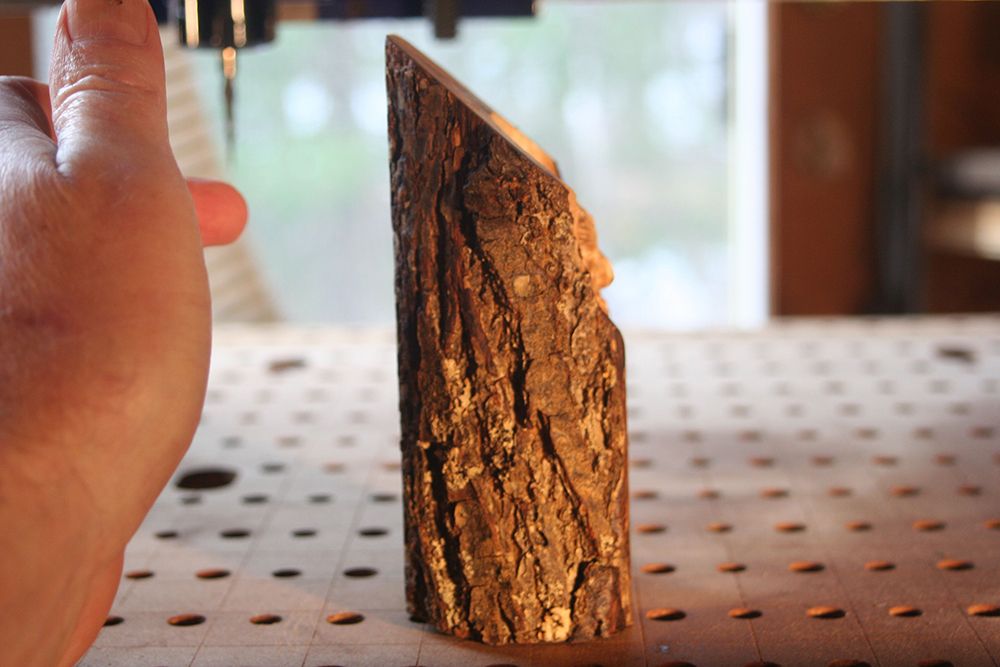
How I sourced the material was all luck. My aunt had a big black Walnut tree cut down in her front yard over two years ago. I learned she was paying them to take tree (40” diameter trunk) away. I put a stop to it as soon as I learned, and asked my uncle who had just bought a portable sawmill to come for the trunk pieces. When I went over to mark some best cut lines there was still a very small pile of branches that had not been trucked/chipped/cut for firewood so I cherrypicked the ones I thought I could use.
I had cut one into smaller sections, sanded the end-grains to 600G, and on one had sanded off a chainsaw mark on the back to expose sap/heartwood. I also bevelled the top, and then a piece of the bottom. Then used Linseed/Beeswax “Butter” and brought all exposed wood up to finish. And then they sat on the kitchen counter for two years waiting.
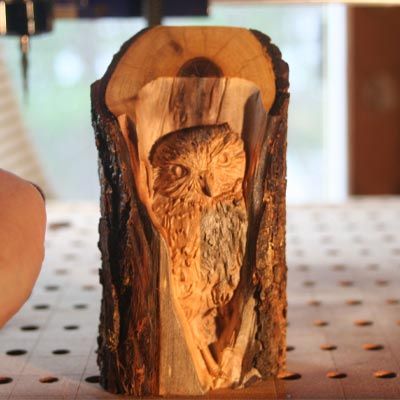
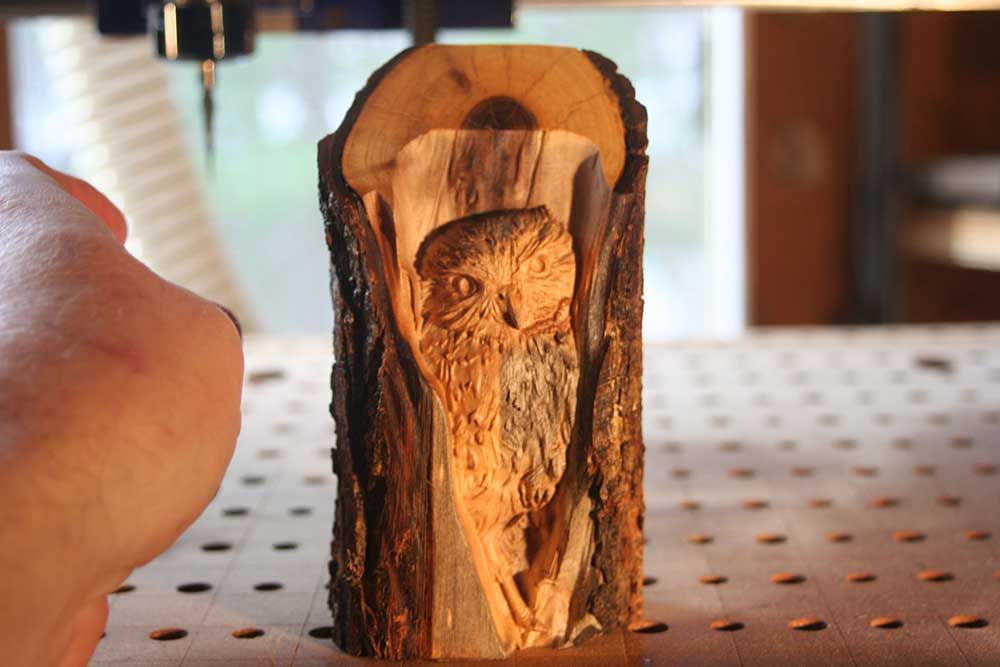
The very first model I ever bought with my own money was that “Owl in a Tree” that I had seen on the Vectric Forum. I basically learned about 3D modelling and machining on that piece. Later on, I found out my Step-Mother had started collecting owl figures etc. and I said “Would you like a wooden one?” I wanted to make her something special, and combed my exotics and looked through my “Scraps but I had nothing that quite fit the bill... then saw those Walnut branch pieces!
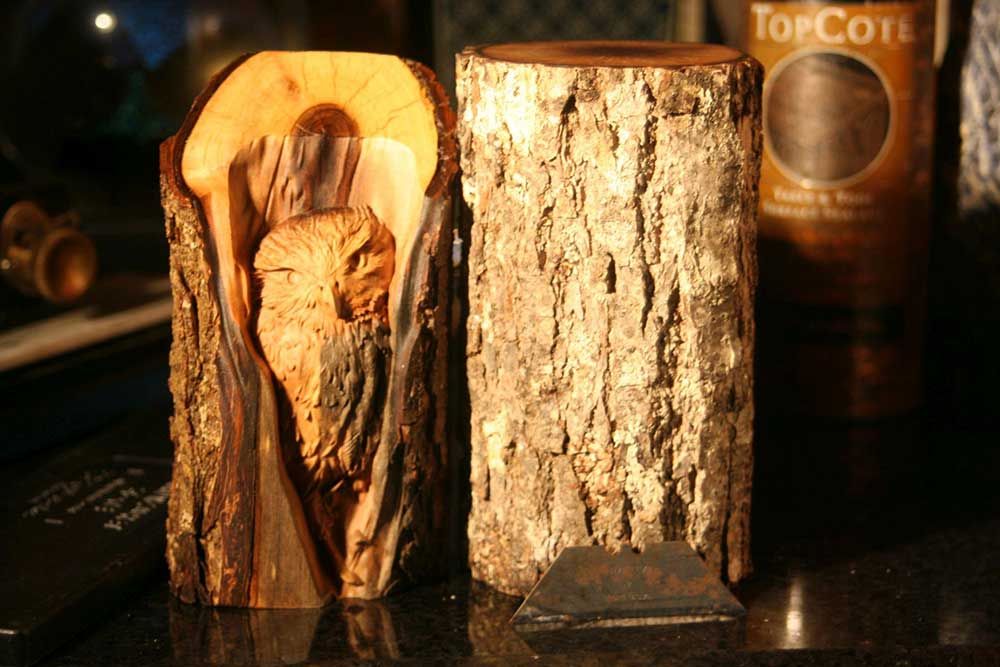
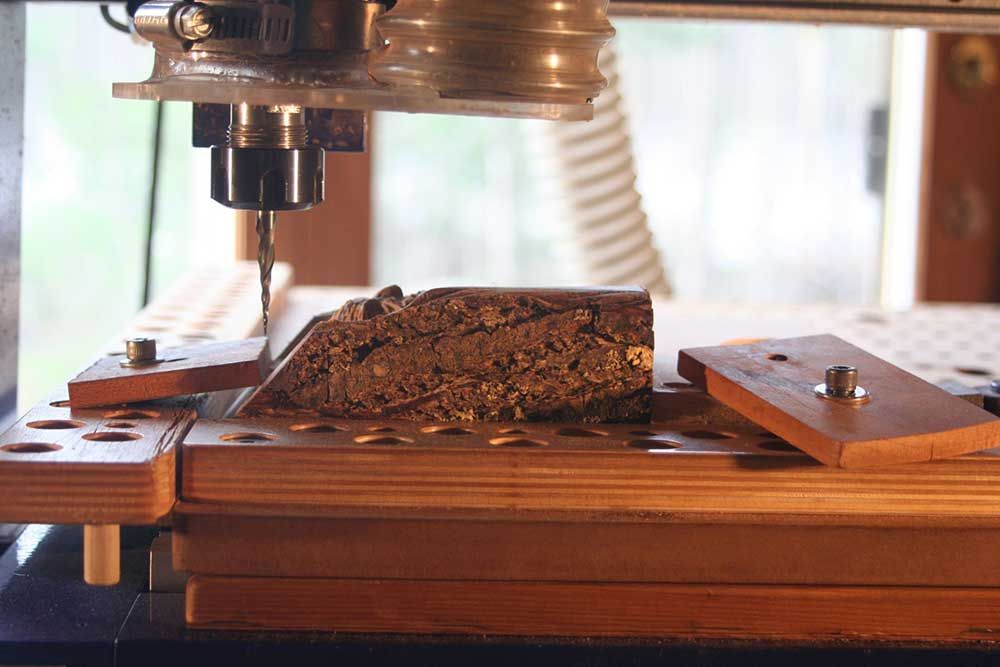
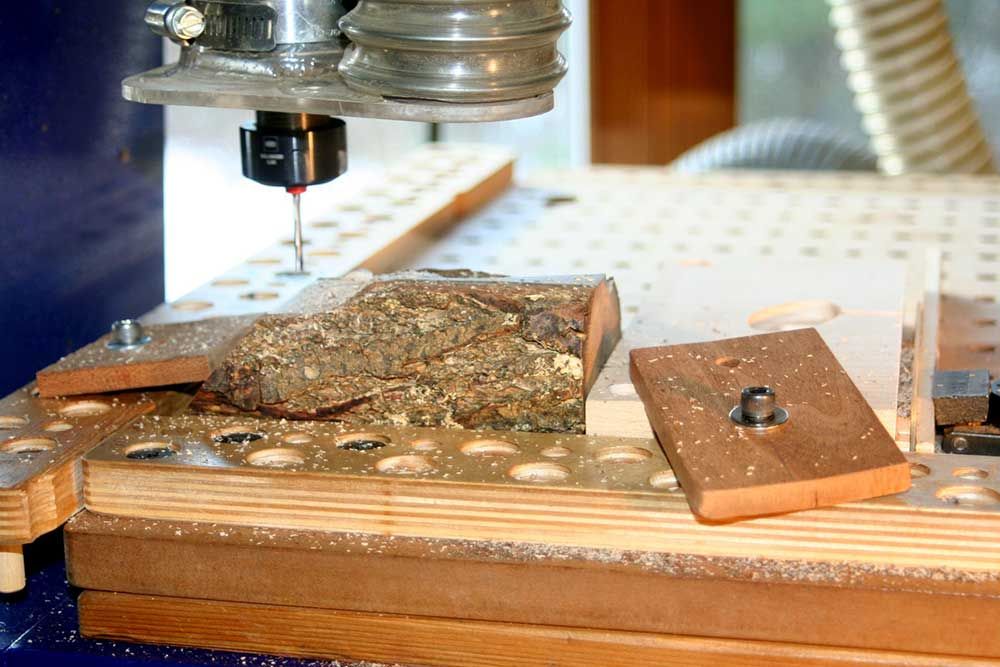
At first, I was just going to stick the whole model in the branch, but it just didn't look right. Then I started playing with an oversized model, boundary and material size to my bevelled branch. I took it out to the shop and jigged the branch up, got some exact measurements and tweaked the angle of the model to better fit for the jigged branch. I had increased model height so I thought heart/sapwood would be interesting. I resized the model owl a few times, and by hovering over the preview to see depths and taking measurements, I got it to where it appeared the model would “fall off” the diameter of the branch, so the model bark and the branch bark would be close.
This was the first time I had ever tried this, and with my computer, recalculating a 5% stepover with a .25mm Tapered Ball Nose took too long. So, I used a measurement from the tallest bark to calculate all and planned to lower my Z-Zero down in machine's software and keep close track of it.
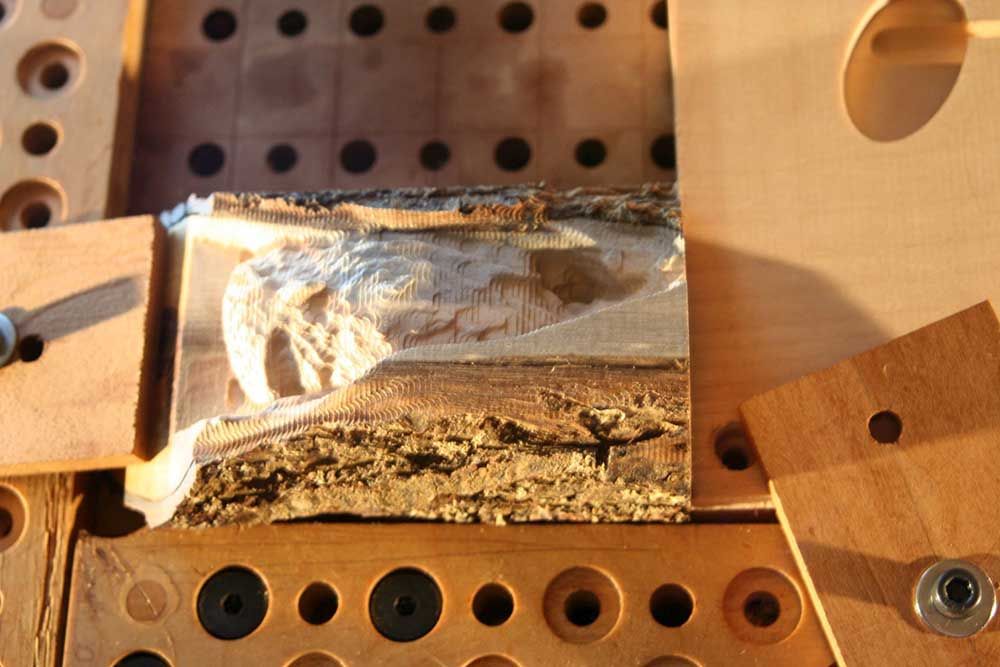
Roughing was with Drillman1's new longer .125” down-cut End Mill, and I ran 2 passes at .05”. Then lowered Z-Zero (Nudging in Shopbot) .1” and did it again, and again, and again, until good wood showed by his feet, and his beak was solid wood with no bark discoloration. Then ran the full roughing toolpath as far as the bit’s cutter length would let me (50% of the full Roughing file).
Then stuck a 3” .25” shank, .25mmTBN in, Z-Zeroed to spoil board, then move my Z-0 down the total amount of nudging that the roughing bit was (.3”) and cut. Even though this was the prototype it came out great and she loved it – bonus!
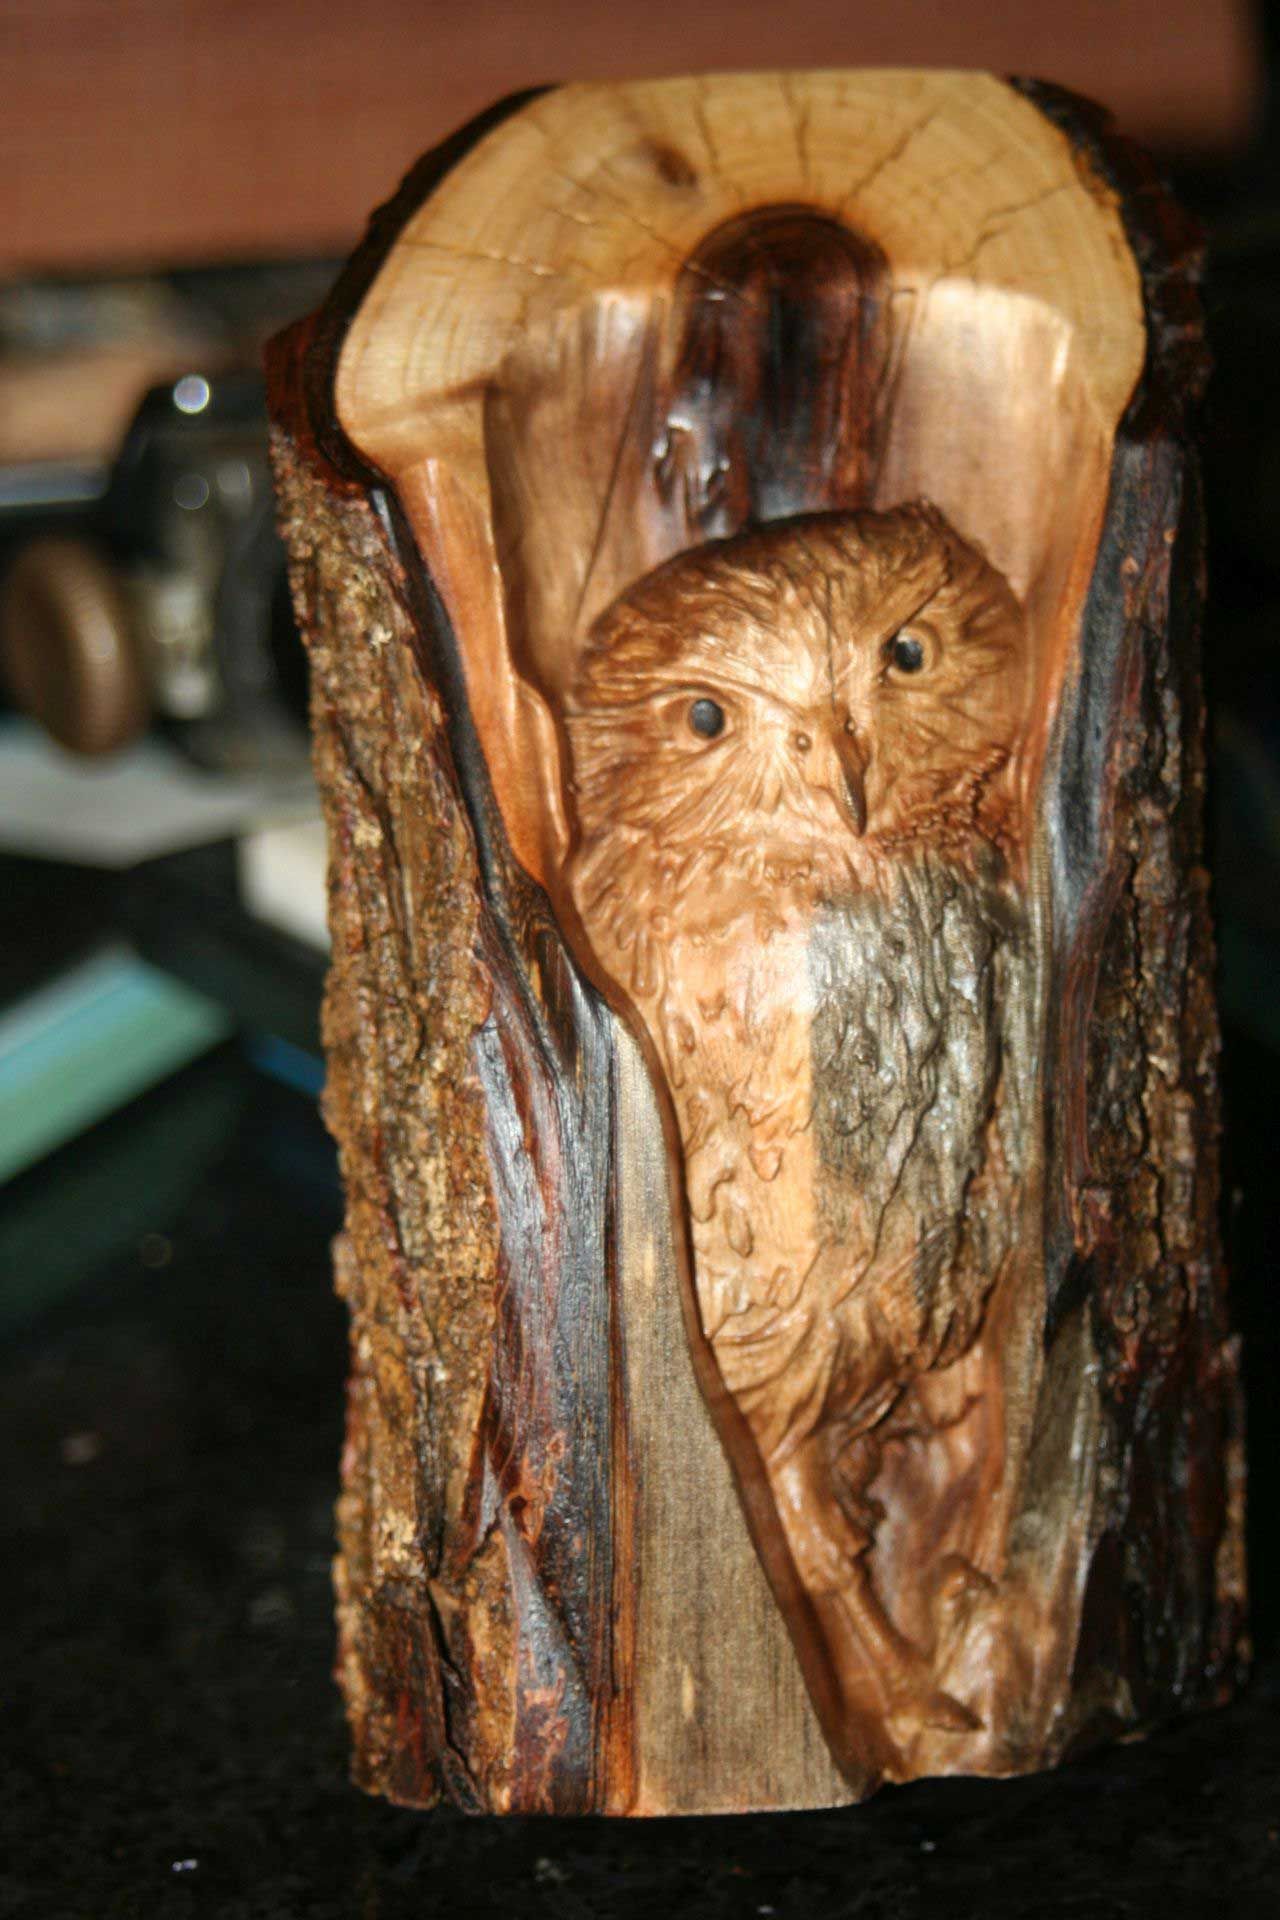
What really helped when designing and creating this project was the accuracy of the preview at maximum resolution, and then being able to hover over an area to get the height at that point was critical. The ability to disproportionately change model height, and cut to boundary vectors was essential. Roughing with a 1/8” bit and a .02” allowance let me see as I went, pretty much what level in the wood I wanted to start the actual cut at. Sizing the model so the bark in the model was slightly larger than the actual material bark worked Great! Having a Tapered Ball Nose with enough cutter length, and a .25mm radius tip for the details made it possible, but again this combined with being able to hover over the steepest parts of the model in VCarve Pro for the depths helped me maximise the model height to accentuate those same details.
As for tips I could share with you, cutting at a 5% stepover made sure that virtually no sanding was required to remove stepover marks, fuzzies etc. Also, things like round eyes, stayed round and details like the talons and nostrils need no touching up. I'd rather the machine cut a couple hours more, than me sanding off details I worked so hard to get. It was virtually ready to go with just a stiff boar bristle brushing.
I have a mix I developed for button finishing (80/20 Polymerized Linseed Oil/Beeswax melted to a “Butter” in a double boiler) that I applied after roughing, let it sit for 20 minutes, then brushed the excess into a smooth layer on the wood. It seems to reduce fuzzies, lets me run the finish toolpath and packs the fines into the wood pores for a smoother finish. Most of all use your imagination and try to use the features of the wood itself to add to the model. Don't be afraid to think outside the box!
We would like to take this opportunity to thank Scott for telling us his story and for sharing some really useful techniques and tricks when using raw materials. If you would like to view more of this sort of inspiration head over to the Vectric User Forum where you can find 1000’s of projects to learn from.
Vectric Ltd
Precision House
2 Arden Road
Alcester
B49 6HN
GB115123072
Privacy Policy |
Terms and Conditions


