Doug Strickland uses VCarve Pro to design custom signs that he cuts on his ShopBot Router. In this case study Doug describes the process he went through to design, route, deliver and commission a set of signs for a local bank.
Doug describes the project.
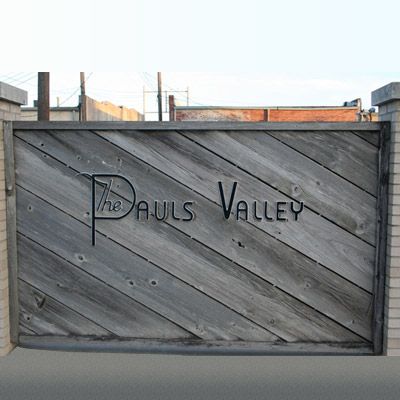
This was a job for one of our local banks, to be installed on the fencing enclosing their parking lot. The fences were 1”x12” cedar, installed on a diagonal. There is a lot of foot traffic by this location, so vandalism had to be considered. The previous wooden letters had been vandalized and stolen, so we decided to try a different approach. We chose to make them out of two layers of acrylic, one screwed to the fence, and the other glued to the top of the screwed down letters. I guess it worked because they have been up for almost a year, and are all still intact. Here’s how we did it....
The logo was one I had designed many years ago, and is still being used. After we had imported the original logo in VCarve Pro and decided on a layout, colors and sizes, and submitted it for approval, both to the bank and the city code officer. Both approved the design so we went to work.
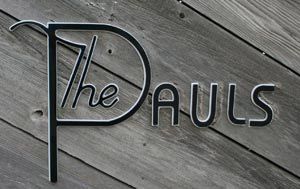
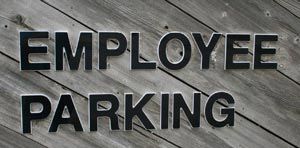
We then established an outline of 0.125” for the base acrylic, being white to offset it’s appearance on the weathered gray cedar, and left the top (black) layer as the original size. The material chosen was Cyro Acrylic, 0.180” thick and I used a Belin O bit, 0.125” cutting diameter, downcut, moving at 100 ipm, and Z axis plunge at 60 ipm, with vacuum hold-down and tabs. I used the small bit due to some tight corners in the logo. As you can see in the photos, the logo has pretty thin strokes on it. We cut both the white and black and then cut the set copy with a Belin O bit, .250” diameter, same speed and all.
While the files were cutting, I plotted the layout pattern on the plotter and had it ready to go when we were ready for it. After all was cut, I took the white letters to the drill press and drilled 0.125” countersunk holes in assorted places through the white plex, all the letters. The location of the holes was not critical, so I just drilled away. I drilled a minimum of four holes per letter; some more, some less. Next I cleaned up all the edges (needed almost no cleaning, used a new bit, and they are dangerously sharp).
On site I installed the white letters firstly to the fence using countersunk screws and then secured the Black letters on top using a combination of Weld On #11 and #16 glue, and old reliable 3M VHB tape. This turned out to be the most difficult part of the job. There is no such thing as a level fence, especially a cedar fence. I do not do well at holding small pieces of acrylic together while waiting for glue to dry. But I learned…….After an hour or so of gluing and holding, the job was complete. The next part is the best part-getting paid. This is my personal bank, and the current president is a third generation family owner, and my high school pal and fellow team member on the football team, so getting paid promptly is no problem. This job paid very well for a small town in Oklahoma. With a nice profit on the job, and one of many others we have done for them.
This is the way I approach most jobs of this sort, always seems to work. I have a ShopBot PRT, purchased used in 2006 in Florida. I previously owned a ShopBot PR. I have no complaints or issues with my equipment but I'm using a 3 ¼ 4 HP Porter Cable which is a great tool, but incredibly loud. I'm trying to find time to install a spindle I purchased a while back - and my ears will thank me for this.
Thank you for your time and kind interest.
Doug Strickland
Superior Sign Shop
Ada, OK
USA
superiorsignshop@cableone.net
Vectric Ltd
Precision House
2 Arden Road
Alcester
B49 6HN
Registered in England Number 05382596
VAT Registration GB115123072
Privacy Policy |
Cookie Policy |
Terms and Conditions


