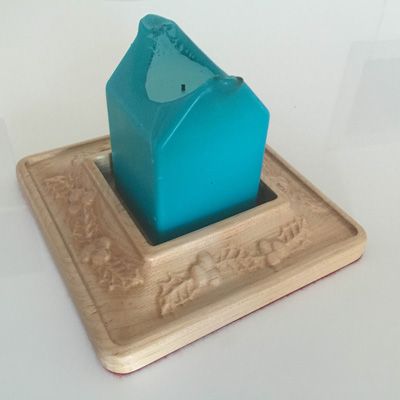
So, the time had come for me to get in the Vectric Labs and cut my first project. It was quite fortunate that I was given this task close to Christmas as I hadn’t been shopping for my parents present (as usual) so it was a perfect opportunity to make them something special from me – even though I’m in my twenties I was banking on the fact they would still enjoy what their child has made.
With not much time to spare and knowing that I’m not the most proficient user of the software, I knew that I could quickly make something professional looking by using a project from Design & Make. The question now was “What would my parents like?”
I took a look through the Design & Make Project Shop and it took me a while to choose what I wanted to make as every project I saw I thought of cool ideas. After a couple of hours of browsing I was leaning towards creating the ‘Home for the Holidays No.2’ project as I knew it was something my mother could use as a candle centrepiece for the dining table at Christmas. I clicked on the project to view the details and I saw some amazing examples of what other customers had made and I was sold. I downloaded the project there and then and got to work. To help me along the way I watched the Design & Make video tutorials.
Putting together the model:
I used the ‘Square Trivet’ model as the main canvas and base of the candle holder and thought I could add some of the other bits of clip art on top to create some seasonal decoration. At first I was tempted with v-carving some personalized text along each side but again I couldn’t decide what to write, so I used the ‘Holly Sprig No.1’ and the ‘Holly Leaf No.1’ and arranged them (quite easily) along one side of the part.
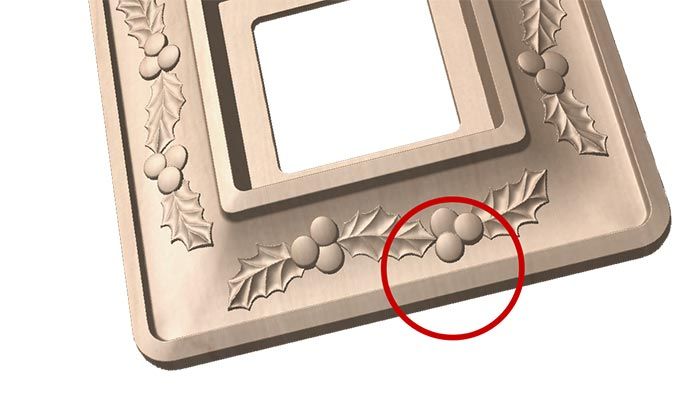
Using the ‘Mirror Selected Objects’ tool, I selected the holly leaf arrangement and mirrored them about the job center so that everything was aligned equally each side – Note: I had to make sure that the tool could fit in between the border of the base and the holly berries (as highlighted in the image).
Now that I was happy with the final design it was time to calculate the toolpaths. First, I calculated the roughing toolpath using a 0.25” End Mill. Once this had been done I then calculated the 3D Finishing Toolpath using a 0.125” Ball Nose. Finally I generated the Profiling toolpath again using the 0.25” End Mill. To make sure the finished part didn’t fly off the machine bed I thought it was only right to insert some tabs beforehand – Safety first!!
As it was my first time machining something I wanted to get my toolpaths checked, so I asked James to make sure everything was ok. All the toolpaths were in good shape but he did give me a great piece of advice. He explained to me that once you had hogged away big chunks of material with the Z-level roughing toolpath you could then run another roughing toolpath but this time have it Raster closer to the material, acting as a “semi-finish”. This would then leave just enough material for the finishing toolpath to work with, saving time and decreasing the stress on the ball nose bit and machine. So with that in mind we calculated a second roughing toolpath and I was good to go.
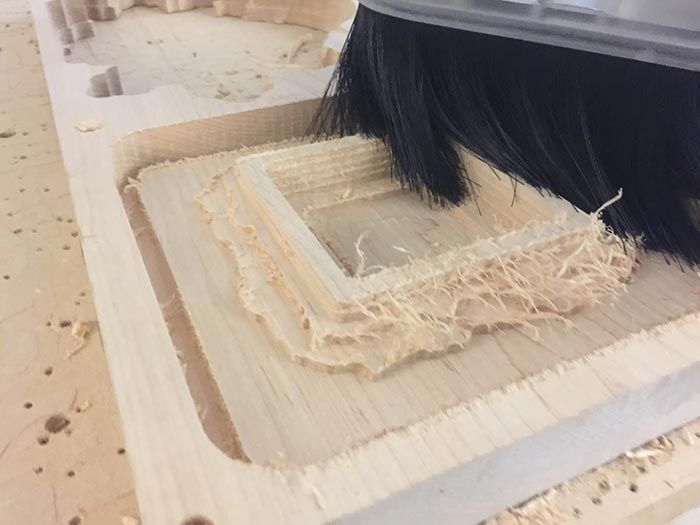
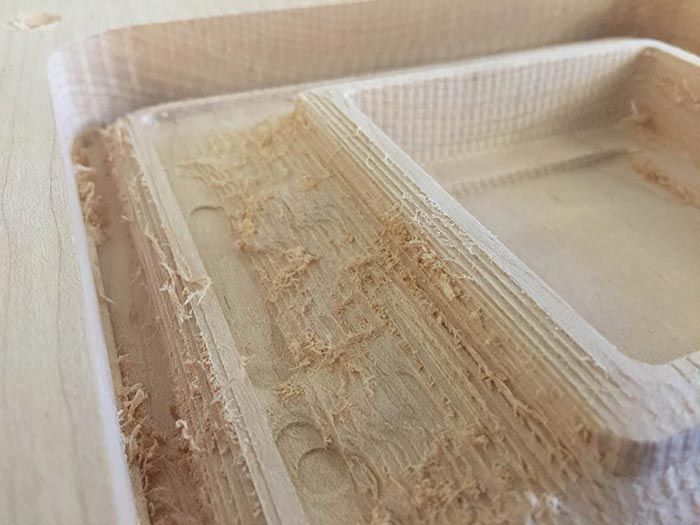
It was time to machine! Once I had the machine set up and material in place (with the help of Sean) I ran the roughing toolpath. It looked quite furry but I was assured this was ok. Then I ran the second roughing toolpath.
Now that I had completed both roughing toolpaths it was time for the 3D Finishing Toolpath. As I was swapping the bit over I couldn’t find the 0.125” Ball Nose, which is what I had calculated my toolpath with. So after a while looking around for the tool, I decided to use a 0.25” Ball Nose. I was anxious when calculating the toolpath as I knew the bigger the bit the less of the fine detail it would pick up, but I was assured that the detail will still be strong. So with a deep breath I ran the new finishing toolpath and it didn’t turn out too badly. The extra detail that would have shown with the 1/8” tool would have been nice but you have to work with what you’ve got.
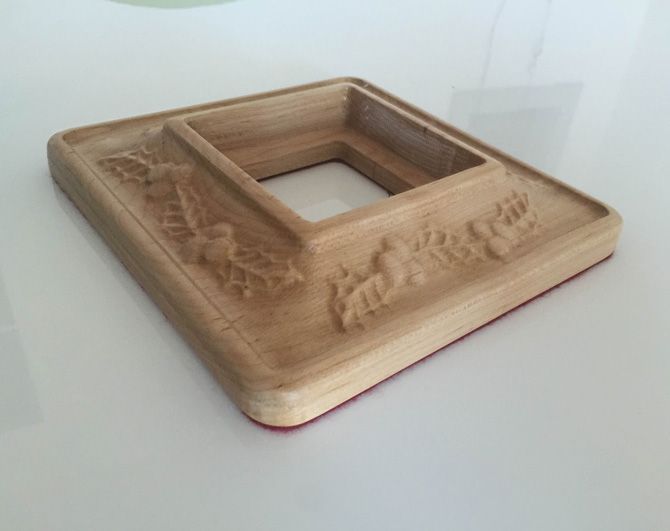
Now it was time to finish the part. The first thing was to saw the tabs and use the small belt sander to sand down excess tab material. Then I spent some time with some sandpaper, a sanding block and a Dremel hand sander making everything flush. Tip for the hand sander, keep the contact between the sander and the material light and constantly moving… otherwise you will burn the material. Once it was all sanded and I had got rid of as much of the “fur” as possible it was time to coat my piece in a few layers of Shellac.
Once everything had dried I thought I was finished but I felt something was missing. I picked up the piece, inspected it, visually it looked great, I put the piece back on the table and as I did I realised what was missing… a cloth finish on the bottom side.
I purchased some dark red felt, measured the part and was ready to cut the cloth base with a Stanley blade, but then I realised there was a laser machine across the room. Again I had never used the laser machine, and with the risk of setting fire to Vectric HQ I thought it was wise to get James’s help.
We went back into Aspire, drew out the shape that needed to be cut and saved that out as a DXF file. After positioning the material in the machine and loading the file we hit ‘Go’ and it was a success, there was no fire. I am 100% certain that allowing the laser to cut the piece turned out much more accurate and visually appealing than my wonky cuts would have been.
I finely spread PVA glue across the whole of the bottom of the part (I didn’t have time to take a photo of this bit as the glue was drying too fast) and quickly lined up the material to the candle holder. Making sure I didn’t apply too much glue was most important as it would cause the material to bubble, slide and even worse seep through the material fibres.
I’m quite happy with the final piece, but there are a few things I would do differently the next time I get in the workshop. I would definitely take even more time to sand and prep the piece for a finish, the more you eradicate imperfections at the start the less they are highlighted once you finish. Also I would make sure to check and double check that I have all the equipment I planned to use beforehand. The last thing I would do when using a Design & Make project is to thoroughly check for all the resources that are available for the project I have downloaded. My candle holder was sized a touch too big for the set sizes of regular candles – but the guys at Design & Make do have a size chart explaining what sizes to scale the models to.

Vectric Ltd
Precision House
2 Arden Road
Alcester
B49 6HN
Registered in England Number 05382596
VAT Registration GB115123072
Privacy Policy |
Cookie Policy |
Terms and Conditions



