How would you go from working 80+ hours a week for over 30 years to retirement? Well, this month’s customer case study Gary Mast has had to make this jump, and to fill up his time he has taken to the world of CNC. You may have seen Gary’s outstanding work on the Vectric Forum and his posts have gained a lot of attention – especially his latest piece which he will be taking us through a bit later in the article. Before we discover how he had made his fantastic project we had to find out about his background…
In 1967, while I was still in high school, I bought into a very small equipment rental business. After my graduation I became manager. About 3-years later, the original owner died and I was able to acquire 50% ownership of the business. In the 1990’s I became 100% owner and by 1997 I built the company to five locations and became the largest Equipment Rental Company in Utah. In 1997, the year United Rentals was established, I became the first company they bought out before going public – I retired two months my 47th birthday.
I went from working 80-hours a week for the past three decades, to suddenly having nothing to do. It was at this point I decided I wanted to pursue a hobby in making things out of wood, so I decided to buy a Laser Engraver. I found it to be very unsatisfying and soon after replaced it with my first CNC machine.
The software package being sold alongside the CNC machine I was looking at was very expensive, so I needed to find an alternative with the same functionality. The company I bought the CNC machine from recommended a brand-new company with software much more affordable called Vectric, so I initially purchased their Cut3D and VCarve programs.
In 2008 Vectric launched a new product called Aspire, I wanted to get more into 3D modelling, so I bought it soon after. Although I own Cut3D, VCarve Pro and PhotoVCarve, since Aspire came out I haven’t needed to use the other Vectric software. Aspire is the main software I use on every project. I even use it to generate the art and vectors for use in my laser cutter and vectors for the plasma cutter. I make sure I upgrade Aspire to get all the new goodies.
As far as machinery goes, you name it, I have probably owned it. I converted my own RV garage at my home with everything needed for woodworking. Currently I have a CNC, 400-watt laser cutter, 12” table saw, 18” bandsaw, Grizzly 5-hp cyclone dust collector, drum sander, commercial grade 3-D printer, Lathe and Mill, just to name a few items in my shop.
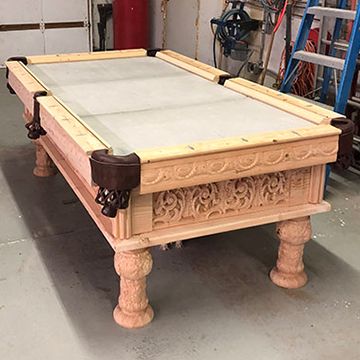
With Vectric’s Aspire at his disposal and an ever growing “toolbox” of hardware it’s clear to see Gary has everything he needs to create pretty much any project he desires, no matter how big the task… and this is exactly what he has done. He starts by telling us why he wanted to make his pool table.
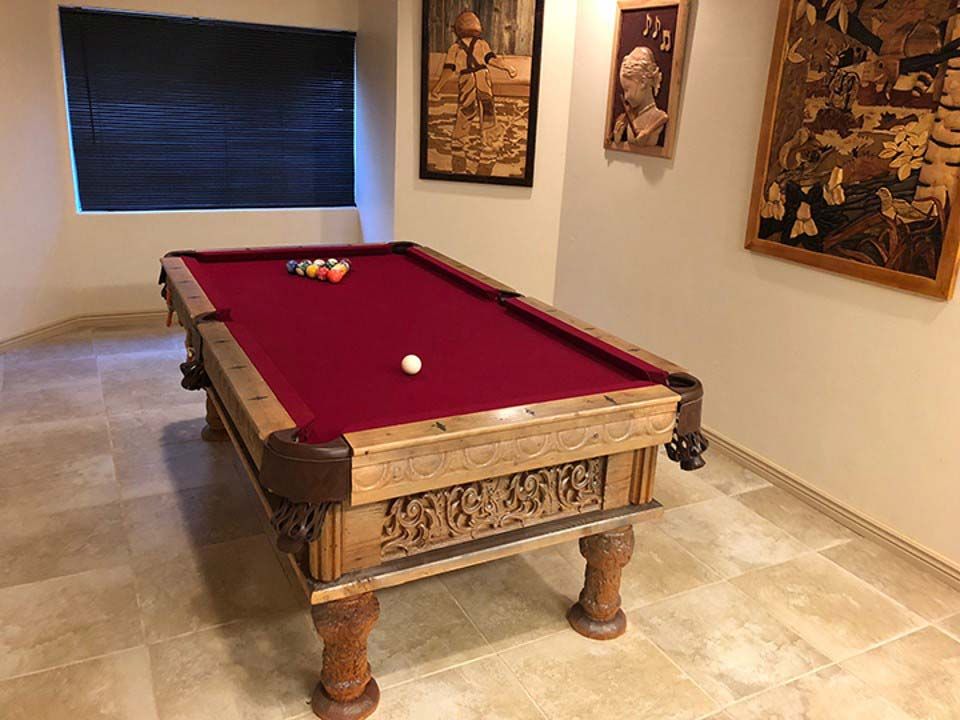
I have a smaller room in my basement that needed something to fill it up. Due to the size of the room, I decided to build a 7-foot pool table, rather than the larger more common size. I found bits and pieces of information on the internet that helped me with dimensions and profiles, but found out that not all pool tables are the quite the same. Making a trip to a local business that sells pool tables, I also got some more measurements. I ended up making the table rails twice, because the measurement I got didn’t work once I got the leather pockets. The first lesson learned is make sure I have all my parts before I proceed.
The first stage was designing the project on the computer, which took two or three days. (I changed things a lot). Due to the detail of the profile, the table rails were designed in Rhino, but all the other parts were designed using Aspire. I was in the middle of the design process when the newest upgrade to Aspire came out. I freaked out and even sent an email to Vectric Support because I thought features and tools had been taken out of Aspire. It turned out, after watching the “What’s New” video, the changes in Aspire made the design process a thousand times easier. I also used some of the Aspire Clipart for decoration around the edge of the table and on the legs.
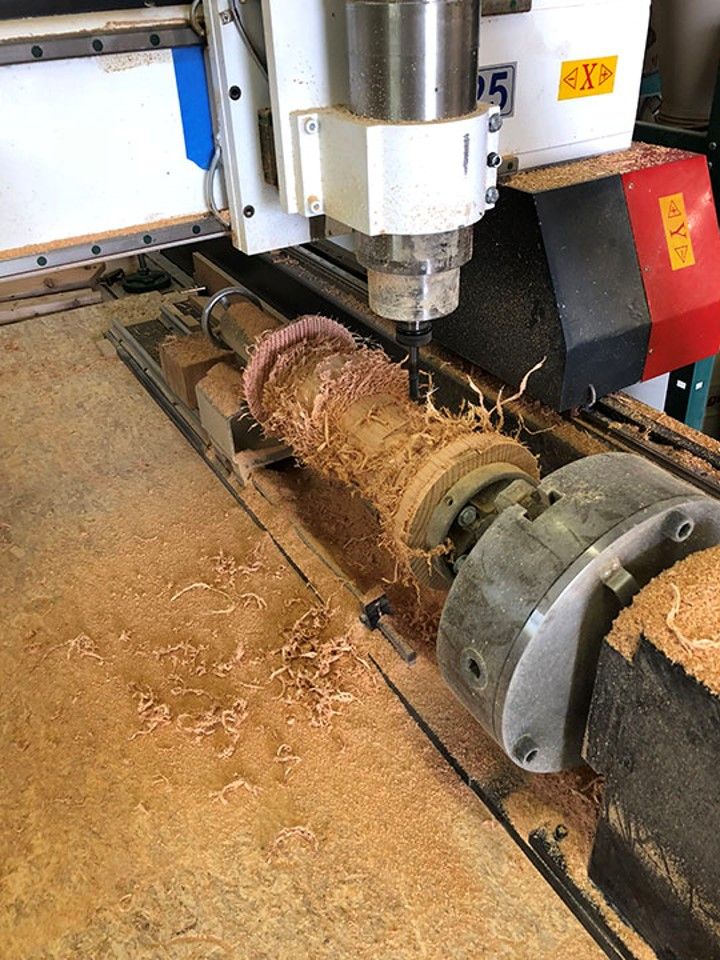
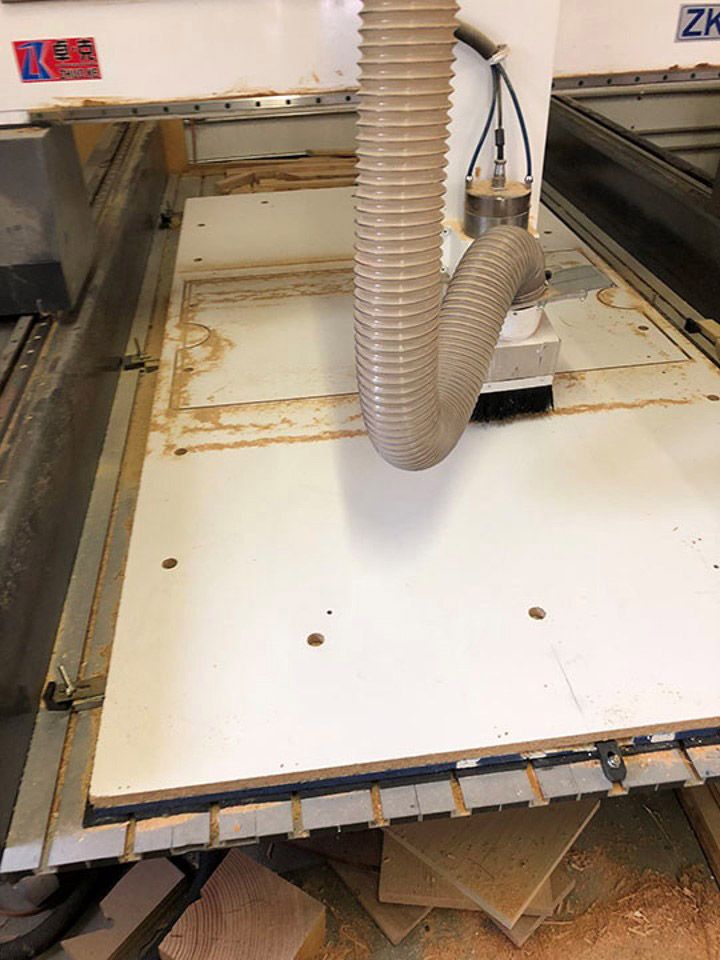
I needed 8” x 8” – 8’ beam to machine the legs. Although I wanted a prime grade of wood like maple, walnut or oak in that size, the only thing available around the Salt Lake City area that size was rough cut Douglas Fir. I could have ordered something else in but didn’t want to spend hundreds of dollars in freight. Each leg, using the rotary on the CNC took about 5-6 hours to machine.
I had four 2” x 10” – 10’ Douglas fir rough cut planks that I had laying around in my shop for about 10-years, that I knew I could carve the sides and not have a problem with warping. Those were used for the frame and sides of the rails. Cutting, milling and carving them took about 3-days.
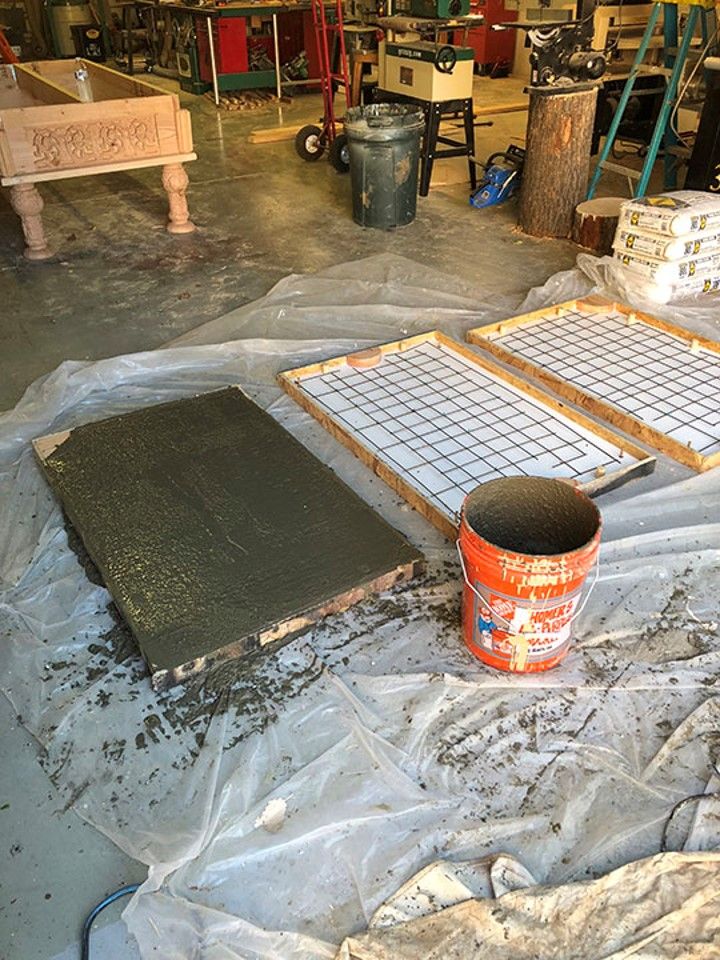
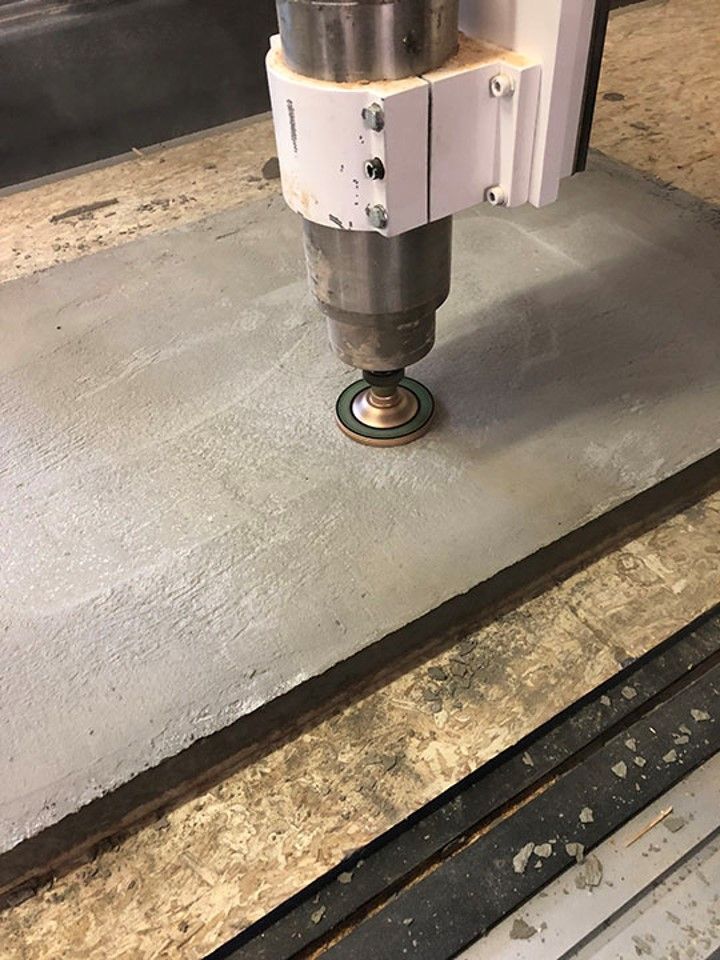
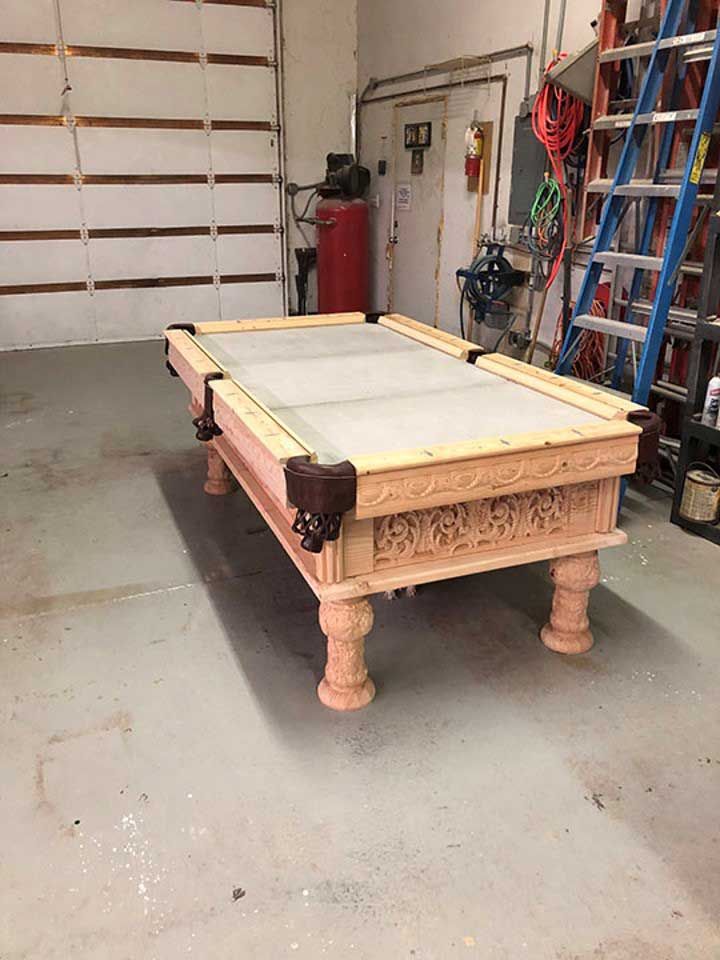
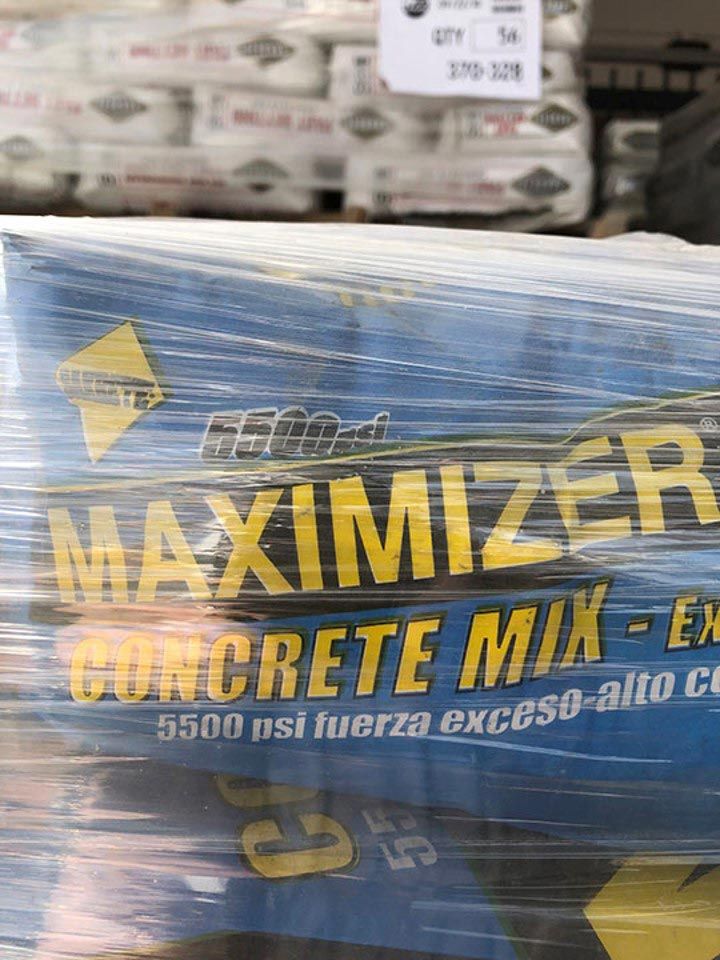
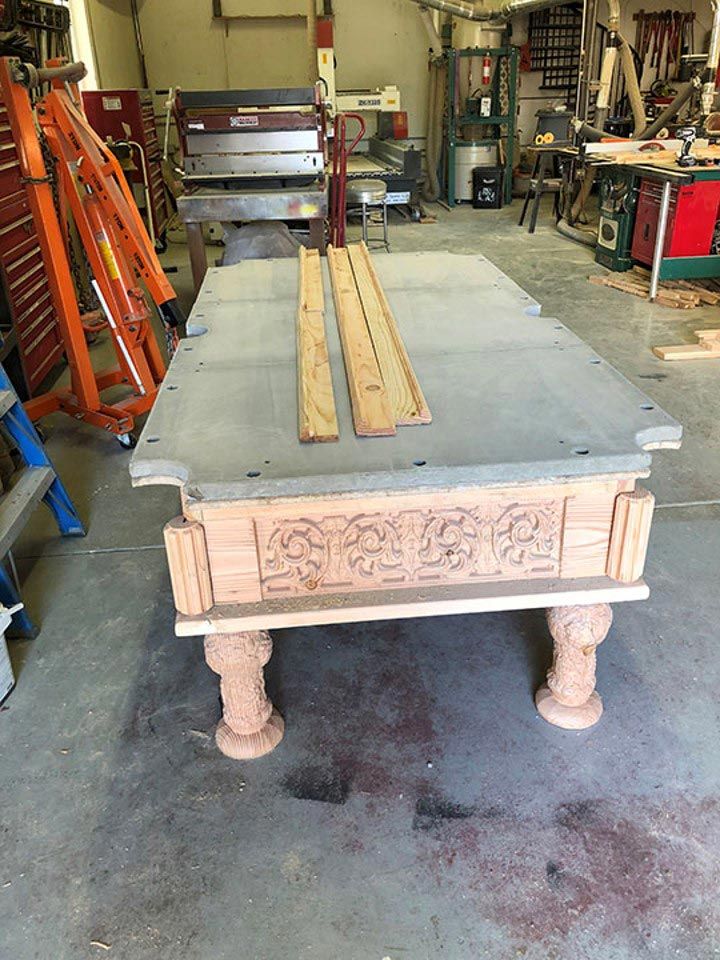
I could have bought the slate, but that wasn’t the point. I wanted to make everything. I watched a YouTube video about concrete countertops to get the correct type of concrete and additives. Since I wanted a perfect surface, I purchased a sheet of ¾” melamine for the Face Side of the form. I cut three sections on the CNC machine, cutting out all the holes and pocket formation. I used six bags of high PSI concrete I purchased from HomeDepot costing about $6.50 per bag. I also used some wire mesh to make sure the concrete didn’t crack. I screed and trowelled the cement making it as level as I could, however after it set, I had high areas. I let it cure for two days before I purchased a 4” diamond grinding wheel from Harbour Freight for $20, machined the end of a 5/8” bolt on my lathe so it would fit into a ½” collet to mount it to the CNC spindle. I ended up milling about 6 mm, mostly around the edges to make each section exactly the same thickness. It took about 1-hour per section to grind. It also took me about 3-hours to clean all the concrete dust out of my shop – glad I had a leaf blower and a lot of fans!
Once I moved the table downstairs, I filled the gaps with a flexible patching compound and bees wax. In my shop the concrete slabs were perfectly level; however, once downstairs, I did have to shim in two spots using a matchbook cover. All in all, it turned out great.
The side rails were the trickiest. I cut them using the table saw and router table. The first set, I used Douglas fir, however using contact adhesive, the rubber bumpers didn’t adhere very well. When I redid the rails, I used ¾” MDF, which worked very well. Using Aspire, I cut inlays for the diamond marks on the top plate and filled with resin. This resin was colored with walnut sawdust. The total time for this was a couple of hours.
In summary for the tooling and machining parameters I used a 12mm end mill for the rough cut and a 6mm ball mill for the finish pass. If I went to a 3mm ball mill for the finish pass for the grape engravings on the legs I would have been happier, but it would of increased the time by two or three days, so I didn’t do it. If I had to do it over, I think I would take the extra time.
One of the software features that really made things a lot easier for me when designing and milling was the new rotary machiningsupport within the new V9.5 version of Aspire. That combined with the 3D modelling tools and the already included huge clipart library allowed me to take the designing and machining to the next level.
Looking back at the project everything went as expected, except the rails, which I had to do twice. I would definitely get the leather pockets first before I start cutting. Not having them caused me to have to redo the rails. I have never been good at wrapping presents so the stretching and wrapping of the fabric around the rubber bumpers at the pocket ends didn’t turn out as well as I would have liked. I should have had a second person helping.
We would like to take this opportunity to thank Gary for sparing some of his time to share his incredible story and amazing project with all of the Vectric community. We love hearing how Vectric software has enabled users to create projects to perfection with ease. This is certainly a centrepiece that will get people talking.
We asked Gary what he was planning to work on next and how he was going to top this project…
Staying busy is my biggest challenge. I’m still looking for the next ‘big thing’ but until that comes along, I’m being kept busy by my Grandchildren who have more requests than I can keep up with. One wants me to make her a bed, another wants me to make a replica of his car. I’m coming up to 21-years of being retired and I really just want to continue enjoying my family and hobbies. I do a couple of weeks a year traveling, golfing, and looking for other adventures. I’m glad I spent my early 30-plus years building my businesses, so I can enjoy and do whatever I want to do now.
If you would like to make your own Pool Table Gary has very kindly given us his project files for you to download for FREE. Click the button below to download the files.
Vectric Ltd
Precision House
2 Arden Road
Alcester
B49 6HN
Registered in England Number 05382596
VAT Registration GB115123072
Privacy Policy |
Cookie Policy |
Terms and Conditions


