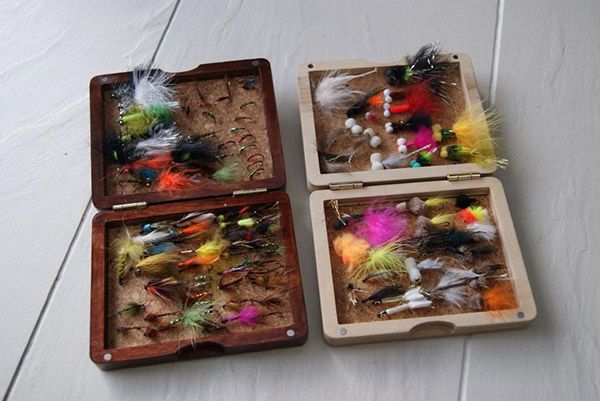
Darren Matthews is a budding fisherman from the Midlands region of the United Kingdom. He recently set up his first CNC workshop based from home. For one of his first projects he decided to produce a batch of custom fly boxes to see if he could recoup some of the money spent on his CNC investment.
Working within the hot foil stamping (print finishing) industry, Darren had no previous experience in CNC. After a lot of research into machinery and software, Darren opted for a Heiz HighZ S400 machine and Vectric's VCarve Pro and PhotoVCarve software. Darren explains his decision to choose Vectric's software against others...
"Vectric's VCarve Pro and PhotoVCarve software are available as free trial downloads, so I downloaded them and had a good play about before my machine was delivered. With no prior experience at all using software like this, and CNC itself, I was surprised at how simple the Vectric software was."
After exploring the various avenues of what CNC was capable of and what Darren felt he could actually achieve himself, he admits that the potential of CNC machinery and Vectric's software is only limited by your imagination.
Darren continues to explain how he produced his custom Fly Boxes using his new software and CNC setup...
"The box itself is made from offcuts of plywood used in the cutting form industry; I get these free from a local company and turn them into these boxes.
The CRV file (VCarve Pro layout - available via the download link, right) is the basic set of vectors used to create each half of the box, if you were using large sheets of ply you could cut multiple copies of these, as I have lots of small blanks I do them one at a time.
Here is the initial file (left) open and on screen with all my toolpaths already done.
As you can see from the screenshot with the completed toolpaths they are very simple line drawings. The wood I use is 18mm thick so if you wanted to do thinner make sure you scale down the individual cutting depths to suit the material size.
The recess for the hinges (image - right) is cut using a 2mm end mill. Still using the 2mm endmill I machine the holes for the magnets (image - right) which I buy from www.magnetexpert.co.uk as they are very cheap and come in all shapes and sizes. I feel the 5mm diameter by 3mm thick ones are perfect, maybe even a little overkill for these boxes, but when popped in flush they look unobtrusive and clean. The hole cut on this toolpath is just a pocket the size of the magnet so it creates a tight fit when they get pushed in. They are so powerful that when in haste I put a magnet in upside down and assembled the box it held the lid magically open like it was floating, so its good to ensure magnets are the correct way up before inserting. I also put a dot of superglue in the hole to keep them from ever coming out.
I added the thumb hole shape (image - right) to my second version. Again, a simple alteration that makes the box look different is that this gets cut using a 6mm ball end mill, I use the ball end and not the standard slot mill as it leaves a nice rounded bottom to the finished hole.
The main pocket (image - left) is machined using a 16mm router followed by a 2mm end mill for getting the corners nice and sharp. The only reason I did this was because on my original, with rounded corners, I found it difficult to cut the foam or cork that lines the pocket. Using square corners means it's much easier to cut perfectly to shape and size.
The cut out is a profile toolpath machined using a 6mm end mill. I also added a couple of tabs to keep it stable.
The whole process uses a total of 4 tools, I normally run the toolpaths in the following order
1. 16mm tool for the main pocket
2. 2mm tool to do the pocket profile, the magnet holes and hinge recess.
3. 6mm ball nose for the thumb recess
4. 6mm end mill for the cut out profile, you could use the ball end and overcut into your spoil board deep enough so that you need not load another tool.
After i have cut 2 of these, I sand them and clean any rough edges off. Using Ronseal diamond hard varnish, I then stain the piece applying about 3 coats with a fine sanding in between each coat -this gives the whole box a glass effect. Then I put the 2 halves together and add the hinges, I find this works well if put together as the small magnets provide enough force to hold the two halves closed, I then know that the hinges, which fit neatly into the recess, are in exactly the right place.
Finally I add the cork I have into the pocket of each box, these sheets of cork are the self adhesive 3mm thick tiles as used in bathrooms or to make a cork board. As they are self adhesive I cut them to size using a craft knife and ruler and just stick them in."
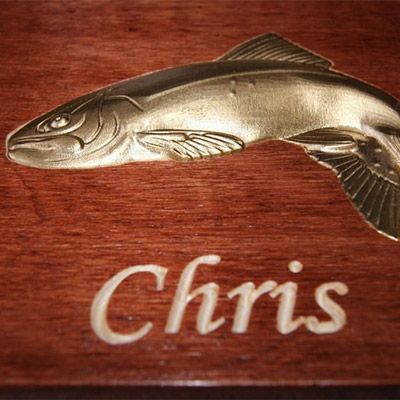
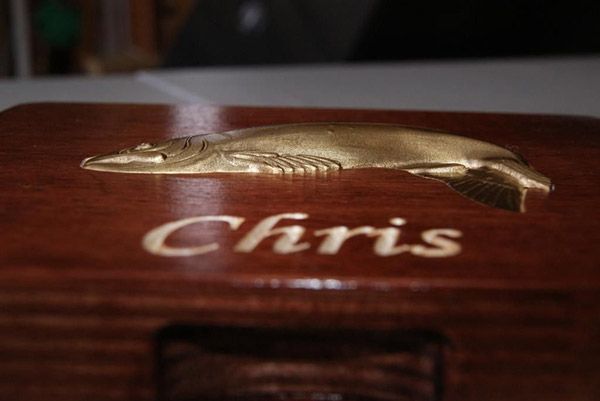
For the addition of the fish (and any other inlay carving) Darren works with 3 or 4 boxes at a time to avoid wasting a spoilboard. He loads the original CRV file and deletes all the vectors other than the cut out profile (image - left). The fish vector file (available to download from the button on the right) then gets loaded in to VCarvePro, where the layers are removed to show the original profile layer, this is then centred or positioned on the box. Finally any text required to personalize the design is then added. Darren continues...
"Using the original box layout file I pocket out the outside vector approx 4mm deep into my spoilboard sometimes adding a -0.1mm to the pocket toolpath and then check the newly made box fits snugly. When it does I re-zero the Z-axis and carve any text. I can do various boxes all at the same time by just editing the above file and reloading my CNC file. After all the text is cut I then cut a .5mm pocket for the fish normally using a 3mm clearance tool and 1mm profile tool, this allows the pre-cut brass fish to drop straight into place after a final clean glue the fish in place."
The fish itself was machined from 6.35mm or ¼ inch brass, a machinable material used in the hot foil stamping industry for making CNC dies. The final part was cut using a 3mm ball nose for roughing and 1mm ball nose tools to finish machine.
The screenshots below are of Darren's fish, setup in the free downloadable program Vector Art 3D Machinist. The model was purchased from Vector Art 3D; VA3D Trout Model.
This size of the fish is set so its depth is 6.4mm even though the material is actually 6.35mm, Darren explains why...
"I do this as I want the finishing pass to cut through the bottom of the brass, rather than do a profile toolpath. I cover the back of the brass with very strong double sided tape and stick to a piece of 1mm card, this itself is doublesided direct to the machine bed, no spoilboard. The finish pass cuts through but the fish is held in position due to the tape. This would probably be much easier if I had a vacuum hold down."
"The roughing toolpath (above center), gets pretty good speeds considering it's brass, I do however only plunge 1.5 mm at a time, I feel this causes less stress on tool. I also ran along the y-axis as this meant the tool did pretty much all the cutting in line rather than being lifted, although it did have to cut some areas out of sequence due to the shape which sometimes causes a line when doing my finishing pass. My machining allowance was 0.25mm so my finishing pass ran with very little load on the tool.
The finishing pass with the 1mm ball nose ran even faster, although stepover is set to 5% so it takes very fine cuts, this means the way it comes off the machine is how it is actually used, no polishing needed!
As this is an ongoing project many changes are sure to happen and the whole idea will probably evolve into something completely different."
Darren admits that by utilizing a combination of PhotoVCarve and VCarve Pro that he can offer clients a wide variety of items, including this Custom Fly Box, at reasonable prices.
Kustom Cut is currently generating an income by selling unique items, such as small nametags and candle holders which prove very popular when put up for sale, Darren continues..
"Everytime we take our items out, they sell, our current sales alone proves to me there is a huge market out there, and we look forward to finding ways to tap into this even more. The one standard throughout my learning curve though has been Vectric's software and its top support available direct and via the Vectric Forum. Even having reviewed many other software packages I would definitely recommend Vectric software, it is so easy to use I could not see myself using anything else. "
Keep checking Kustom Cut's Facebook page and Website for more new exciting projects, including a fully working clock, Japanese puzzle boxes and much more...
Darren Matthews, Kustom Cut.


Vectric Ltd
Precision House
2 Arden Road
Alcester
B49 6HN
Registered in England Number 05382596
VAT Registration GB115123072
Privacy Policy |
Cookie Policy |
Terms and Conditions


