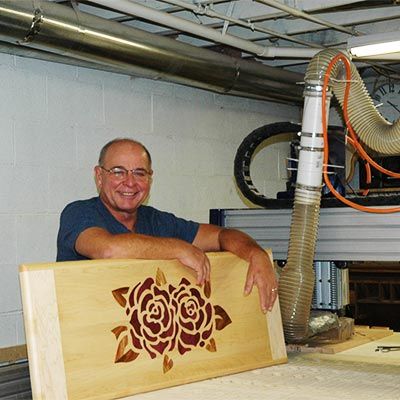
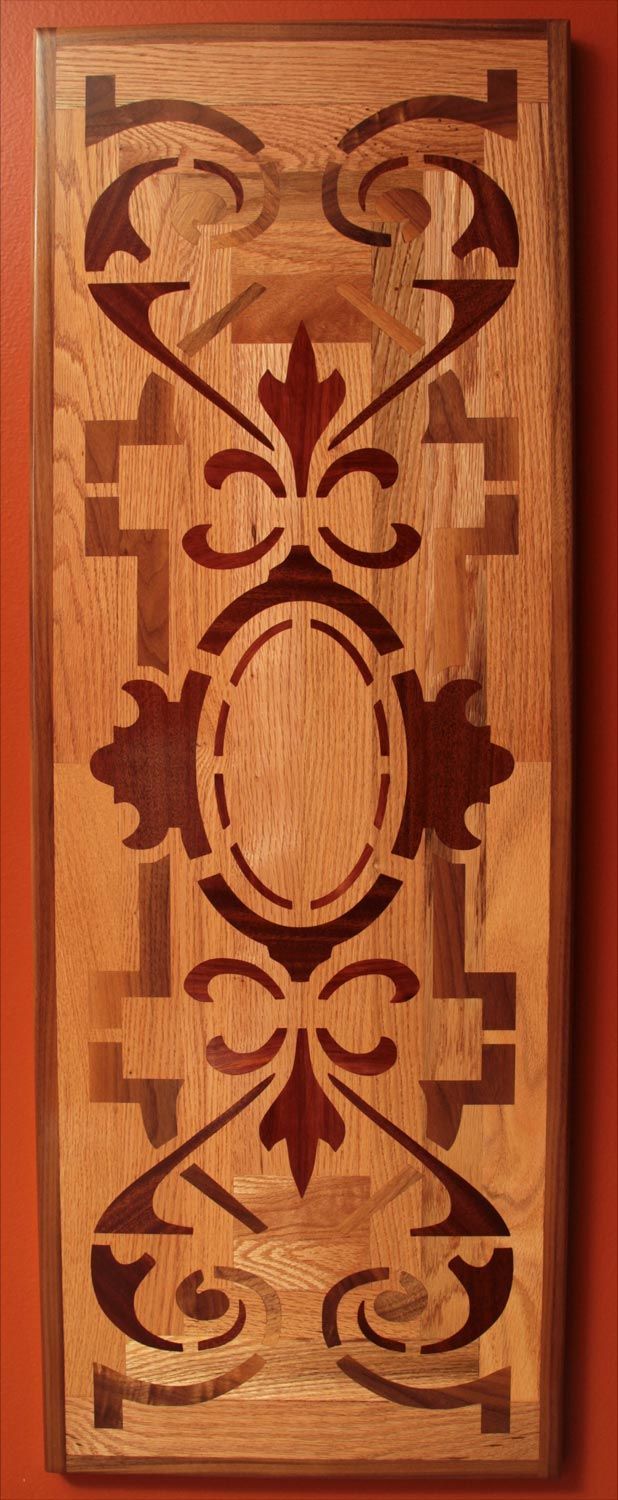
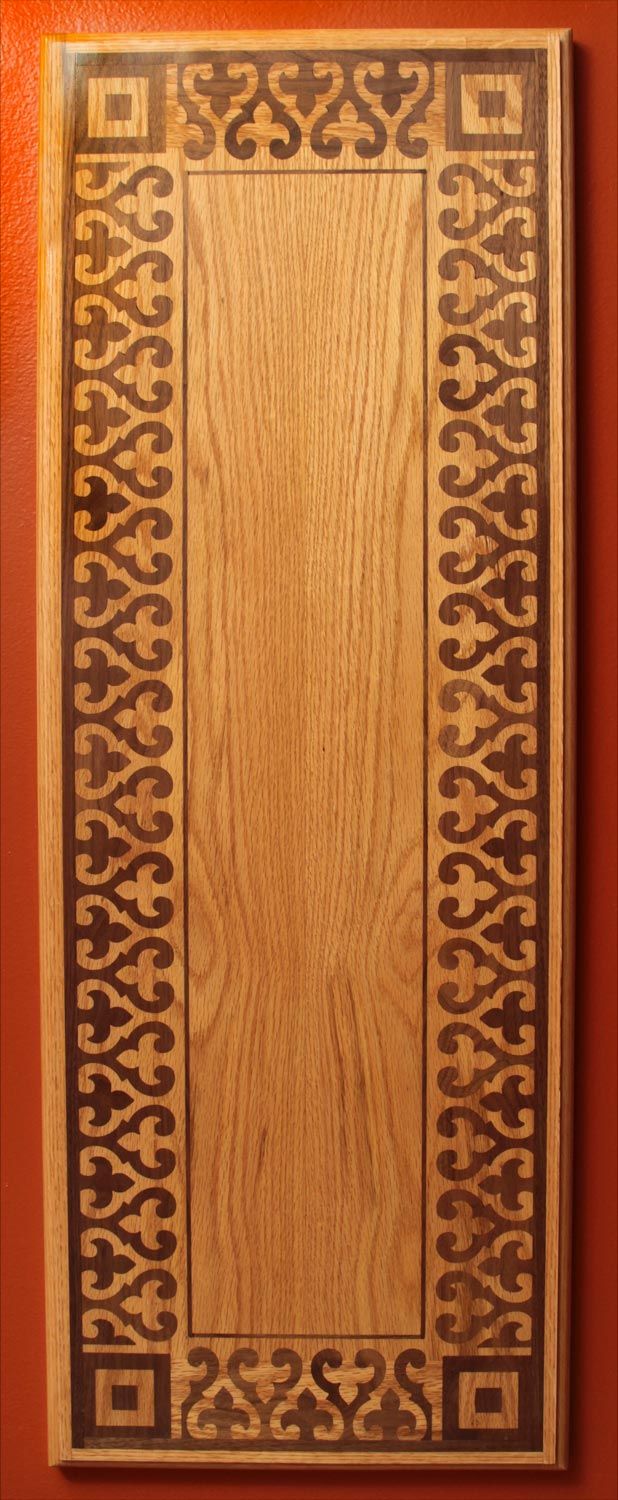
For this month's case study we talked to Mark Berndt who used his CNC router and Vectric software to turn a lifelong passion for woodworking into a retirement business creating custom inlayed furniture. Mark's passion and attention to detail are clearly demonstrated within his products, some that are made up of 10 different types of wood and include over 500 parts!
Mark begins by explaining his route into woodworking, then how his day job led him to discover CNC technology and ultimately how this allowed him to combine his hobbies into making beautiful furniture. He then goes on to share the techniques he uses when designing, machining and finishing an inlay project.
"I have always wanted to be a woodworker ever since I started nailing boards together with my grandmother and she would have to undo the pieces I nailed to the floor! Once I decided to turn professional, the main hurdle I needed to overcome was being able to distinguish myself from the other local cabinet and furniture makers who had been doing the same thing for the last 20 – 30 years."
"Luckily I did quite a lot of computer programming throughout my career before retiring, which meant that I gained a strong understanding of what you are able to achieve with the accuracy and repeatability of computer driven equipment. I remember thinking a long time ago whilst watching an old-fashion pen plotter that it wouldn't be that difficult to add a dremel attachment to the plotter so that you could create a very simple 2D etcher. It wasn't long after thinking this that I saw a ShopBot advertisement, I knew there and then that I had found an affordable and accurate piece of equipment that could help me create furniture that incorporated "artistic" enhancements."
"Before I purchased the Shopbot, I decided to attend several "camps" where various software packages were presented that could compliment my CNC machine. It was at these camps that I was introduced to Vectric software and realized that I could use the features available in the software to quickly and easily incorporate decorative carvings to my projects - just what I wanted. When I decided to purchase the Shopbot I also purchased VCarve Pro and started working through the tutorials available on the product disc straight away. I was creating designs before my CNC equipment was even set up!"
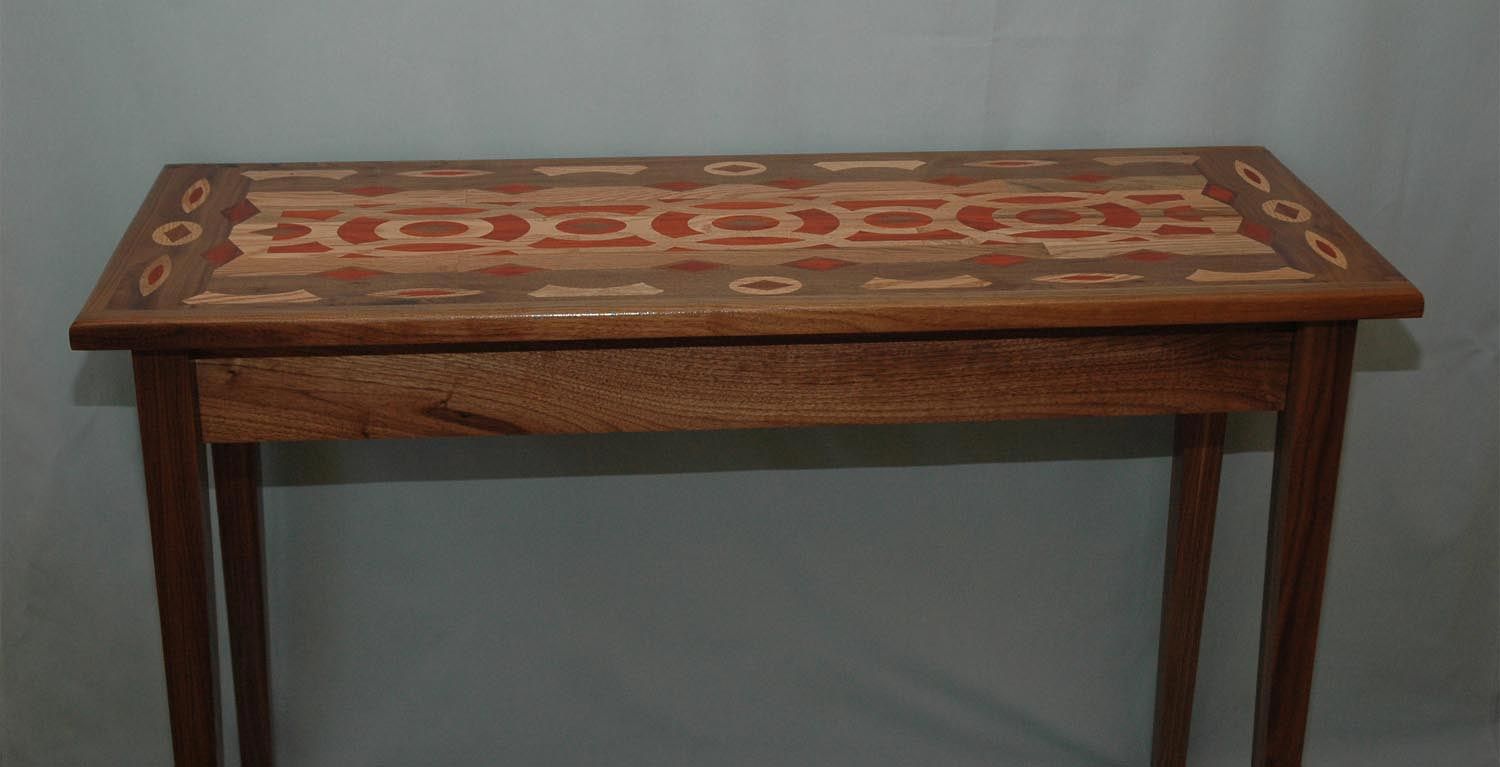
"As well as my passion for CNC I am also a hobbyist photographer and am naturally drawn to color. As soon as I realized that I could create inlay toolpaths with VCarve Pro I knew I could add many different species of wood (i.e. colors) to flat surfaces, it was because of this that I decided to focus on tables with multi-colored tops. When an upgrade was released that included the added feature of auto-inlay toolpathing, I decided to get it straight away. The inlay features really simplified the process needed to create these table tops and made them so much easier and fun to make. Now I can concentrate on designs and wood selection instead of "offsets" and router bit diameters."
Design Process.
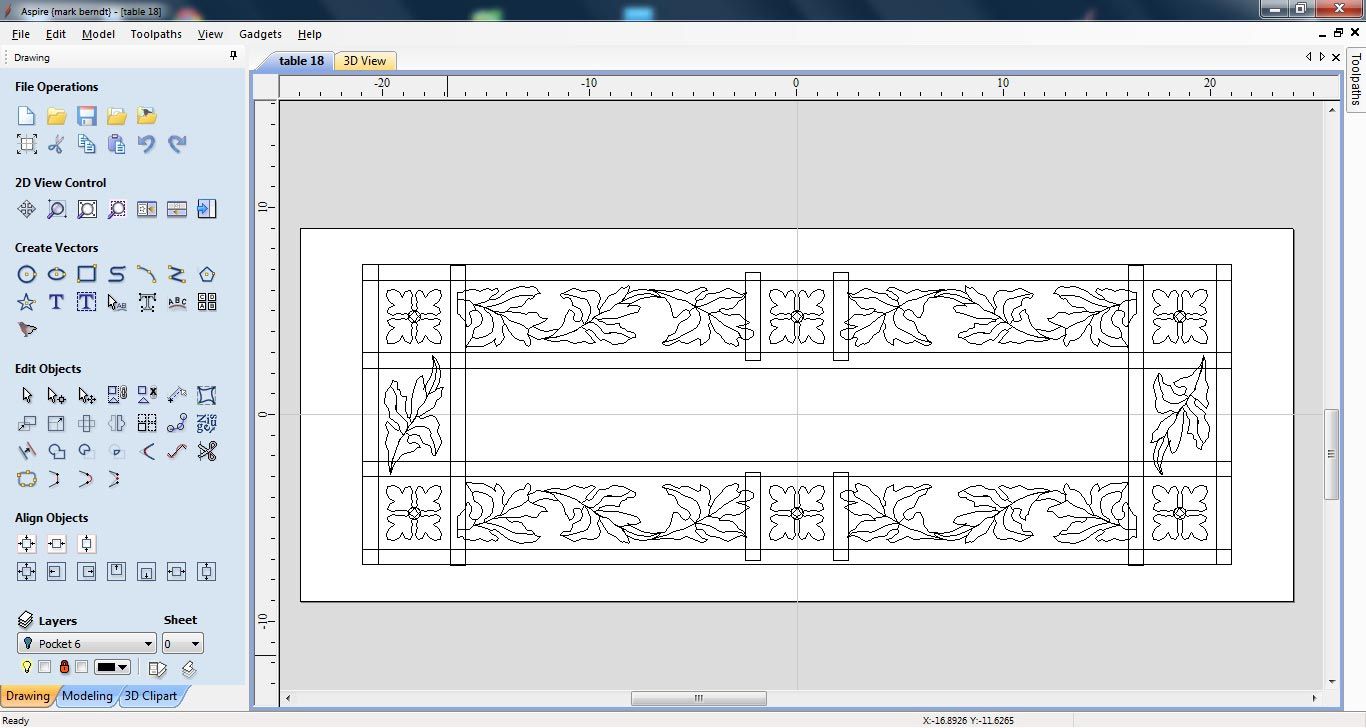
Mark goes on to tell us what inspires him when creating his designs and shares a variety of pieces he created that demonstrate the intricacy of his work. He then details his approach to the initial layout of his projects and shows us how he utilizes images to help layout the vectors within Aspire (which Mark upgraded to from VCarve Pro when it was released).
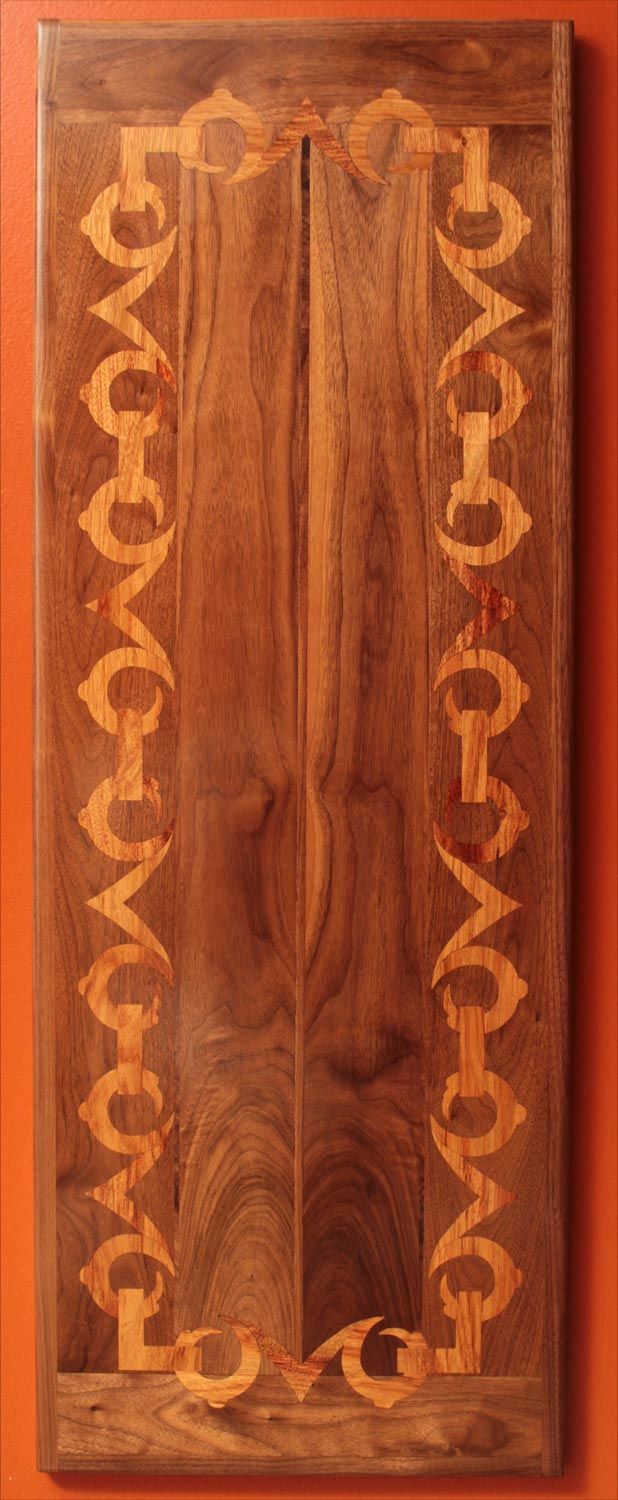
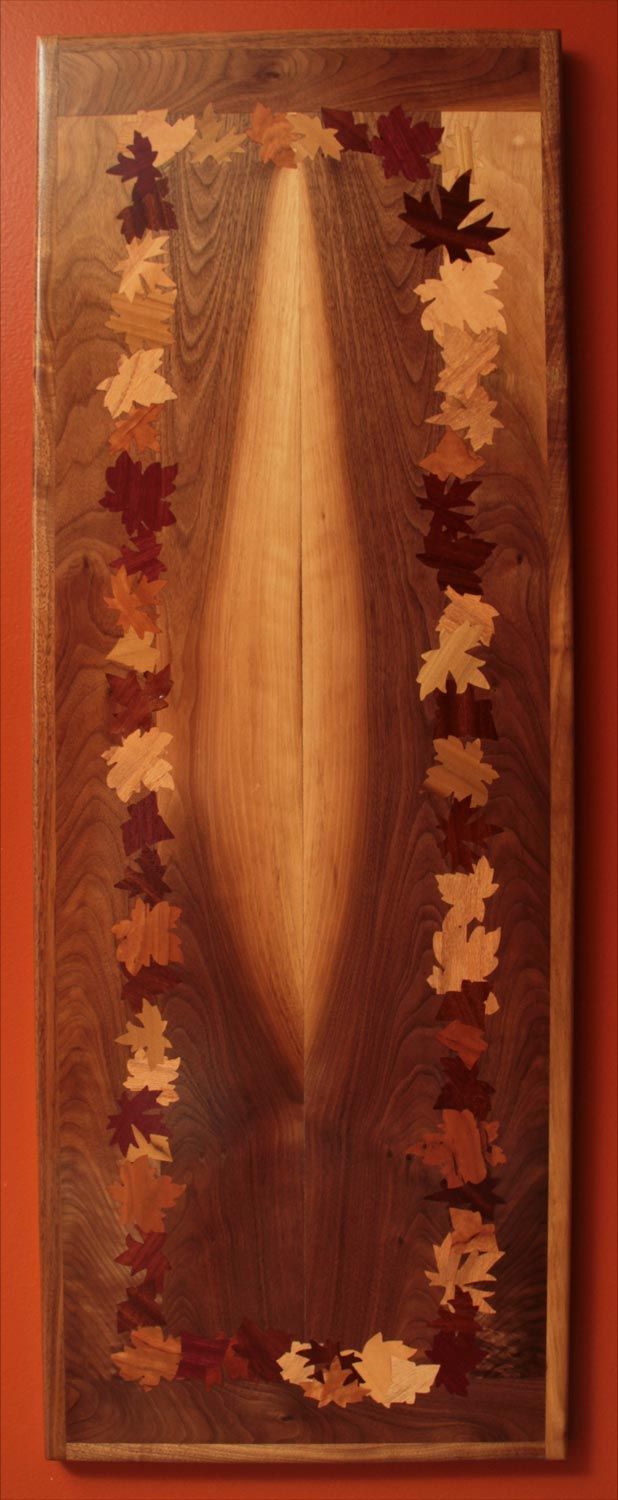
"Most of my table designs are inspired from pictures that I have taken or seen from 'Dover Books' that deal with a variety of design types, such as Victorian, Gothic and Celtic. I also find books on stained glass projects and quilting patterns are also a great source for ideas. To help with my design process I even take pictures myself of oriental rugs, mosaic tiles, wallpaper and patterns on clothing that I find interesting."
"As soon as I choose an interesting pattern for an inlay project, I import the picture into Aspire and create vectors around the design manually using the Polyline tool. I find that it is easier to "fine-tune" rather than use the Arc or Curve tools. The Dover books I mentioned before often come with vectors on a CD, but I often find that more time is spent cleaning up those vectors than creating new vectors from scratch."
"To create the pockets and inlay pieces I always use the Aspire inlay toolpath feature. I know that a lot of forum members use the documented V-inlay technique, but for me the auto-inlay feature of Aspire works great. Some of my table tops are made up of as many as 500 male pieces and from 10 different type of wood. I feel that the auto-inlay technique allows me to complete these complicated designs in the most efficient way possible and saves me a lot of time."
Toolpath Process & Machining
After the design process Mark has to generate the necessary toolpaths ready to machine his project. The Auto-Inlay Toolpath in VCarve Pro and Aspire can be used to ensure that the male and female components of the design fit together correctly once machined. Mark details his toolpath setup and approach to machining, and shares some tips that have helped him get the best results.
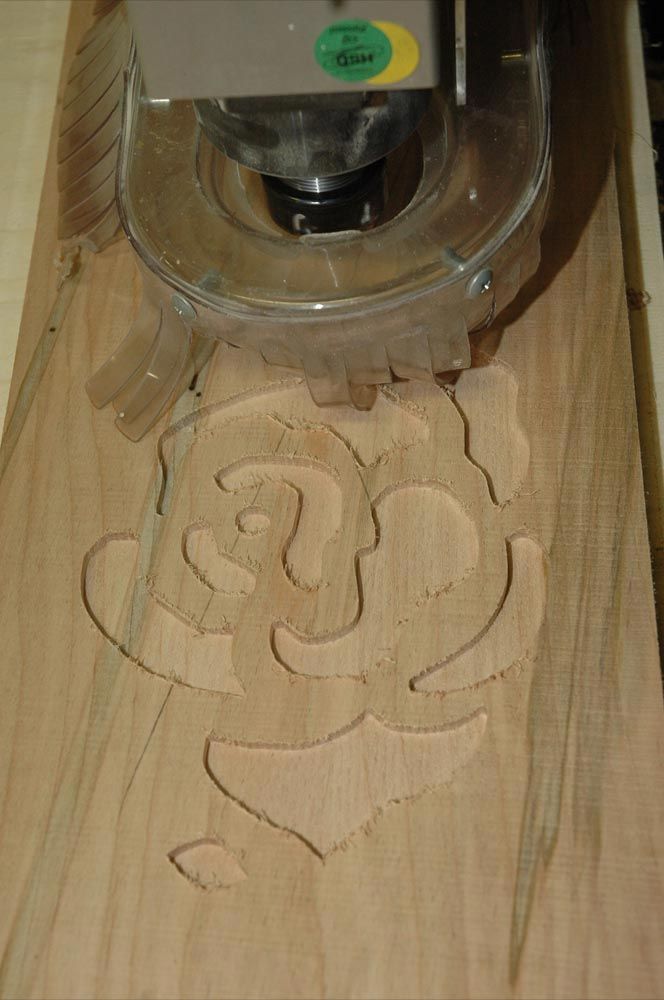
"The pockets in this design are carved to a depth of 3/16" using a 1/8" bit to clear out the large areas and then a 1/16" bit is used to finish the inside profile. I generally use an offset of .004" on the pockets but some material, like purpleheart, fit better if a .006 or .008 offset is used. I use the offset on the pockets instead of the inlay pieces, that way, if the inlay piece is too tight, I can simply enlarge the pocket instead of cutting out a new set of inlays. This saves both time and material."
"The male components are cut with the same 1/16" bit to a depth of .225, leaving a .025 "skin" on a 1/4" resawn board. Flipping the board over and running it through a wide belt sander removes the "skin" and the male pieces then fall out. These pieces are then glued into their respective pockets before the entire table is planed with a 1 ¼ end mill and then finally sanded."
"I know others use veneers for their inlays, but I like to be able to sand my projects without worrying about sanding through the male pieces. An added benefit for the customer is that if the top is damaged in some way, the top can often be sanded and refinished instead of needing expensive veneer repair."
Finishing
Once the machining is complete and the inlay pieces are set in place, Mark uses a variety of techniques to finish his design. Mark tells us what finishing materials he uses, why and again shares a few tips that helps reduce time and cost if any problems occur after machining / finishing.
"The "magic moment" that only happens once per project is when the first coat of finish is applied and the colors of the individual woods really stand out. All the days or weeks of sawing, planing, routing and sanding pay off when I finally see the physical results of what I envisioned at the start of the project."
"Most of the time the results are worth the wait, but there are a few times that the color is not what I had hoped for. This is where Aspire really comes to the rescue. The major sanding and first coats of finish are applied to the table top before it is removed from the CNC table. That way, if there is something that needs to be corrected or a color needs to be changed, I just get back into Aspire, route out new pockets and create the male pieces out of a different wood. Sometimes during the initial planing of the surface, a defect in the background wood is exposed. At this point (instead of starting over) I will make a minor design change to cover up the flaw. This does not result in a blemish, but as Bob Ross the painter used to say, creates a "happy accident" that adds to the character of the piece."
"The table tops are finished with several coats of dewaxed shellac and then sanding between coats with finer sandpaper helps creates grits that fill the pores in the open grain woods. The shellac is followed by 2-3 coats of wipe on poly and then buffed in a three stage process using tripoli and white diamond abrasives to remove small scratches. A top coat of carnauba wax is then applied to provide an extra layer of protection and to bring the top to a fine gloss."
What's Next?
"With each completed piece, I find that my ideas move away from symmetrical designs and more towards stained glass pictures. I am currently working on projects that include Victorian type grape vine designs and pictures of flowers. I am also experimenting with a 1/32" bit to add further refinement and detail to my designs. With Aspire's ease of vector creation and toolpath control I feel like there is no limit to the detail I can go to in future projects."
We would like to thank Mark for taking the time to talk to us about his approach to inlay projects and for sharing a variety of tips that you may try for yourself when attempting an inlay design of your own. You can see more of Mark's projects via his website - http://cartesianwoodworks.com.

Vectric Ltd
Precision House
2 Arden Road
Alcester
B49 6HN
Registered in England Number 05382596
VAT Registration GB115123072
Privacy Policy |
Cookie Policy |
Terms and Conditions


