Here at Vectric HQ, we are always impressed by the projects made by our users. Doug Pinney’s Liberty Box project was one of his many projects that stood out to us on the Vectric Forum due to the impressive detailing and finish of the box. For this month’s case study, we caught up with Doug and asked him about his background and how he got in to CNC…
I retired in 2009 from my contracting business. I was a design/build general contractor, designing and building commercial buildings. I still design buildings for a couple of contractors.
May of 2009, I finished my last project and flue to Alaska for three weeks. On the return trip my wife asked what I was going to do when we get home. I had no work lined up and she suggested that I retire. I agreed to that because me body was already telling me it had, had enough.
She then asked what I would do and suggested that I finish my wood shop, so I jumped all over that idea.
After about four years of wood working, building furniture and other things, I started to look for a new challenge in woodworking. I started looking into CNC and talking to machine manufacturers.
I started with a Legacy Arty 58, then moved to a Legacy Maverick 3x5, I now have a Legacy Maverick 4x8 and a Legacy 2020 Maverick 4x8 with Auto Tool Change and Vacuum System coming.
I started with Aspire V4.0, what a great program.
It’s been more than 7 years since Doug started with version 4 of Aspire, with all of this CNC experience under his belt it’s not difficult to see where Doug got his skills to create such amazing projects.
We wanted to hear more about why he decided to create the Liberty Box…
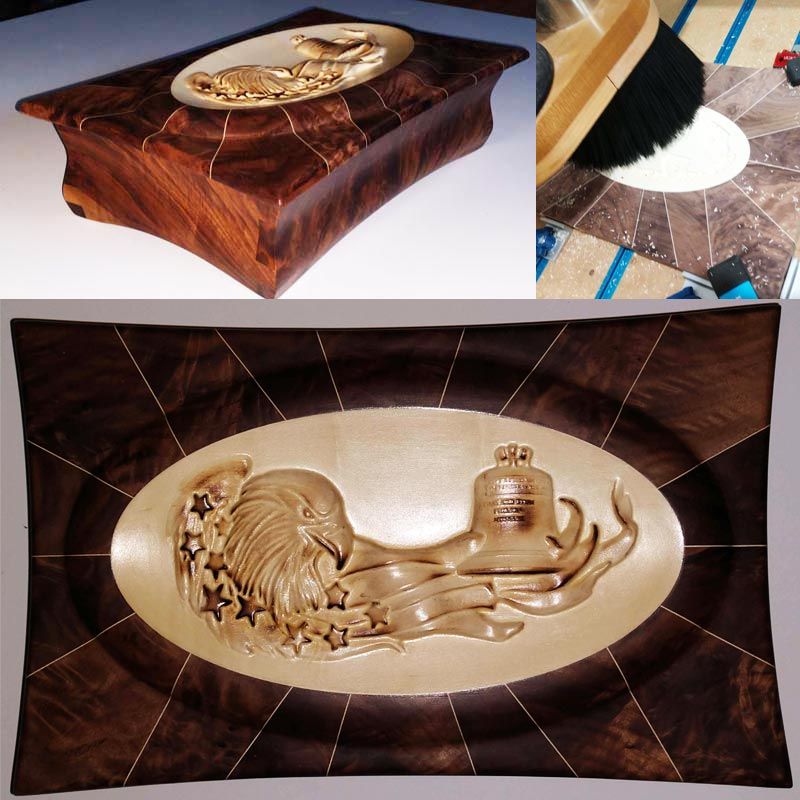
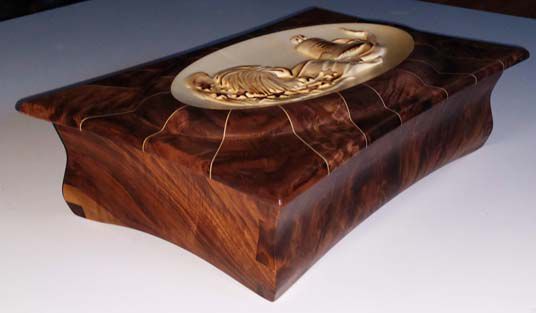
I made the Pelican Box in 2018, which I liked the shape of. One day I remembered that I had a couple of boxes of black walnut burl. How can I use the wood? Let’s make a box like the Pelican Box using black walnut burl.
After coming up with the idea and getting the materials together, Doug went to work planning and designing the project…
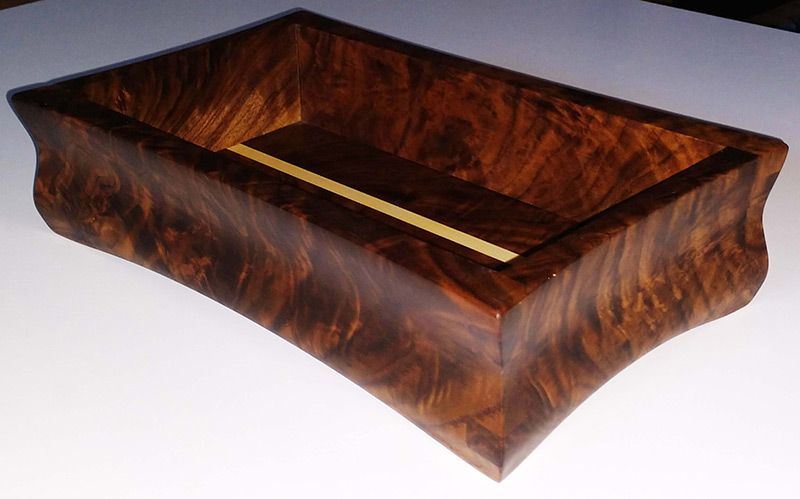
I choose black walnut burl and Holly for the wood. Black walnut burl comes in small pieces of wood, so I had to design the box around the wood I had. Holly is white and makes a good contrast with the walnut.
I am capable of designing things in my head, which I did for several weeks trying to work out the details for the box top before I sat down with Aspire.
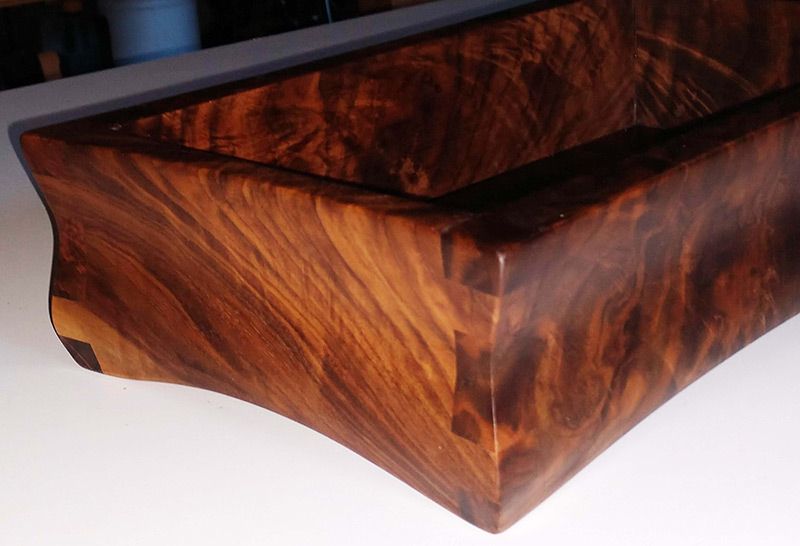
The big challenge was the wood and how to create the top and bottom with what I had available. You can’t go out and buy walnut burl off the shelf. The pieces I had ranged from 1” to 4” wide and 6” to 14” long. I looked out and found 4 pieces for the box sides and pieces for the bottom glue up. I did not have enough long walnut for the bottom; so I used some Holly racing strips when gluing up the bottom panel.
Now I have various pieces in different lengths and widths to make the top. I decided on segmenting the box top. I was able to create a design using 18 segments of 5 different shapes and sizes to make the top.
Then I decided to place Holly veneer between each segment pieces. I knew that gluing up 18 different shapes plus 18 veneer strips was not going to be easy. They will move when gluing them together. This is when I decided to put a Holly oval in the middle to hide the miss-alignment of the segmented pieces. All of the segmented pieces were cut on the CNC.
I had the idea from the beginning of using the eagle flag clipart in a dish and name the box the ‘Liberty Box’. The eagle flag looks good, but it is out of balance in the oval on the right side. Let’s add the liberty bell clip art at the end of the flag. The liberty bell has the wooden cross arm above the bell that did not look right, so I removed the cross arm. The bell fit in under the flag and balanced the image.
Now the big problem, cut an oval insert within the raised oval, insert the Holly and recut the oval dish with the 3D flag, liberty bell and keep everything centered. This operation requires the workpiece to be removed from the CNC, glue the Holly insert into the walnut and reassemble. As the insert is Holly, the dish cut has to be dead on center (I have one shot to get it right) or you will get a white lip on one side and dig into the walnut burl on the other side. In the end it all worked out well.
The custom box joints need to be cut on the CNC vertical vice. The box has to be assembled (4-sides and bottom) before shaping the box sides. The box sides which have a double two-rail sweep in both directions are also cut on the CNC vertical vice. The sides are contoured in both directions.
Doug explained about the finishing and building of the project with some reflection…
I finished the box by hand sanding all the parts and then buffed and waxed.
Planning out the project from start to finish. There was a lot of things to work out for the box top (37- pieces to put together and machine). I only had enough wood for one shot at it so I had to get it right.
I would not change a thing.
We then asked Doug if he has any tips or advice to fellow makers…
Don’t be afraid to try new things. I love difficult projects with a challenge, the bigger the challenge the better.
Difficulty with a project is nothing more than a new challenge. Take time to work through the process. You cannot rush a project like this one.
Doug’s hard work has clearly paid off shows in this project and hopefully many more to come. Before we let him go, we asked Doug what plans he had for the future…
I am designing our 57th Anniversary plaque.
We wanted to say a huge thank you to Doug for taking the time to talk to us about his project so that we could inspire our community to try something new. If you have a story you would like us to feature, please get in touch, simply email online@vectric.com. We would love to hear from you.


Vectric Ltd
Precision House
2 Arden Road
Alcester
B49 6HN
Registered in England Number 05382596
VAT Registration GB115123072
Privacy Policy |
Cookie Policy |
Terms and Conditions


