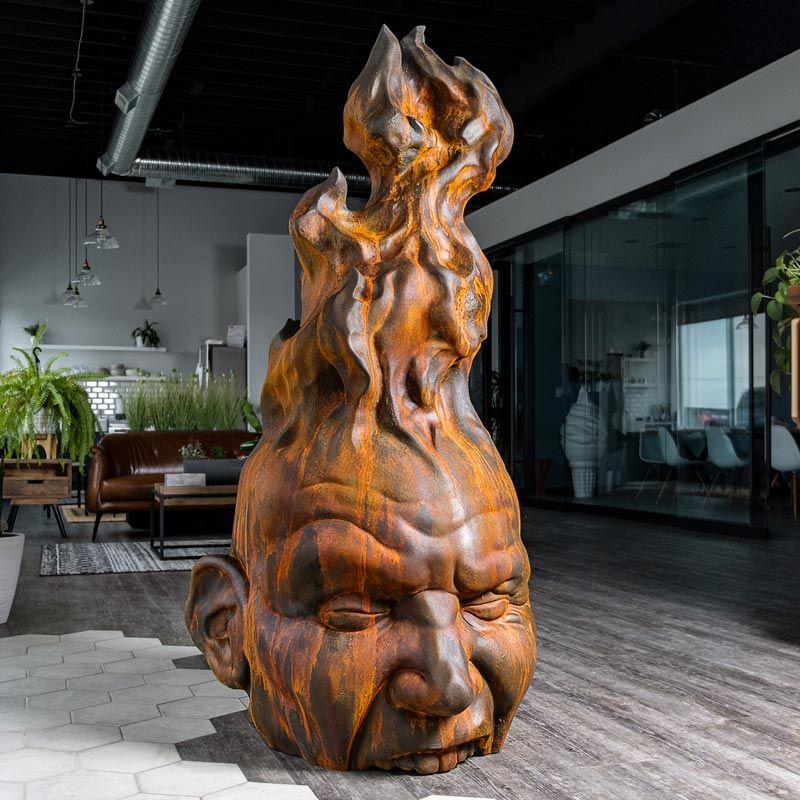
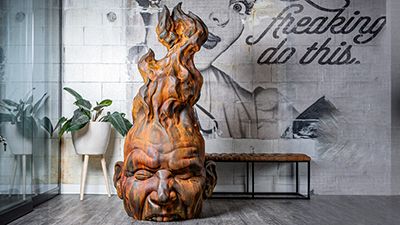
From concept to clay and from clay to carve! Have you ever thought about creating a 6ft foam fire head sculpture? Not until now, I hear you say!
Here at Vectric we’re used to seeing incredible projects created by our community but when Brian Novak of Streamline Automation sent through their Fire Head creation, we were all in awe of the sculpture and wanted to know all about how they created the design and their finishing process…If you’re intrigued, you’re in the right place so keep reading.
Streamline Automation is a Canadian company who have been selling FROG3D milling machines, wire cutters, printing machines and tooling for over 20 years. Focussing on helping customers with their production processes, enhancing productivity and ensuring quality cutting has been key to their success over the last two decades.
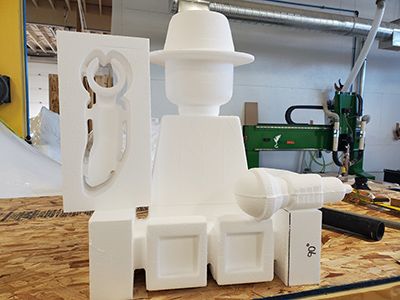
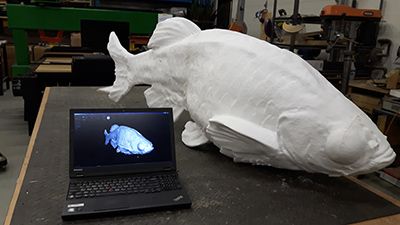
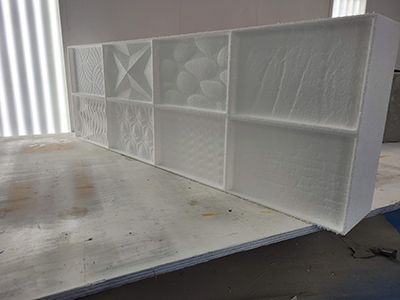
Most of our customers have sculptural applications, work in architectural and construction industries, or are using prototyping and reverse engineering processes. We also have customers producing one-offs for special events, exhibits and scenic design, including a variety of highly intricate 3D props and themed environments.
Here is some of the work that has been produced using Aspire and cut on our FROG3D milling machines. We mostly use EPS foam so once the finished products are installed, the surface coating and paint makes it impossible to tell that it’s made of foam, so the images here are unfinished pieces.
Wow! They are all amazing… Talking of incredible projects. Tell us EVERYTHING about how your Fire Head sculpture came to life…
The Fire Head was a personal art piece that we made for our office, commissioning a local artist to sculpt the concept out of clay. We then used our FROGScan Flash 3D scanner to collect the geometry, and enable us to bring it into Vectric Aspire for tooling.
For this project, we use the 2-sided machining setup in Vectric Aspire, however, as the details required some relief cutting from specific angles (like the concave recess behind the ears) and additionally the overall size of the part greatly exceeded the length of our tool, we machined this part from 4 sides.
We did rough cutting on the FROGWire hotwire cutting machine, which removed the bulk of the additional material, and thanks to Aspire’s functional vector tools, we were able to determine specific boundaries based off the actual 3D model information, ensuring everything lined up with our milling operations. For the finish machining, we used the FROGMill CNC router. A number of 3D roughing toolpaths were executed to further break down the block and get us closer to the final 3D surface, and we used a large 1” dia FROGTool for this step with the 3D finishing toolpaths completed using a ½” tool to get us our final details. We did a series of four 3D relief toolpaths to complete the full model before the machining was complete.
Part of the unique artistry of this project is the finishing process. How did you achieve such an incredible end result?
We used the FROGSkin Polyurethane coating system to give it a protective coating, then the final model was sprayed with Metal Masters Rust paint system. This was a very simple finishing technique as once the base coat is applied over the entire surface, it’s sprayed with an oxidizing catalyst, and the rest of the details happen naturally as the paint actually starts to rust (this process is very much like the ratted or patina technique used on motor vehicles and other objects to create a rusted look).
What an incredible project! Watch the full process come together here: https://www.instagram.com/reel/CAf9FlYnX9-/?hl=en
What are your top tips for working in Aspire?
Some Aspire top tips to getting this project right include using the ‘quick orientation’ buttons in the 3D model import screen to ensure that jobs like this keep aligned. Then using a combination of the 2D and 3D design spaces, you can generate multiple processes off the same file, keeping things organized and ensuring that the orientations and scaling of the individual elements are all maintained.
We were very happy with the ease of programming, and confident in the outcome of the final part. If we were to do this again, the only thing we would change is to just make it even bigger.
A huge thank you to Brian Novak of Streamline Automation for sharing this amazing project with us. These guys are so busy with their supersized projects, watch this space to find out more about the incredible display projects they produce...coming soon!
Vectric Ltd
Precision House
2 Arden Road
Alcester
B49 6HN
Registered in England Number 05382596
VAT Registration GB115123072
Privacy Policy |
Cookie Policy |
Terms and Conditions


