Here at Vectric HQ, we are always impressed by the projects made by our users. Scott Ismail’s D&D Lord of The Rings Gaming Table project was one that stood out to us on the Vectric Forum due to the impressive detail, amazing finish, and the pure scale of the project. For this month’s case study, we caught up with Scott and asked him about his background and how he got into CNC…
Woodworking is a hobby of mine and not a full-time job, but I do have a background in Mechanical engineering and CNC work has always interested me. About 8 years ago I bought plans (Solsylva) for a simple homemade CNC machine and a few months later had it up and running. I started out of the gate with VCarve Pro and have loved it ever since.
We wanted to hear more about why he decided to create the gaming table…
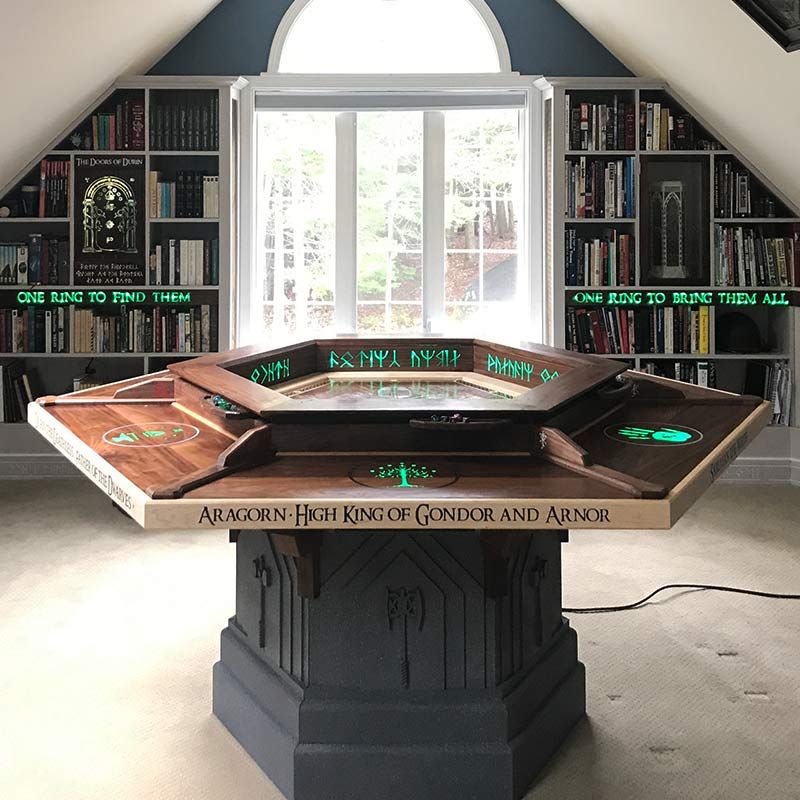
The works of JRR Tolkien (primarily the Lord of the Rings) have been an inspiration to me most of my life, and I recently got back into tabletop gaming after not having played for 20 years. That gave me a good excuse to try to design and build a dedicated gaming table for the group I play with. Considering the game (Dungeons and Dragons), it was a natural fit to make it in a fantasy theme and I settled on a Dwarven aesthetic as depicted in the Lord of the Rings movies.
After coming up with the idea Scott went to work planning and designing the project…
I designed everything in Sketchup and that process took about 5 months of working an hour or two here and there. I tried to put a lot of thought into the design to make sure it hit several important criteria for the intended use – common central play space, player space (for books, dice, etc), enough leg room for comfort, all without making the table too large and unwieldy. The fact was I would be spending too much money on Hardwood to screw it up and get a second chance at the design 😊
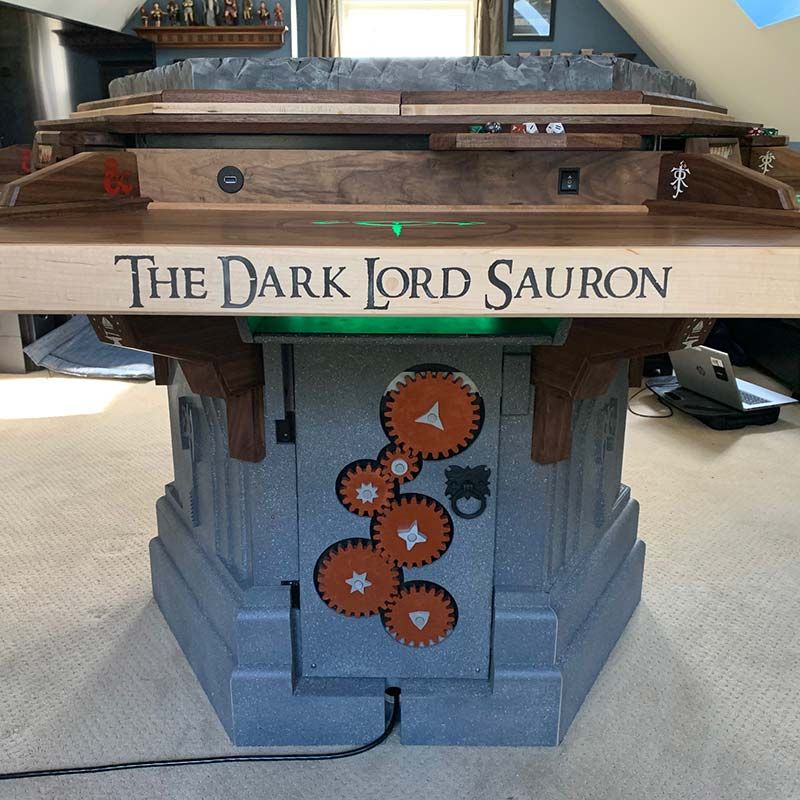
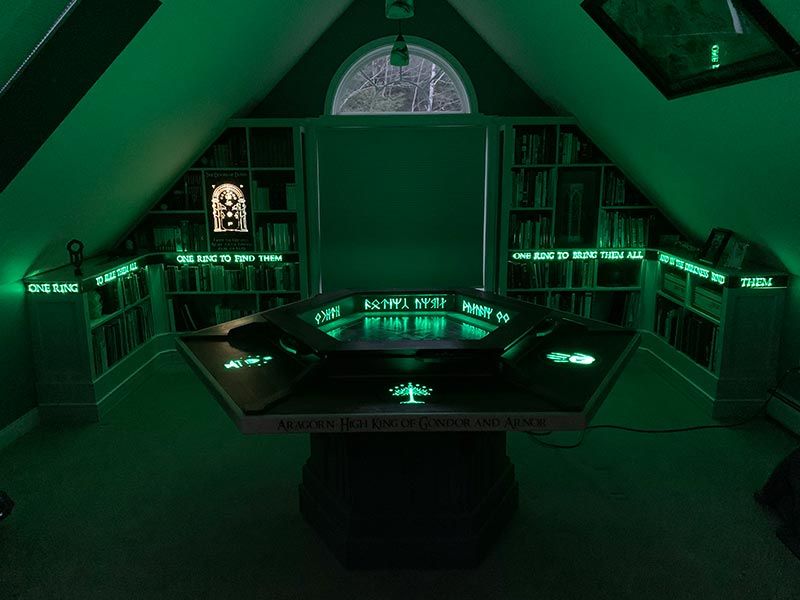
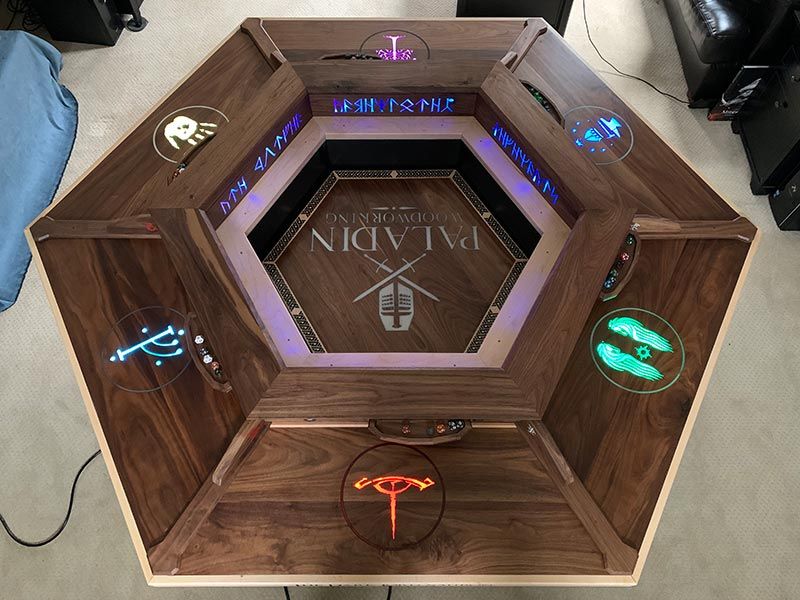
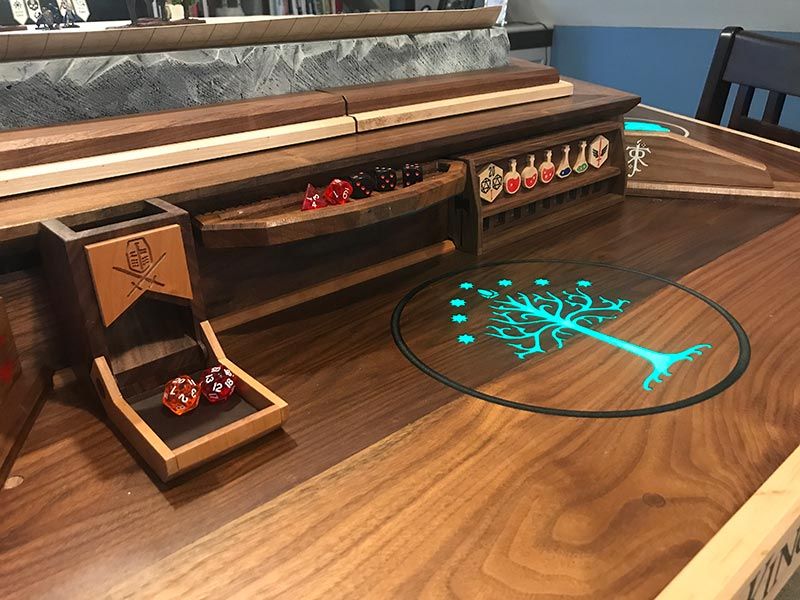
I have also developed a technique over the last couple years to use CNC to carve, epoxy and backlight different designs and lettering which I used extensively in this build (technique shown below). All the lighting is controlled through a phone app and the individual symbols can all be controlled and lit in different colours. There are seven different sets of LED strips embedded in the table.
The central column in the table can elevate which is useful in games for creating some dramatic moments for your players.
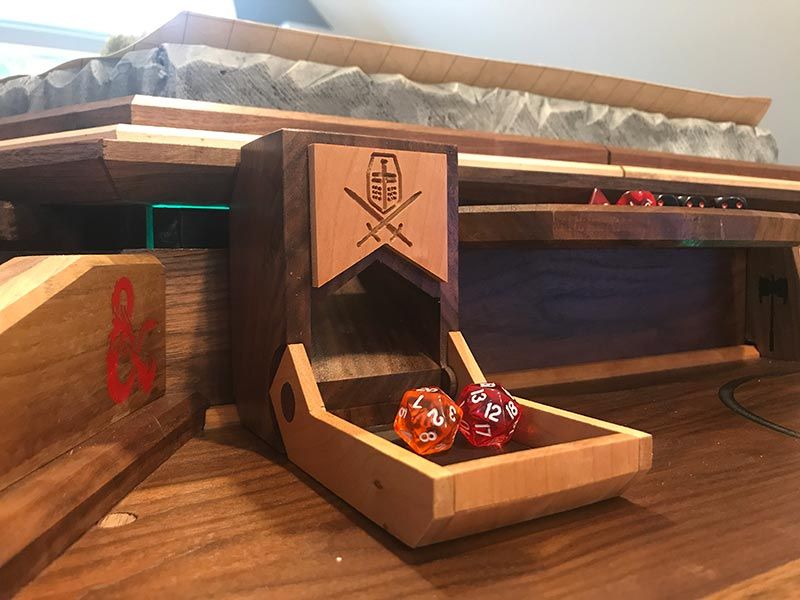
In addition to carving, all the small accessories - Dice tower, magnetic dice trays, and inventory shelves were all designed and cut using a combination of Sketchup and then importing into VCarve Pro.
As stated above the reason for this project being pulled off so well was the time and detail Scott spent designing every part and accessory of the table. He has not cut any corners and has thought of everything you might need while using the table. The use of time when planning and designing a project can mitigate errors and mistakes when it comes to machining.
Scott then went onto to talk about the materials and cutting tools he used for this project…
All the material for the table that was CNC’d was either solid Walnut or Maple. I knew I did not have enough materials to mess up, so each cut needed to be right.
I didn’t use any particular strategies regarding the toolpaths (I’m not that advanced!), and my cutting tools are simple 1/16”, 1/8”, ¼” end mills mostly with some V-bits mixed in.
Scott explained about the finishing and building of the project with some reflection…
For the hardwood I finished mostly with General Finishes Arm-r-Seal. For the central Base column for the table, I wanted it to look like stone (and also to save money over buying more hardwood), so I sprayed it with a stone texture spray paint which worked surprisingly well.
The key to this project was not rushing the design...I spent far more time designing than.
We then asked Scott if he has any tips or advice to fellow makers…
A lot of people ask me how I do the light-up symbols and lettering and here is the simple process:
With this technique you can create very delicate designs in wood that glow beautifully (you can see more examples on my Instagram @paladinwoodworkingmaine)
Scott’s hard work has clearly paid off and shows in this project. Before we let him go, we asked Scott what plans he had for the future…
Not sure, but after building the built-in bookcase and game table for this game room, I will probably find some other small projects to fill out the decorating.
We wanted to say a huge thank you to Scott for taking the time to talk to us about his project so that we could inspire our community to try something new. If you have a story you would like us to feature, please get in touch, simply email online@vectric.com. We would love to hear from you.
Vectric Ltd
Precision House
2 Arden Road
Alcester
B49 6HN
Registered in England Number 05382596
VAT Registration GB115123072
Privacy Policy |
Cookie Policy |
Terms and Conditions


