Tim Hornshaw and his wife live and work in Holland, Michigan. After fifteen years of design engineering for Aerospace and Automotive companies, he decided to return to his first love, woodworking and setup his own business - Hornshaw Wood Works.
Tim didn't want to lose the experience and technical skills he gained in his previous career. So he set out to utilize his knowledge of CADCAM and CNC machining to produce his personalized range of products.
His mission was to produce high quality, low cost wooden products using his experience in design engineering coupled with the latest CNC woodworking technologies and software.
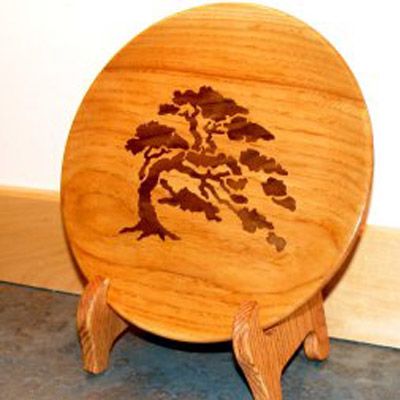
The example below shows how Tim uses the combination of 2 sided machining in Cut3D with the VCarve Pro V-Inlay technique to carve beautiful plates on his CNC router.
Tim's Process
A summary of Tim's process is outlined below and more details about the V-Inlay Machining technique that was originally developed by VCarve Pro users Paul Zank and Damien, can be found on the Vectric Forum.
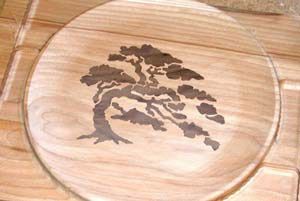
Tim designs his standard 3D plate models using CAD software and exports an STL mesh file that is machined using the automatic 2 Sided machining in Cut3D. He then uses the VCarve Pro to calculate the V-Inlay engraving toolpaths that allow the very precise and fine detail to be inlayed into the surface of the plate.
First Tim runs a the roughing toolpath on the top of the plate and then VCarve's the pocket for the inlay, taking into consideration the "Machining allowance" set in Cut3D. The mating inlay piece is then engraved, in this case a piece of Walnut, in reverse.
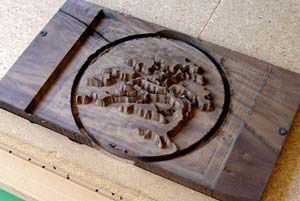
Once dried Tim re-runs the roughing cut on the top of the plate. (this clears away the inlayed walnut piece) and runs the finishing toolpath to finish the top of the plate.The mating inlay is then glued in place, clamped and left for about 3 hours.
The plate is then flipped and re-indexed (note that he uses the Tabs in Cut3D to hold the plate centrally in the material) then the roughing toolpath for the back is run followed by the finish cut for the bottom of the plate.
Tim finishes the plate by VCarving his business signature - Hornshaw Wood Works logo - into the reverse of the plate.
Tim is then left to simply trim off the tabs, sand and finish the completed plate.
Tim has also designed a Decorative Easel that is perfect for displaying the plates. These are machined from Oak and finished with Golden Oak stain and lacquered.
Tim found this project very interesting and would like to share the following points.
"I ran my roughing cuts along the grain and this caused some tear-out in some areas that I had to repair. Running the roughing across-grain gives better results "
"Make sure you orient the logo on the back to match the inlay on the front."
"Pay attention to your machining allowance in Cut3D as you will need to accommodate this in your Z origin set up for engraving the inlay pocket"
"The Vectric Software makes it very easy and lots of fun!"

Vectric Ltd
Precision House
2 Arden Road
Alcester
B49 6HN
Registered in England Number 05382596
VAT Registration GB115123072
Privacy Policy |
Cookie Policy |
Terms and Conditions


