Euan Hanchard is a craftsman who is able to not only envision very imaginative projects but also use his extensive woodworking experience and relatively newly learned CNC skills to bring these to life. Last year Euan attended the Vectric User Group Meeting for the first time, he was kind enough to bring along some very interesting pieces to display and discuss with the other attendees. The complexity of the techniques he used both with the software and the CNC really caught our eye. In addition we'd also noticed Euan's contributions on the Vectric User Forum so knew he was really working well with Aspire. In chatting with him we found out that he comes from a “traditional” woodworking background and so is fairly new to the world of CNC machining, so we asked him to tell us a bit about why he added a CNC to his workshop and discussed some of his excellent work...
Two and a half years ago I added a CNC router to my otherwise well-equipped woodworking facility. Specifically I acquired a CAMaster Stinger I and along with it came Vectric VCarve Pro 7 and Cut3D. The initial impetus for the addition was to customize my products by engraving customers' logos and text, as well as cutting out my own designs. Learning the Vectric software was straight forward thanks to the excellent training videos and the user forum. I quickly saw the potential of much more interesting things than just cutting out products. Many of the features in VCarve Pro allowed me to make nice smooth 2D and 2.5D curves in the products. I used the fluting toolpath extensively to make curved recesses in bowls and spoons. But it was when I upgraded to Aspire last spring, that I could unlock the magic of 3D and create products with my own ideas of curves in all three directions.
Curves are a noticeable feature in many of the pieces that I make. The spoons that I make are curved to fit the hand. I like the insides of my boxes to have a nice radiused transition from sidewall to the bottom. My cutting boards all have radiused edges and corners. And my bowls... well bowls are expected to have curves aren't they? So how many curves can you fit on a bowl?
There's something really appealing about curves. I find that they make a piece of woodwork a little special. Curves make a piece feel softer. They add an organic look to a piece. I like the way they play with the grain in wood, adding visual interest in a friendly manner. The generous use of curves in a piece really draws the viewer in and begs the viewer to touch it. I don’t mean that using a 1/4” round over on every edge will rescue a poor design. Far from it. Curves tend to work best when they are varied and designed in from the outset, and especially if they seamlessly flow from one radius to another. Curves also tend to make a piece harder to fabricate. Inside curves are harder to sand. And curvaceous pieces are sometimes harder to design.
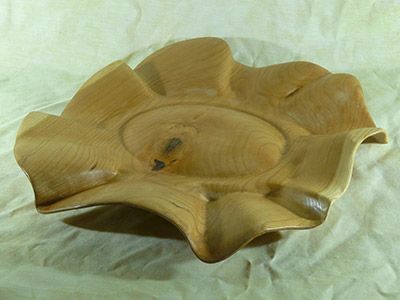
Euan's ability to generate an “organic flow” with wood is really why his work caught our eye at the User Group Meeting last year, particularly a certain ‘wooden curtained bowl’. We were really impressed by this piece of work and how it combined organic shapes, with the geometry of a bowl. We asked Euan if could explain how he went about creating this piece…
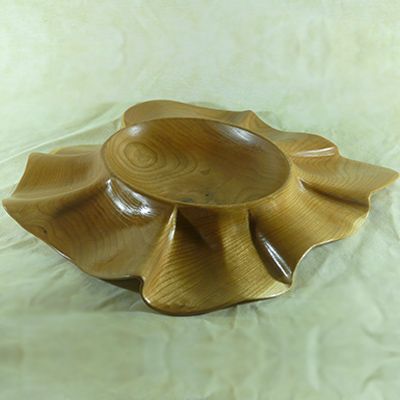
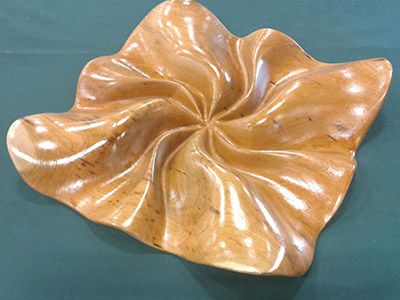
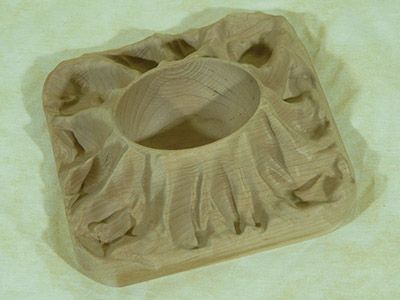
I set out to make something that was a little unusual. I was visualising a bowl set in a surround that had a flowing organic look. I tried a few approaches to achieve this look. Some of the steps along the way are pictured here. I spent quite some time using the sculpting tools to create a version but found it difficult to get the shape to have the fluid look I was envisioning. Though that attempt taught me a lot about the capabilities of the sculpting tools. I was encouraged by the results in the next piece I made. The core of the design was created using multiple two rail sweeps radiating out from a central point. By sweeping a rippled vector out from the centre along some S shaped drive rails I created an interesting shape. This shape was a little more static than I liked so I slid an axial sweep underneath it and multiplied the two shapes, giving me a shape that was modulated in all three directions. This shape was pleasing but it was only cut on the top side. In order to get the light, fluid look I was after, I used power sculpting tools to shape the underside to follow the topside.
This was a significant step toward realising the image I was looking for, but there were some facets of the project that needed developing. The look I was after was now envisioned as a satin dress flowing out from a bowl. I thought that the “skirt” should be non-repeating around the bowl and I wanted a consistent thickness (thinness?) throughout the piece.
Making the centre bowl part was fairly straight forward. I used an oval shaped vector to create a dish. In order to get the dish sitting above the zero plane I used a negative angle with a positive base height. A little rim was added by offsetting the oval and making a half round shape sitting on a base height that brought it up to the top of the dish. I drew a series of drive vectors radiating from the bowl and for each pair, I created a different vector to sweep along each pair of them. I slid a couple of axial sweeps underneath the “skirt”, one of which was used as a multiplier to modulate the ripples. I wanted the piece to look like it was molded from a sheet of flexible wood.
Making the top was a little trickier than planned. Referencing the bottom side from the top required a bit of an unusual approach, I thought. The underlying structure of the 3D aspect of Aspire is a field of pixels, each one having a height value assigned to it. I came up with a somewhat novel but overly complicated approach to creating the bottom side of the project.
By multiplying all the values on the topside by -1, I would thenhave an inverted surface which could be offset to provide a uniform thickness across the piece. Being somewhat pleased with myself for figuring out how to do this, I was taken down a peg at the UGM, where James Booth showed us that simply changing the combine mode to subtract would accomplish the same thing.
On the underside I used another sweep to fill in the space between the bowl bottom and the skirt. As the piece was going to be thin, this added some strength to a potential weak area. The other modification was to offset some of the folds so that an undercut could be hand sculpted into them giving a more dynamic look to it.
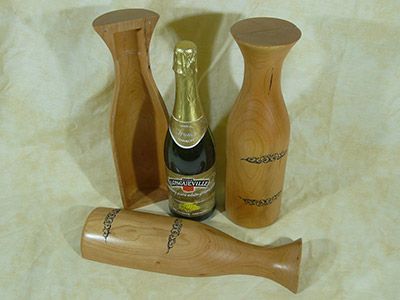
I was using a nice piece of cherry that I could use for this project. It was about 2” by 12” by 14”and it had a large inclusion fortuitously positioned where the bowl would be machined. The piece was roughed out using a long .500” ball nose and finished with a long .250” ball nose bit. The machining time was about an hour and a half on either side. Sanding took several hours as the shape was refined and the undercuts were faired in. It was finished with several coats of spray shellac.
Since completing this bowl, these techniques have been applied to several new projects. I intend to use these techniques to make a number of more intricate projects. I have added a side bracket to my Stinger that allows me to clamp pieces vertically and machine on the edges. I am in the process of designing and building a manual indexer for the side bracket that will enable me to machine multisided objects. There are some intriguing opportunities involving five sided machining. I use Aspire to create many of my projects because the flexibility and ease of use allows me to build some of the wild ideas that I keep coming up with.
It is great to see how Euan pushed the boundaries of his technical knowledge, material limitations and the software to create this "Cloth Bowl". What is even more pleasing is how he uses the software to develop and improve his ideas which in turn has enabled him to implement these new techniques and skills into his other projects. With the introduction of some new hardware for his CNC router we can tell that Euan has been bitten by the CNC bug and we cannot wait to see what he creates in the future.
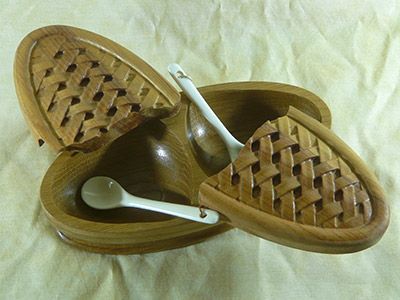
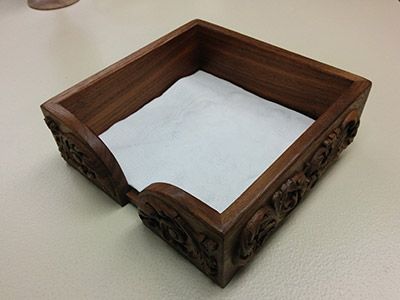
We would like to take this opportunity to thank Euan for putting aside time to share his work and experiences for this article. If you would like to see more of Euan's work then scroll down to view a small gallery. Alternatively you can find Euan being very helpful on the Vectric User Forum where he posts with the user name "eph210". Here is a link from the Forum to another one of his projects that again shows a very clever approach to a difficult problem: Euan's Penrose Triangle.
Vectric Ltd
Precision House
2 Arden Road
Alcester
B49 6HN
GB115123072
Privacy Policy |
Terms and Conditions


