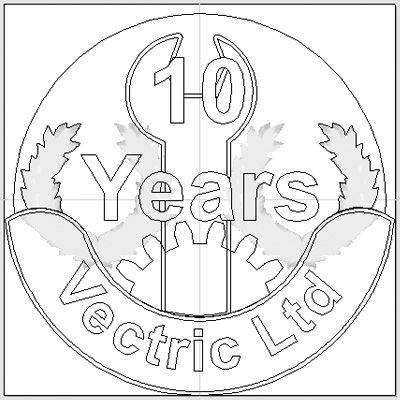
To celebrate the 10 Years of Vectric Ltd, I want to make a small plaque. I know I want it to be quite a complex design, something I have not tried yet, and it needs to use both 2D and 3D toolpathing to get as much out of VCarve Pro as I have learned so far.
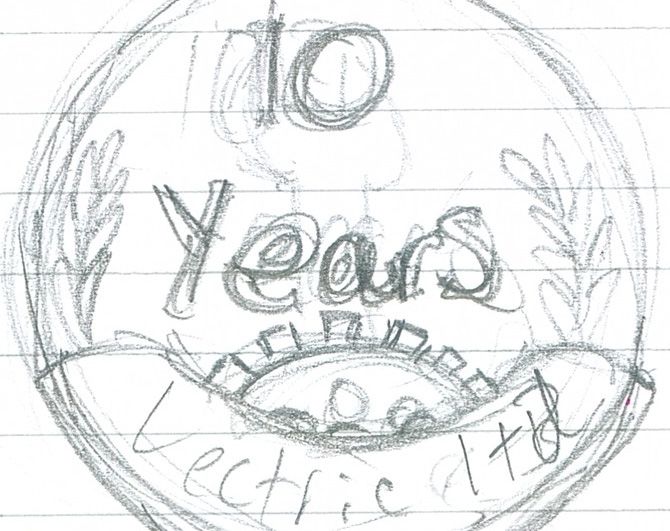
Unlike last time I went ahead and started sketching out what I plan to make.
I want it to be a simple disc with a Laurel Leaf pattern incorporated, the phrase “10 Years”, “Vectric Ltd” and then a spanner and a gear (which are common elements seen in previous blog posts!)
I feel like the Vectric section should be raised up above the rest of the design and done with a VCarve, while the “10 Years” should be in a raised Prism style text.
The Spanner should then be shorter then the text, but still raised from the background, and then the Gear should be cut deeper into the Background to provide a strong contrast.
The 3D Laurels can be from the Clipart selection that comes with VCarve Pro v8 so I won’t need to design my own.
--
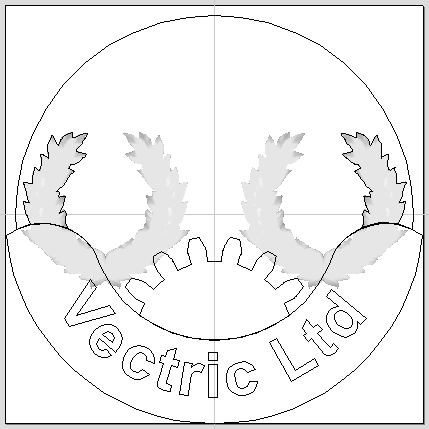
I start with the simple Circle and Arc tools to create the basic layout of the circle and raised lower segment, and then the text editor to add the 2 sections of text I will need.
I can then use the bottom Arc and the Vectric Ltd text with the Fit text to curve tool to get it curved to the correct angle.
Then I use the Gear Creator Gadget from the Support site to make my gear shape.
--
Now I have all the basic elements in place I need to start working on making the toolpathing suitable for CNC work.
First off I create an outline of the Laurel and delete all but the section I need cut. This will allow me to use a Vector Boundary 3D toolpath and only cut the section I need cut.
Next I need to crop down the Main Circle, so that only the bit not overlapped by the lower segment remains, otherwise when I pocket it it will cut the wrong section.
At this point I begin to work with layers as well to help organise the work.
I select each element that will be important for a particular cut or pocket and then Right Click them to select Copy to – New Layer. This puts a copy onto a new layer so I can work with them only and not accidently start cutting the wrong parts.
As I want the text for “10 Years” to stand out over the Spanner, which in turn is also raised over the background, I need to do some editing of the nodes to create my toolpathing.
I create 2 layers where the remains of the circle have the text, the spanner and the laurels removed and pocket everything else, then a layer where the spanner has the text removed from it as well. After some small edits to account for tool diameter in tight corners, I apply 2 pocket toolpaths, each at different depths and I get the result I’m looking for.
Next I create a 3D toolpathing using the laurels and the vector boundaries I created for them, which will be cut on top of the outlined laurel shape left by the pocket toolpath.
Then to complete the main design, I use the Gear, which has been trimmed so that it will not overlap with the lower segment and create a simple pocket toolpath that is the deepest one yet, but starts cutting from the height of the Spanner so that it does not air cut where material is already removed.
--
The last element of the design, the “Vectric Ltd” text requires no special editing and will be cut with a standard VCarving.
I also decide to run a VBit around the edges of the text to chamfer them to give them a less harsh edge and improve the final look of the design.
--
At this point I have 7 different toolpaths ready to run on my Machine, and only use 4 different tools between them. Even with the toolpaths ordered in such a way that I only need to change tools three times, that is still quite a number of different toolpaths to run, and the need to be done in the correct order to work.
I will use the new feature “Merge Toolpaths” to combine them within the software and get the number of toolpaths down to 4, so I only have to match the tools to the toolpath one at a time during machining. I think this will make the next steps easier!
--
This will be continued in the next post, and I will run these toolpaths and get a finished item!

Vectric Ltd
Precision House
2 Arden Road
Alcester
B49 6HN
Registered in England Number 05382596
VAT Registration GB115123072
Privacy Policy |
Cookie Policy |
Terms and Conditions



