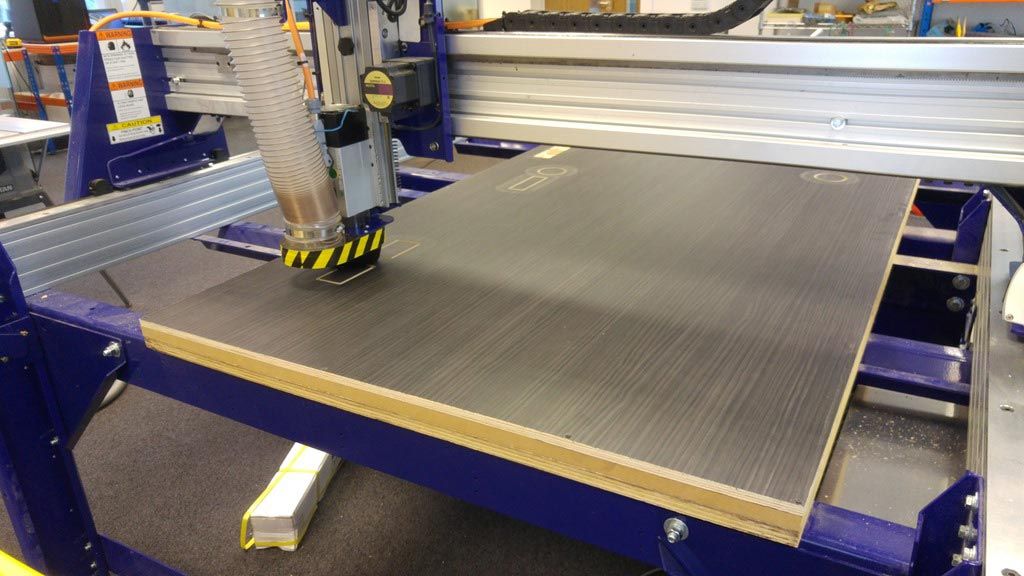
I’m back and I have finally completed my conversion, hurrah, and still managed to get in a couple of breaks away, and my first ever music festival, all while the summer was still here….double hurrah. So lets get down to business, and let me take you on the final journey………..I’ve become such a hippy.
After cutting out all my files on our CNC machine here at the “Vectric Labs” I bundled it all into my empty shell of a van and headed home. It was getting late, I hadn’t eaten for hours and it was a Friday, so thought I would treat myself to a takeaway and some beers, a little self-congratulations, “yeah you did it, you are the boss, we’re going to put this together tomorrow and have the proper finished one done by the end of the weekend”…..ha what a dreamer.
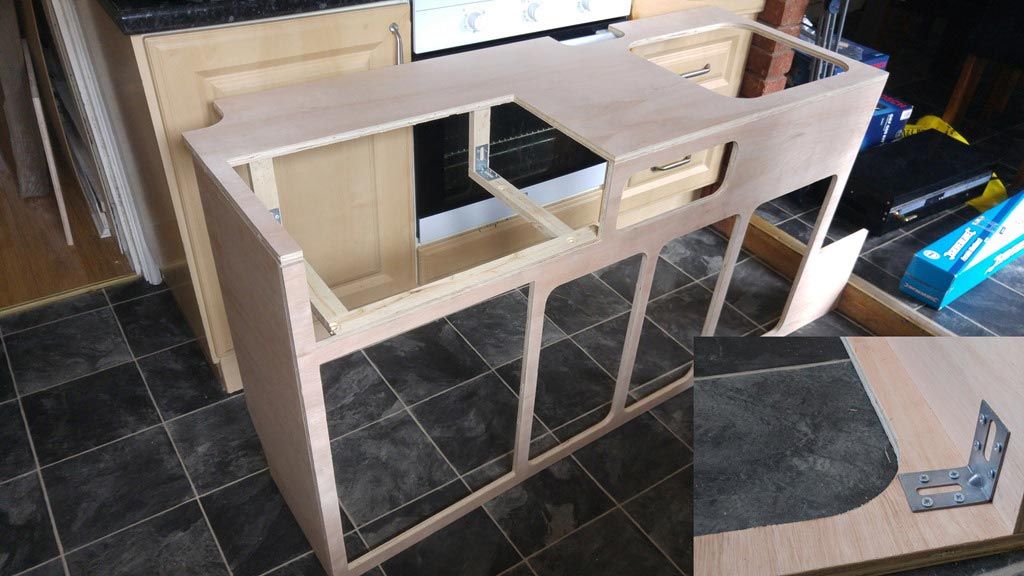
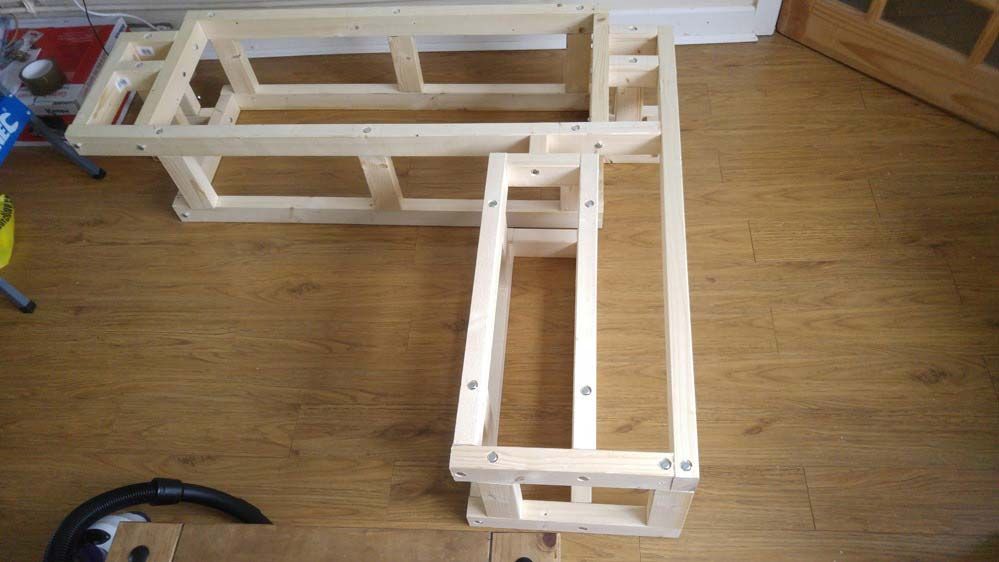
The next day, me and my partner were up like troopers, ready to put this thing together, it started off very well, we had the main body of it up and ready in no time. We had no prior idea of how we were going to put this together, I just purchased a load of assorted very sturdy angled brackets with the aim of using those, luckily they turned out to be perfect. I needed to create something to hold the hobb & grill in place, so off I went and purchased a load of wood with the idea that I knew I needed wood to created my seat bench later too.
After inspecting the grill I had bought, I noticed it had 4 feet to hold it off the ground, so I thought rather than over complicate things, I would literally just cut thin strips of wood to suspend it in its rightful place, held together by, you guessed it, angled brackets. I positioned the grill in place and drawn around the feet, I then used a flat wood drill bit to cut me some countersunk holes to help locate the grill and stop it from moving around.
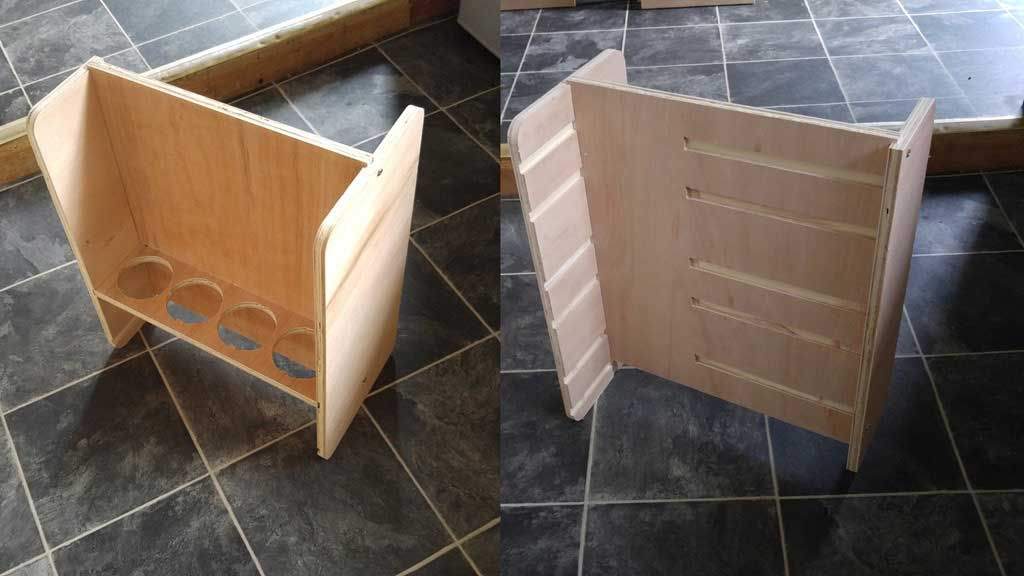
Since the carcass was pretty much built apart from the sides that surrounded the seat bench, I thought I would get started on building my wine drawer and cutlery drawer.
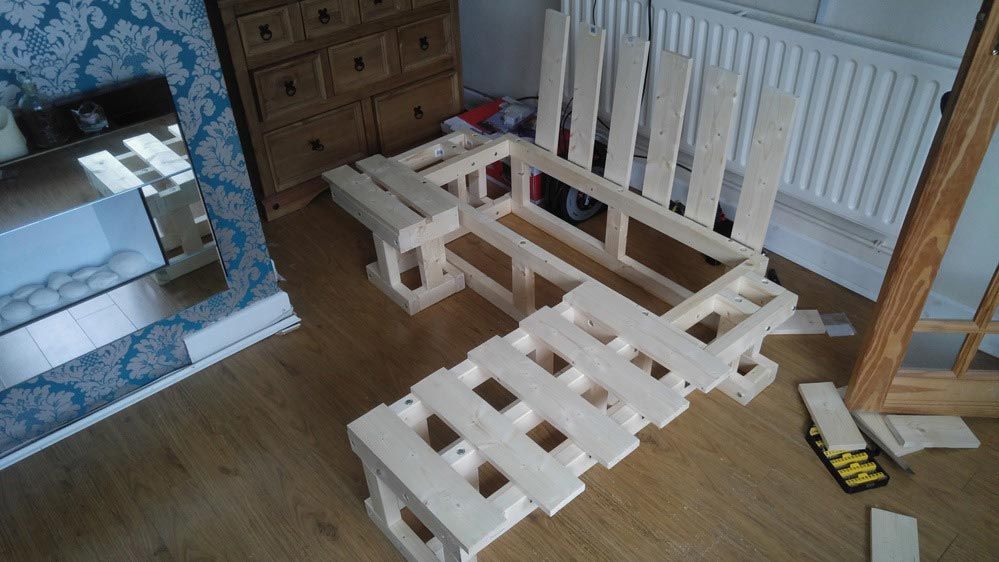
The seat bench was created in 3 separate sections, the rear you can see above and then the left and right sides. I then created the top part of the rear section and sat it in place to ensure it was the correct fit.
Perfect, I can now measure up and start cutting the wood for the left side,
Finish the right side and add some nice hinged slats to finish off the seat bench.
"So off we ran into the house, loaded up the laptop, opened Vectric’s Cut2D Pro, created the job the same size as the mattress and created all the various shapes I needed effortlessly"
Now I remember spending a fair amount of time calculating how this was going to go together, yet as you can see managed to get it wrong somewhat. The center section was machined double sided and I clearly messed up the vectors for this as the slots for the half shelves are on the right-hand side and not the left joining the slots on the front of the drawer. I also managed to forget creating vectors for a backing on the half shelves and a solid flat for any bottles of wine to sit on once located. Not only this but had nowhere to mount the drawer slides that this was supposed to move on back and forth on.
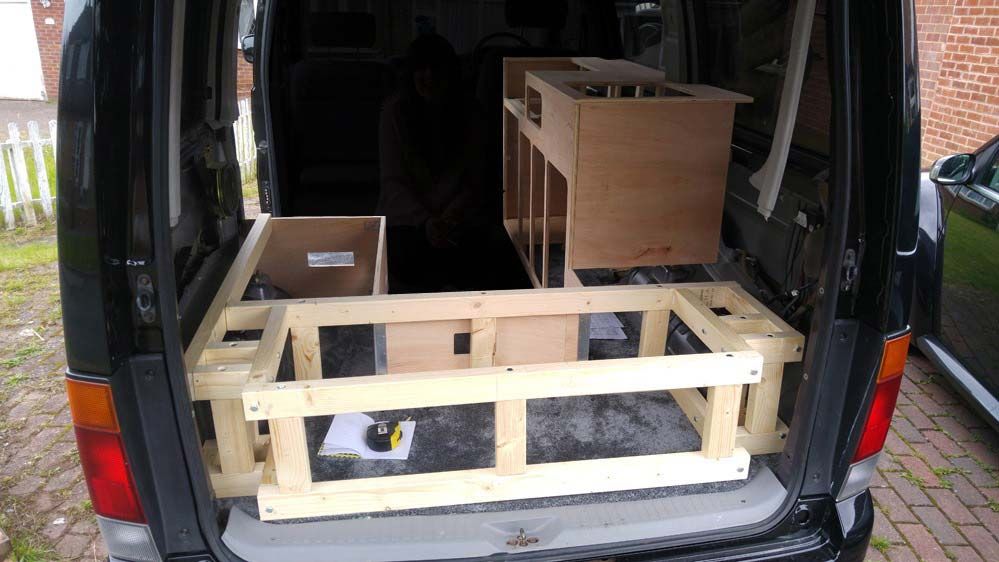
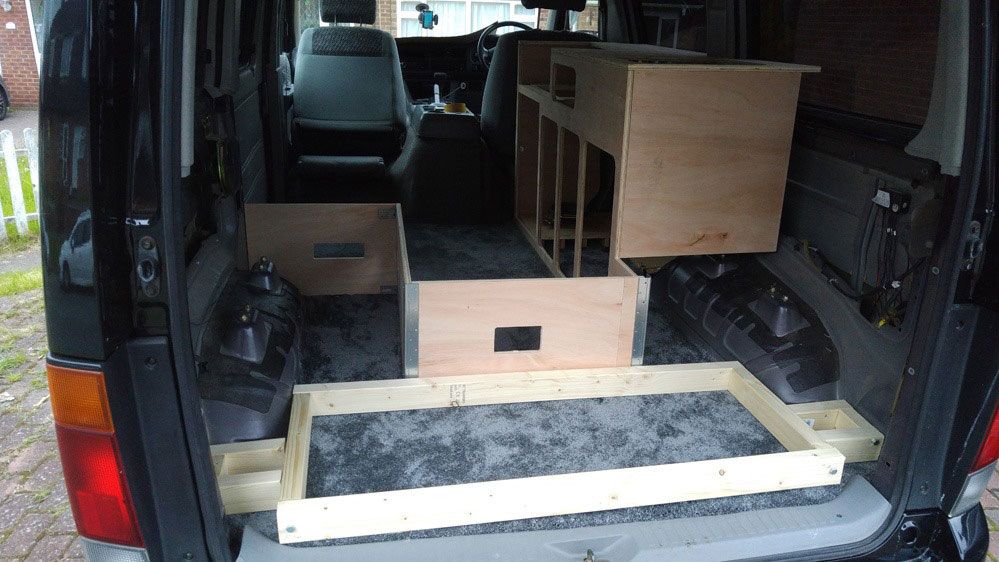
This was quickly becoming an “epic fail”, the story was the same with the cutlery drawer, all down to a missed offset on one of the slots. I decided to make a note of everything that needed attention and persevered onto the bench seat. Now as of yet, I had no plans drawn up for this, my plan was to put what I had so far in the van and build around it.
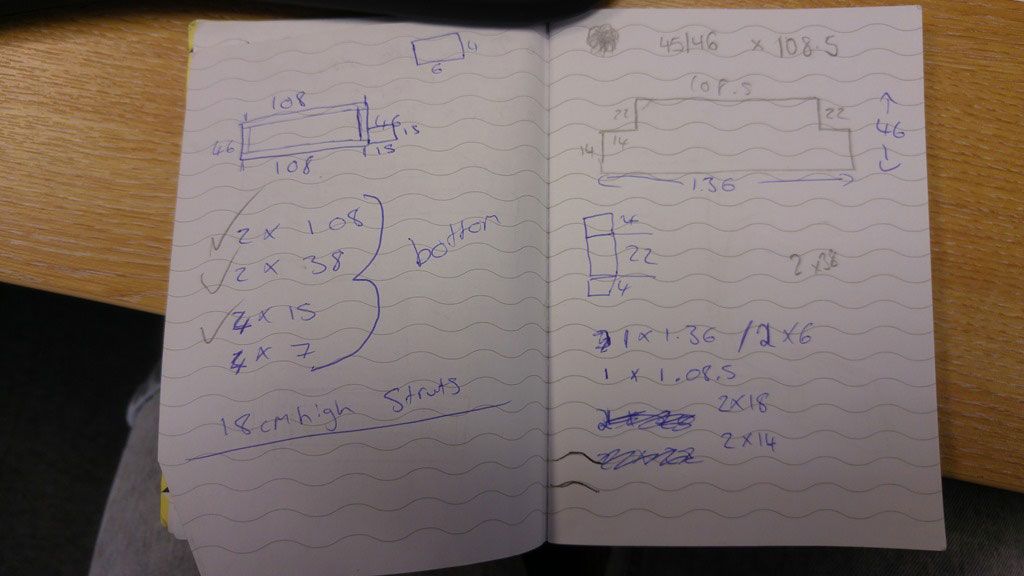
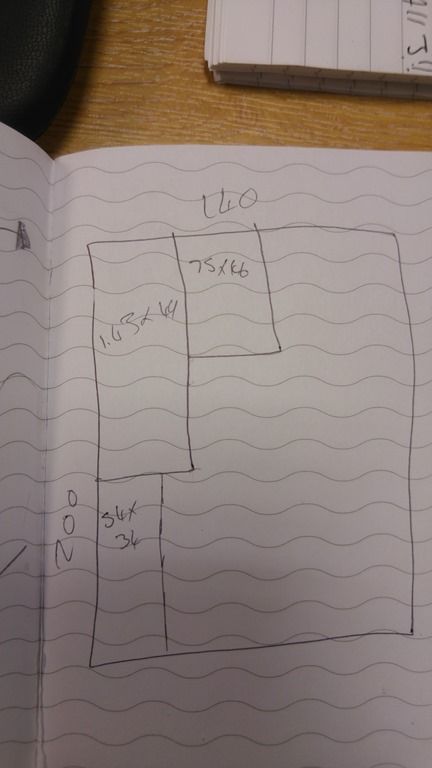
With it in place, I took out my tape measure and started to note down all the measurements, how far between the wheel arches, how far from the back of the unit to the rear of the car, how far along the wheel arch before it ends etc etc. I then started to sketch in the shape of the bottom part and calculated what size pieces of 2×4 I was going to need to create it and then went ahead and cut it out using a circular saw and a portable work bench. Once cut and bolted together I came back to test that it fit. It was like a glove.
With it in place, I took out my tape measure and started to note down all the measurements, how far between the wheel arches, how far from the back of the unit to the rear of the car, how far along the wheel arch before it ends etc etc. I then started to sketch in the shape of the bottom part and calculated what size pieces of 2×4 I was going to need to create it and then went ahead and cut it out using a circular saw and a portable work bench. Once cut and bolted together I came back to test that it fit. It was like a glove.
Now, just showing these images in this way does not demonstrate just how painful creating this seat bench really was. Let me describe it to you, every single piece of wood was hand measured and scored in pencil. Then the wood was clamped to the work bench at roughly the point where the arrow for the blade in the circular saw was going to cut, we offset it a little to make room for the thickness of the blade itself, and then ran the circular saw freehand along a makeshift straight edge until it fell free. This was mega time consuming and tedious, if I were to do this again, I would not be scrimping, I would buy a table saw.
Then after all the pieces were cut for a particular part, we would go and build it. This would involve using a large diameter wood drill bit to clear the way for the large bolt that was going to hold it all together. After that I would change the drill bit to a flat wood drill bit to counter sink the bolt head into the wood, so it didn’t stick out. There were just under 100 of these bolts to pre-drill and countersink….it was only half way through it struck me that I should have bought a second drill. I never did. Believe it or not this seat bench took a good couple of days to complete, now admittedly this was down to having no plans in the first place for it and having to measure, plan and create on the go.
Me and my partner had taken the week off work in the hope that we would have everything finished by end of Sunday, ready to go away and enjoy our fruits for the best part of a week. This was now Tuesday and tomorrow was mot day for the van. So that day we went to ikea looking for a foam mattress that we could cut up and use to make the seat bench a little more comfy.
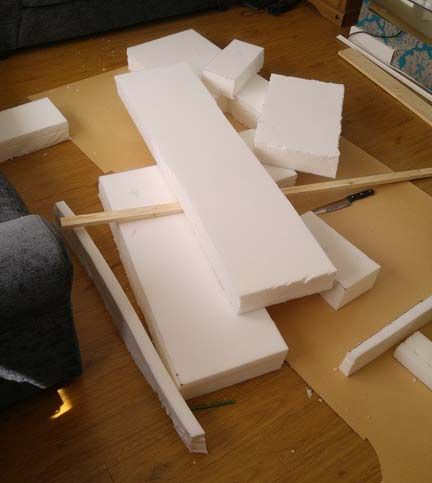
Again the notebook came out and we tried to sketch all the different sized shapes within the confines of the mattress. We did this on a few separate pages whilst stood outside the van until we realised this could be done way simpler. So off we ran into the house, loaded up the laptop, opened Vectric’s Cut2D Pro, created the job the same size as the mattress and created all the various shapes I needed effortlessly and used the nesting tool to see if they would all fit. This was perfect, within minutes I had the verification and I could also print out the vectors I created to use as a guide for later too.
Armed with the mattress, we used the print out to measure and mark up the shapes and went to work with a carving knife to make light work of chopping it up. All was going so well until I realised my van had failed its MOT. To my luck however it was nothing mechanical, it was all electrical, some light bulbs needed replacing and weirdly the rear fog light that was added 10 years ago when it arrived into the UK, had no wiring to power it whatsoever, strange eh how it evaded being found for so long. This news then took me out of action the following day to sort it all out and get it retested.
My partner was getting a little disheartened by what we had managed to achieve so far as she was hoping for a little summer break. This was now Thursday night and we had a choice, to either plough through and get the final version cut with all the fixes or take a break for a couple of nights. I personally was in the mode where I just wanted to carry on and get it finished, but not wanting to disappoint we booked a two-night break in Paignton, Devon at a really nice campsite which gave you views of the whole of Torbay.
So Friday morning, the race was on, there were a number of things I needed to do to get the van useable for the weekend. I needed to first secure the units to the side of the van. Bolt in place the gas locker and drill the emergency vent hole through the locker and through the van floor. Then hook up the gas bottle, cut the relevant copper pipe and rubber hose to take the gas from the locker to the cooker. Surround the cooking area with heat reflecting aluminium sheeting and aluminium foil tape. Fit the cooker itself. Fit all the plumbing for the sink unit and fit the sink unit along with the water tank itself. Finish the 12v and 240v electrical wiring, fit the 12v fridge/freezer, all while the seat bench mattress was getting covers made by my partner, managed to get it all finished and packed up ready to go by 3:30pm that day.
Now even though this little break may have put us behind, it did have a major part to play in how the final version of the conversion turned out, as we quickly found that the little amount of storage space I had planned, was not going to cut it. So the dreams of the fancy wine rack/drawer were history and so was the slide out cutlery drawer.
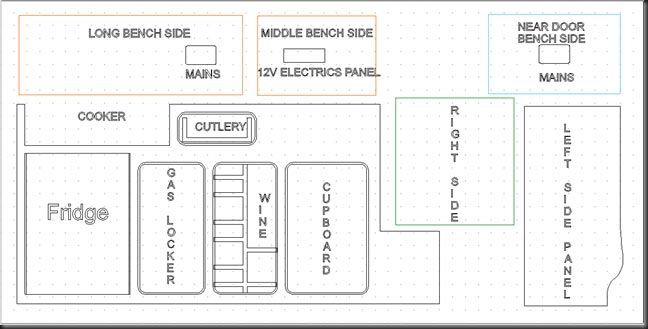
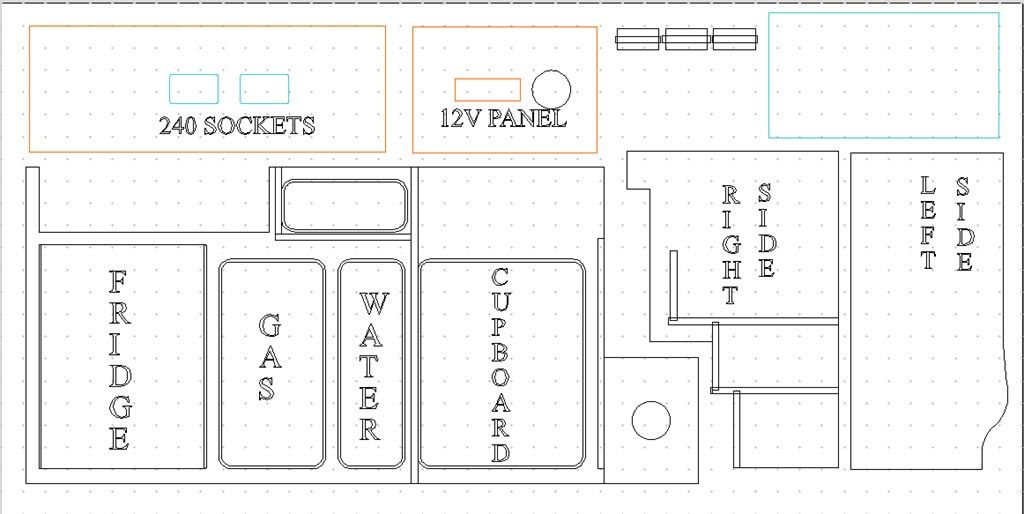
The redesign of sheet one, as you can see compared to the image of the prototype, the wine drawer has been removed and replaced with a much more slim line water storage area. This also opened up a lot of space I could then use to create a shelved cupboard unit. The slim rectangle running up through the unit between water and cupboard is where the inner wall is going to be for the cupboard and shows the other rectangles which join onto it to create the cutlery cupboard. You may also notice that the position of the electrical points have all moved too, this is down to the fact that the seat bench structure was in the way.
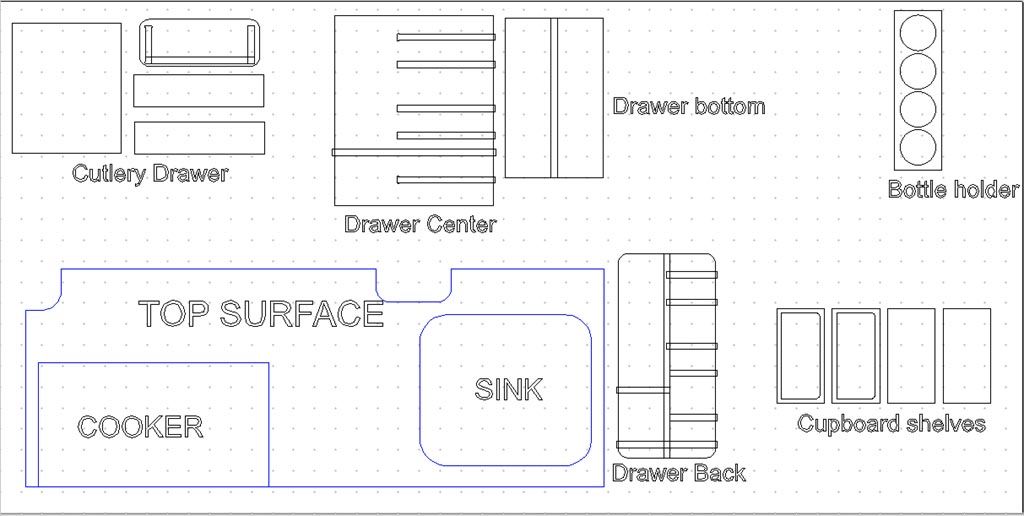
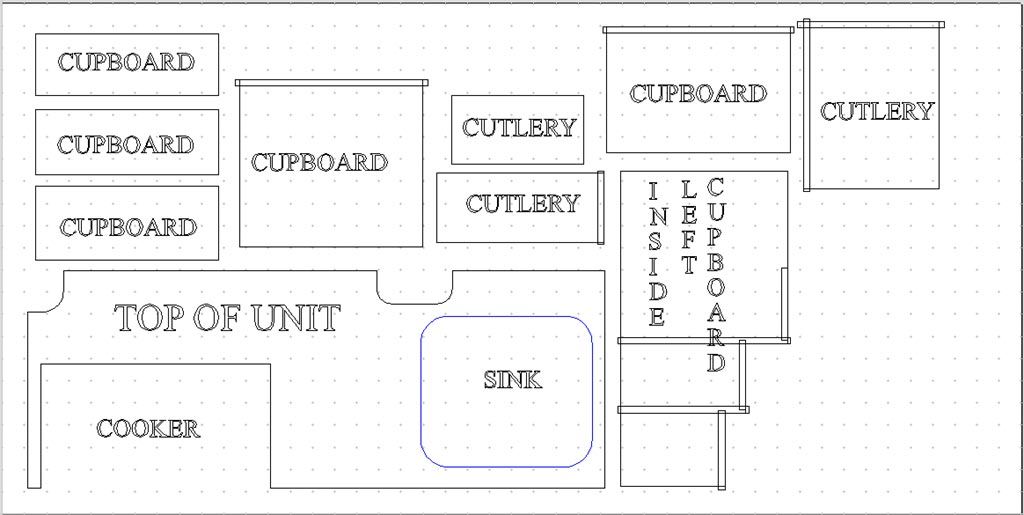
The image is my original sheet two and below is my new sheet two. As you can see, it’s all change here, out with the fancy dream and in with the good old trusty cupboards. Now I went over and over and over this to try and build the picture in my head that this would all fit together and even right before running it, I noticed a little mistake. Now I had no more cheap ply to try this out on and my budget was now over spent, I had to just trust myself and run it on the final veneer ply…. here goes.
Now I did do some test cuts before running the final file as I wanted to make sure the allowances, I left on for the slots was just right, not too tight, not too loose. Once that was decided, I made that quick chance and ran the file and hoped for the best.
Then sheet two. We then spent a good while cutting out all of the tabs and sanding them down as we have no vacuum table. Perhaps this might be my next project….
You would think job done now right? Put this together the same way as last time, nice and quick, finished. It felt so close but yet so far.
For my next mission, I had the job of using a hand router and a t-slotting tool so that I could dress up the exposed ply by knocking in some nice black t-trim. I have never used a hand router in my life, so after watching a few videos on YouTube I now felt qualified for the job. I have to say the whole job was done within half hour, a lot simpler than I thought.
Then I moved onto actually fixing the doors to the panel. It was only at this point with the t-trim in place I realised there would be no room to pivot the doors on hinges, as you can see in the image above there is no room whatsoever. I already had the idea to have the doors stay closed using magnets and they seemed pretty strong, so I decided to go ahead and “try” out just using magnets to keep the doors in place.
Out came the dreaded circular saw again, by this time anything to do with the circular saw brought a massive gloomy cloud with it but we had to just persevere. We cut out a load of two-inch-long pieces of wood to mount the magnets onto, fixed them to the panel and gave it a whirl.
Perfect, they fit flush and hold them in place no problem and require little strength to remove them either and when your done they “snap” back in place really easily. Things were looking up, I literally just have to assemble the cupboard units up and affix it all together and I’m done wahoo. I was however fearing the worst about the cupboard.
So I started sceptically piecing it together, and strangely it was going together, I was still suspicious of it, even so, I then went on to fix it into place so it had no choice about moving.
It worked, I honestly couldn’t believe it and it was standing there so proud defiant of any weight that looked like it should of made it fall over. One proud man I was at this stage as I knew the rest of the build should just go together with ease, I just had to remove the old prototype and scavenge a few things of that first. Heres what the van looked like after I had stripped it all out.
Wires and piping galore, there was also one job in the van I had yet to attend and that was to create new backing along the sides for the seat bench. This required my new favourite tool (the jigsaw) so it made light work of this.
Now I had also started to bring in the final build into the van and get everything wired, plumbed and screwed in…. Then I was told to leave the van by my partner while she did her thing and did her thing she did…
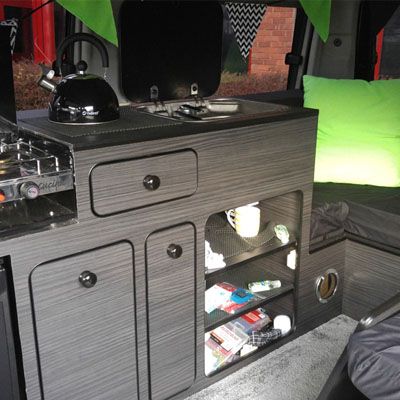
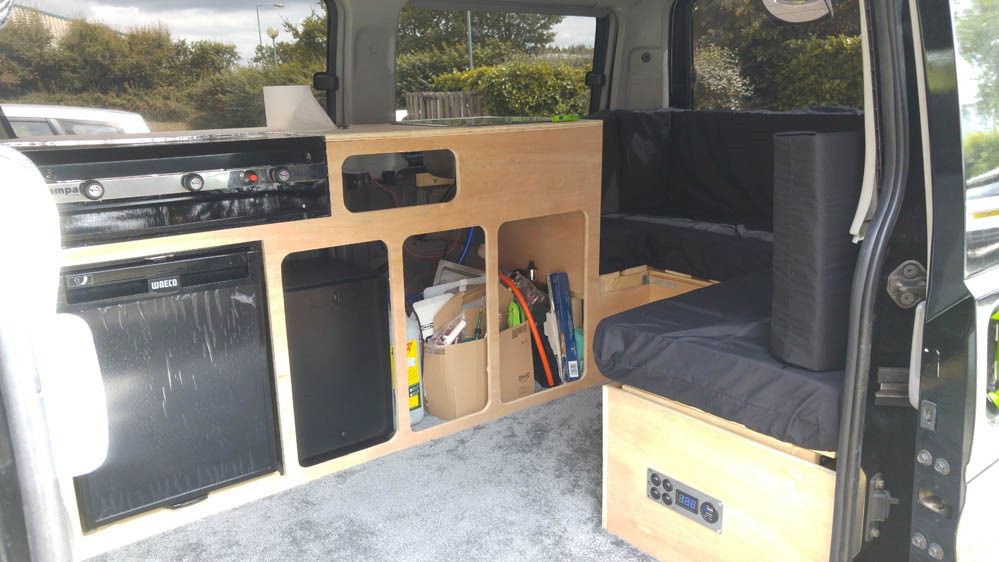
Imagine yourself, walking up to the van, the van you have just painstakingly just spent every spare minute you had for the past what felt like months doing little things for and then seeing this.
Well, I’m still blown away looking at these pictures to this day, I can’t believe that we, who had no prior skills in doing anything like this, could create something like this. There has been little changes to this since these pics, like the circular holes are now covered by speaker grills as there are speakers behind them, the cooker had the whole heat reflective treatment and I also used black edge banding around the fridge to finish it off.
It just shows that you are capable of doing anything if you put your mind to it and I have to say, having never really used Vectrics software for real world uses before, it opened my eyes to how useful it is in more ways than one. The ability to easily create and change vectors, the ability to nest your parts within seconds, the ability to print out your vector layout, the ability to create toolpaths rapidly, the ability to print out job sheets and the ability to preview your toolpaths was by far the best thing for me.
That’s all from me, happy camping y’all.
Sean

Vectric Ltd
Precision House
2 Arden Road
Alcester
B49 6HN
Registered in England Number 05382596
VAT Registration GB115123072
Privacy Policy |
Cookie Policy |
Terms and Conditions


