
The creativity and inspiration that is shared across the Vectric forum and social media never fails to amaze us, and that’s what we really love about this CNC/Vectric community. One afternoon whilst scrolling through the world of YouTube we stumbled across an awesome video on how to create a v-carved inlay, and found ourselves hooked watching more!
Stephan Forseilles creates engaging educational content on his YouTube channel and with each video you are taken on a journey from start to finish on how Stephan creates these intricate inlays using the VCarve toolpath.
For this month’s case study we managed to catch up with Stephan and ask him some questions about his inlay projects and how he got in to CNC. Stephan started by telling us what got him into CNC and why…
I work in IT. My education was programming computers but over time I migrated to management and consultancy (I am 50 now). I picked up woodworking about 2 or 3 years ago. But when you love woodworking and programming, you end up wanting a CNC.
I started with a small Chinese 3018 CNC worth around $200. It was small and slow, but I learned the basics by assembling it myself and making my first projects. But after some time, I felt the need for an upgrade and I went for a larger CNC (1000x1000mm) but still a ‘hobby’ model that I got in a kit and had to assemble myself too.
Behind every creative project there is a beginning, so what was it that inspired Stephan to learn all about the art of the v-carved inlay to then go on to teach others?
I was fascinated by the inlays I saw on YouTube channels like “Brother in Wood” and “mtmwood” but I was struggling to get good results. There are few good tutorials on those techniques, especially if you want to make deep inlays with lots of intricate details. So, I started creating large quantities of inlaid firewood… but I got better at every try. It is a long path of trial and error as every project can take weeks to complete if you are only working on it in the evenings and weekends. I am still learning a lot with every project!
That is what gave me the idea to share my experiments on YouTube, so others could go faster, and we could share our tricks and tips.
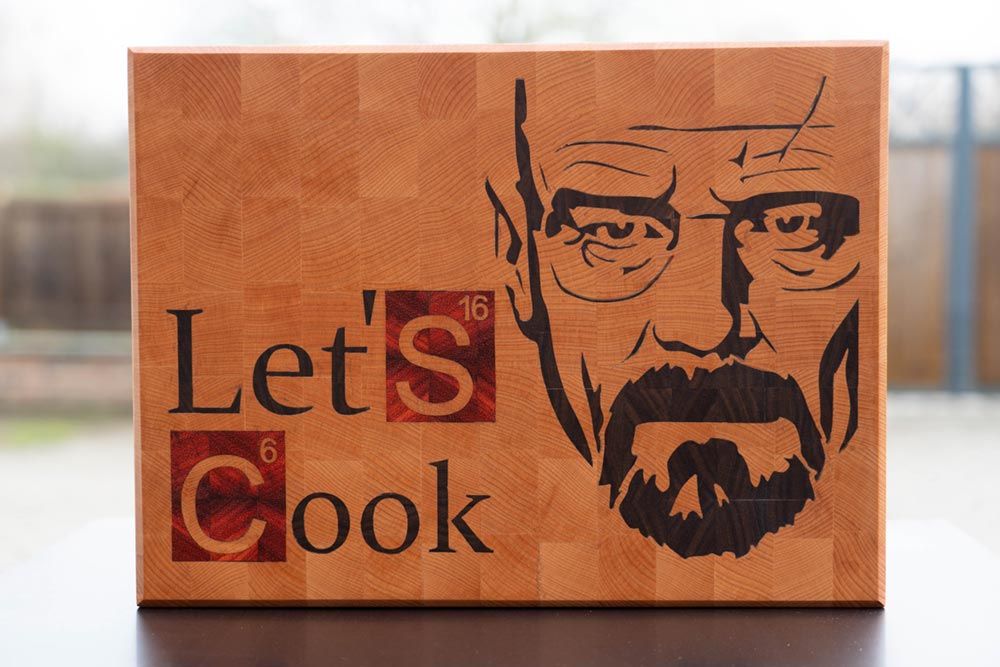
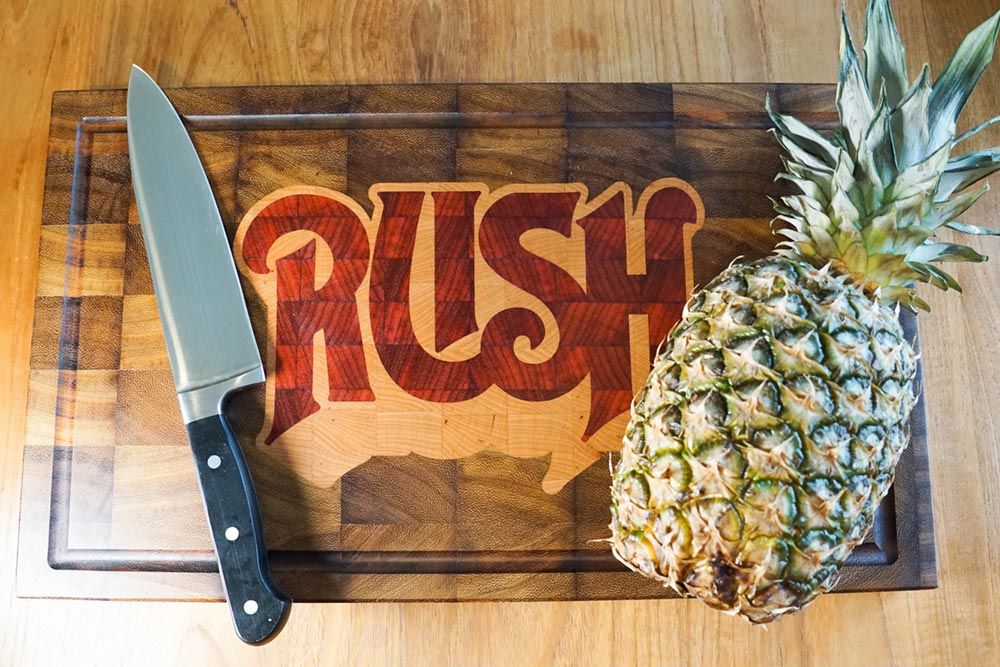
I mostly do end-grain cutting boards. When my wife told me that 5 or 6 cutting boards were enough for one kitchen, I started offering them to friends. I try to personalize the design for them, and I think they are great gifts because they are useful and personal. I do not sell them. Maybe I will later when I am good enough at it.
Stephan certainly has an eye for detail but what challenges is Stephan faced with when starting a project and how does our software help to make this process easier…
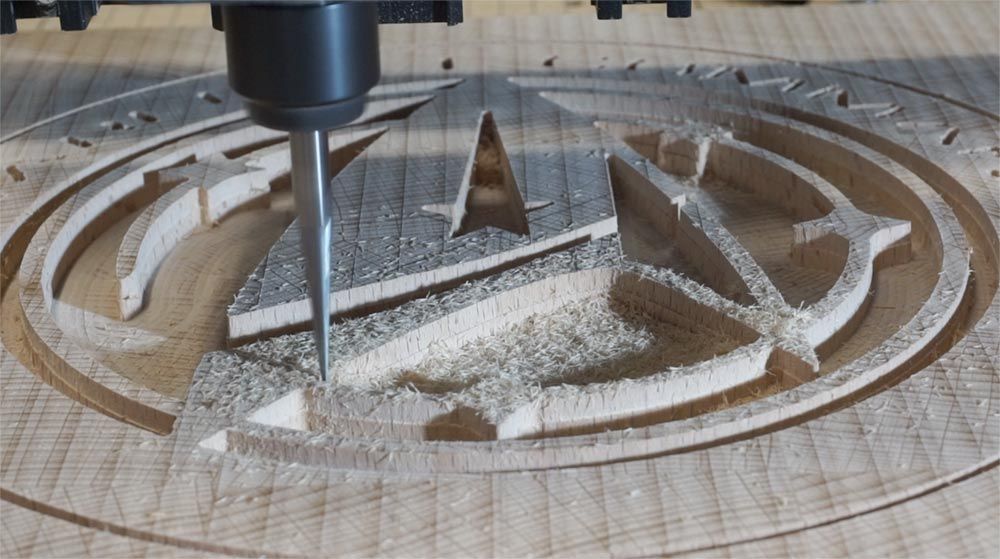
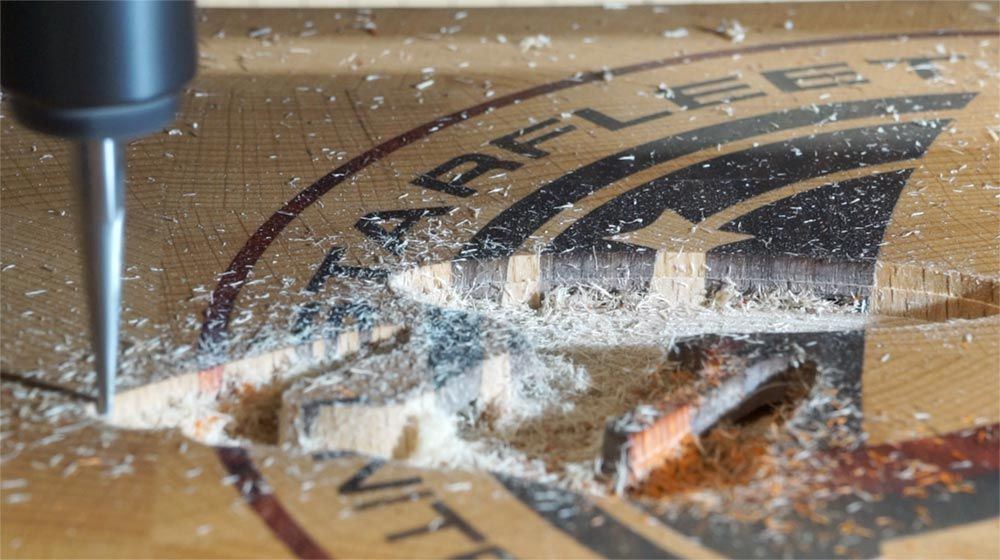
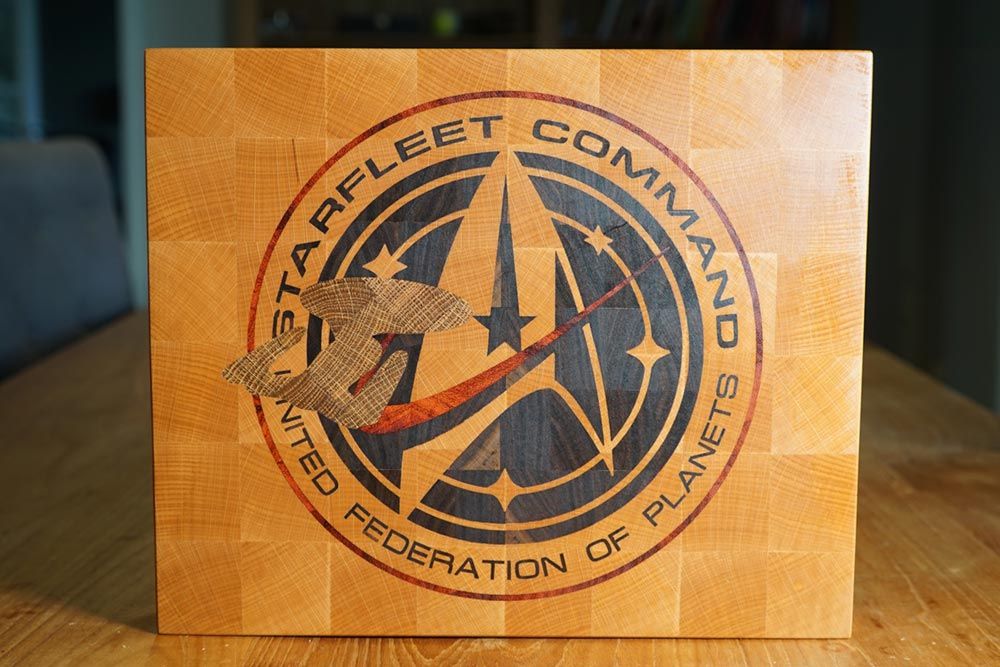
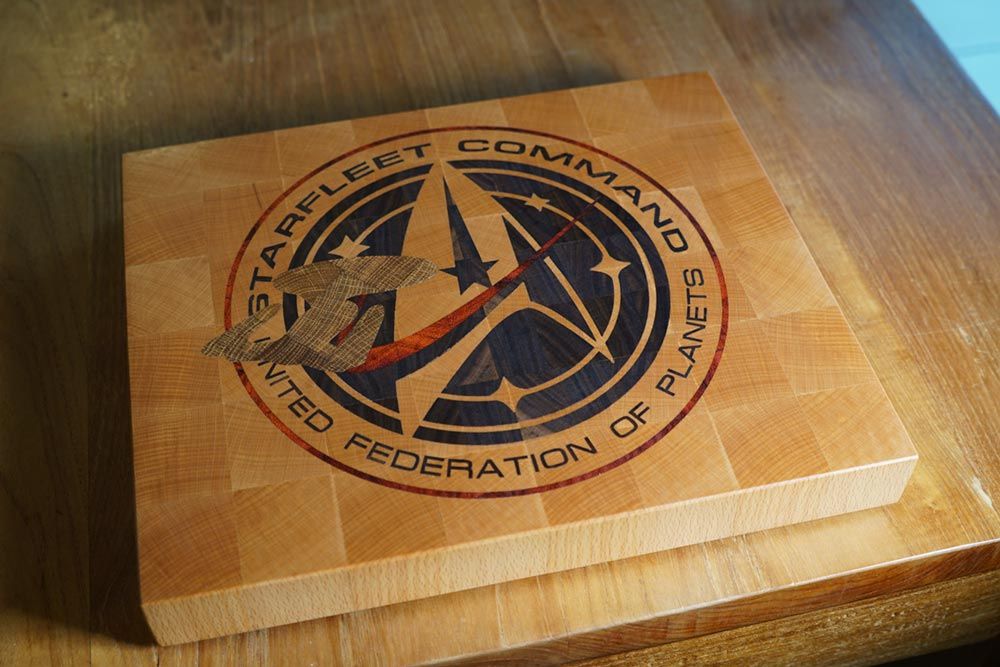
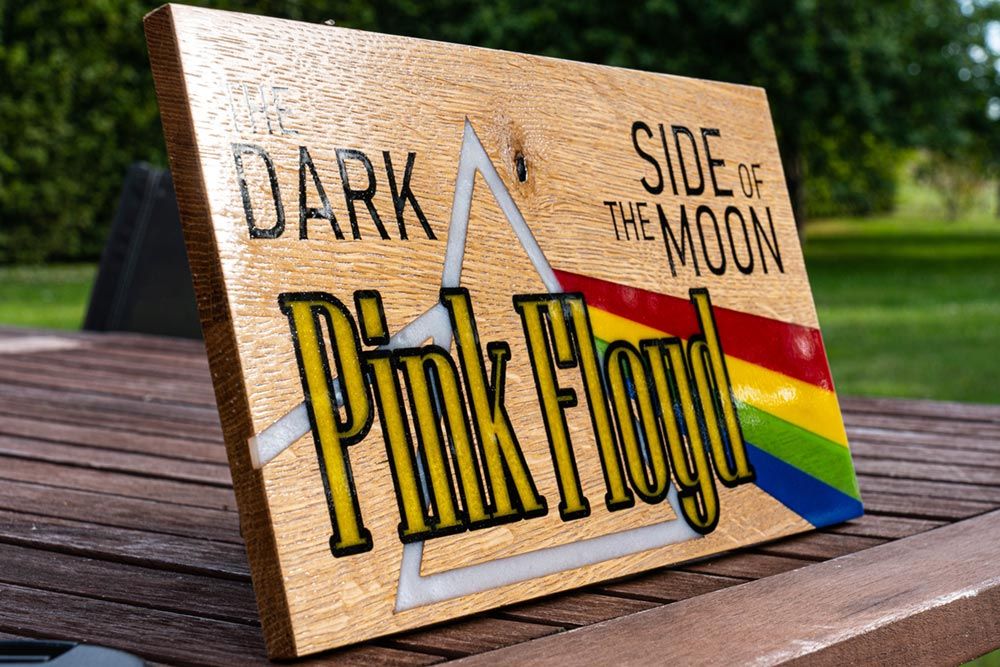
For me, the most difficult part is the original idea! It is easier if I intend to make a gift as I personalize them based on what I know about the people who will get them. The last one I made was for a Star Trek fan. But I need to find something that is challenging enough and will make me learn something but is still doable without tens of hours of carving.
In the past, I would just try to find an SVG or trace a bitmap in VCarve and start with the tool paths. But I have learned that it is worth spending more time in the design phase to make sure it is well adapted to the inlay process. For example: are there parts of my design that are narrow enough to prevent the carving from ‘bottoming out’ to the flat depth? In my latest projects, even though I had SVGs to start with, I re-designed everything in VCarve. Using the Curve tool and Node Editing, I can do just about anything I want faster than in Illustrator now.
For those of us who regularly make VCarve inlay projects, we all have settings and tools that we swear by so let’s find out what Stephan's go-to setup is…
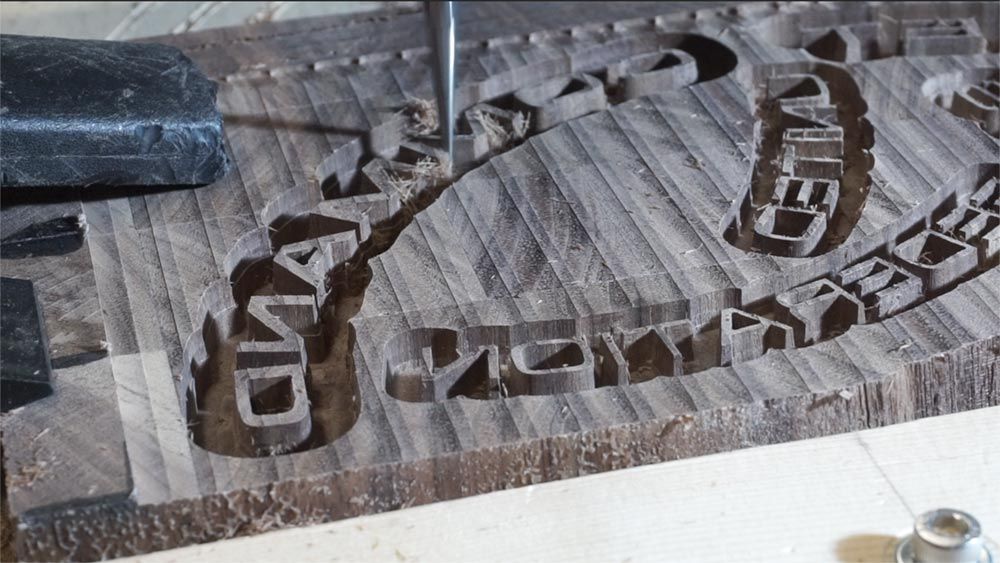
I mostly use the VCarving/Engraving tool path, of course. If the design permits, I will make the pocket with an 8mm flat depth, so the inlay is deep enough to be resistant. A 2mm inlay is okay for a jewelry box but for a cutting board that will be attacked with kitchen knives and soaked in soapy water every day, you need something stronger. For the plug, I use the ‘Start Depth’ technique to define the penetration depth of the plug (generally 7.5mm so I have a 0.5mm ‘glue gap’) and set a 2 or 3mm flat depth that defines what part of the plug will ‘stick out’ of the inlay and will be removed later.
As my CNC is a light aluminum frame, I cannot carve 10 or 11mm at once so I create “pre-passes” toolpaths, as V-Carve will not do that automatically above the Start Depth (yet?).
My ‘go-to’ bits are a 1/8” (3.175mm) straight upcut fishtail bit for clearing out, with 5mm passes at 400 to 600mm/min depending on the wood (sorry for the Metric, I’m European and Imperial is a but alien to me). Finishing is made with a 6mm 10 or 15° V-bit or round-nosed bit (but small nose, generally 0.25mm) which I configure as a carving bit with a flat tip. Also, with 5mm passes, 300 to 500mm/min. Those 0.25mm 10° tips can be rather fragile.
I also use cheap 6mm or ¼’ flat upcut bits for flattening the boards before carving and a same size of downcut bit to remove the excess material of the plug after the glue has set (a bandsaw would be faster, but I don’t have one). I use a downcut for that part of the process because it pushed down so it does not rip the small inlays out of the board.
For those of you that are interested in giving this a go Stephan has some top tips on what materials he uses and why they’re suitable for his projects…
I like to use beech as a base for my boards because it is hard enough, has a light beige color on which I can make contrasts, and is easy to find and not too expensive. I also like to work with oak (strong, easy to find, and has that nice smell when you cut it) as light-colored wood. For the dark ones, I often use Iroko but my preferred one is walnut. Unfortunately, it is not easy to find and quite expensive here in Europe. Padauk provides nice orange tones. Those are the ones I use the most.
I get my wood rough from a local mill and I have bought a small planer (a “thicknesser”, on this side of the pond). The cost of the planer is quickly offset by how much cheaper rough wood is!
As I do end-grain boards, prep work is planning, ripping, gluing, planning again, cross-cutting, and gluing a second time. It is a long process but end grain is much more resistant to knives!
Now we want to know how to best finish a project like this!
Once the inlay is glued to the base and the excess material is removed with a downcut bit down to 0.5mm above the surface, there is a lot of sanding happening. I start at 40-80 grit up to 1000 grit. If there are small defects or gaps, I will fill them with food-grade epoxy. But in a perfect world, there should not be any.
Then the boards are saturated with food-grade mineral oil and a layer of butcher block wax is applied.
With each inlay Stephan has made, a lot of reflection takes place to ensure that lessons are learnt ready for the next, so what would Stephan change if he could go back and do the inlay projects again…
With every project I learn something new so I always wish I could re-do the previous ones using it. But when I started carving, I lost a lot of time because I did not have the right tool bits. However if you have very large inlays with no details, deep inlays will not work well if they are finished with bits of an angle larger than 15 degrees.
Ultimately we want to learn all of Stephan’s secrets so that we can go on to create beautiful, successful v-carved inlays too! So here are some of Stephan’s top tips!
I try to share all I know in my YouTube videos! But if I can give three tricks (besides learning the technique), they would be:
1) Spend enough time in the design
2) Learn to make good blanks, with no gaps
3) Get a good 10 to 15° V-bit
4) (Yes I know, I said three) Have fun!
We want to know more! Are there any projects we should be looking out for in the future?
I’ve just finished my latest project, a Star Trek-themed cutting board (https://youtu.be/sW82qnea4VA ). I’m currently working on a Harley-Davidson board (a classic) for a friend, but for the future I want to experiment with mixing materials in the inlays: aluminium, synthetic materials, epoxy, … I have also started experimenting with what I call ‘procedural carving’: designing curves with mathematical equations or computer code then converting them to gcode.
WOW we can’t wait! You can subscribe to Stephan’s channel hereto see what Stephan and his googly-eyed CNC are up to next!
We wanted to say a huge thank you to Stephan for taking the time to talk to us about his VCarve inlay projects so that we could inspire our community to try something new. If you have a story you would like us to feature, please get in touch, simply email online@vectric.com. We would love to hear from you.
Vectric Ltd
Precision House
2 Arden Road
Alcester
B49 6HN
Registered in England Number 05382596
VAT Registration GB115123072
Privacy Policy |
Cookie Policy |
Terms and Conditions


