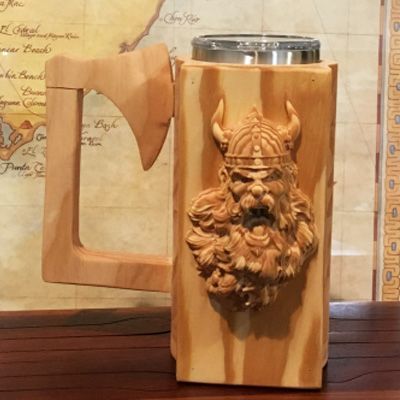
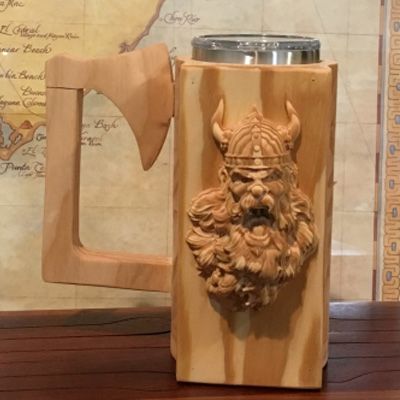
A wise man once said “Great ideas come to those who have had a drink” on this occasion it was the opposite a wise man had a great idea about how to improve having a drink… a personalised Viking tanker. Aspire user Stephen Covell posted this very striking Viking style mug on the Vectric forum and naturally caught the attention from many members of the Vectric community and the staff at Vectric HQ. Due to the projects original and bold design we wanted to find out how Stephen had created the design for this project and a little bit about Stephen as a craftsman. So, before we are taken through the creative process, we asked Stephen to tell us a little about his background…
My employment background is in Information Technology, my last corporate job was in Data Centre Facilities Management. I have been self-employed for the past ten years, designing and running websites for a living. My love of tinkering began when I was ten or twelve years old. I remember poking around my father’s workshops intrigued by the projects scattered across his workbenches. I loved the look & feel of the old hand tools, each with its own story to tell. It was a magical time of discovery. I am now 60 years old and have been using a CNC for the last four or five years, more actively during the past two years. CNC’s and today’s software have brought back some of the childhood tinker’s magic I experienced as a boy. I got into CNC as a hobby after watching some YouTube videos and seeing some real-life examples at the local woodworking store. I bought a Next Wave Automation – Shark CNC several weeks after seeing the in-store demo. I consider the blending of computers and woodworking a match made in heaven. I started with VCarve Desktop and upgraded to Aspire a couple of years later as I wanted the ability to create my own models.
Stephen’s fascination and love for how things are made was sparked from an early age and we can see that it has not left him since. Now that we know a bit about his background, we couldn’t wait to find out all about the project that captured our attention…
Inspiration came while attending a Renaissance festival and later an Octoberfest festival. I noticed quite a few interesting mugs, many of them homemade and thought it would be fun to design my own mug. I soon realized that a custom mug is a must-have for game nights and made a few of mugs for my grandkids.
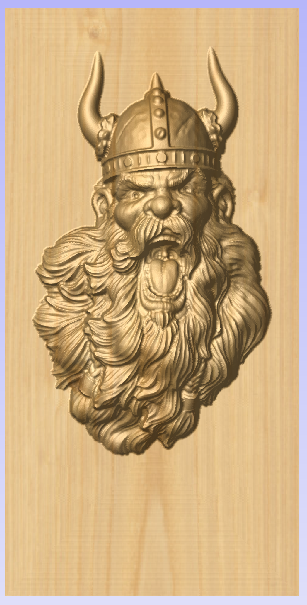
With this project I used ¾ inch pine for the cup rings and handle. A piece of 1.5 inch pine is used for the Viking face. I could have used a harder wood, but a few nicks and dinks which will be accumulated during its use will add to the Viking facade. All material was purchased from a local big box store. I sourced the screaming Viking face model on Etsy and resized it to a depth of 1.5 inches using Aspire. Of course, many different models could be placed on the front of the cup using the same process. A Viking just happened to fit my theme. I am contemplating making a mug using the wizard and/or dragon models included in Vectric’s clipart collection.
Designing it was a smooth process. I drew out quick designs in Xara Photo & Graphic Designer as it allowed me to use a drawing tablet. I imported the basic design into Aspire and created precise vectors and the toolpaths using the imported file as a guide. A favourite feature of the software was being able to see how the toolpaths will cut before investing time and material. It is also nice to be able to save the projected image, which allows me to share it with the recipient and make any needed changes before starting the cutting process, it’s a real time saver. Another favourite feature is that the software warns you if the toolpath will cut entirely through the material.
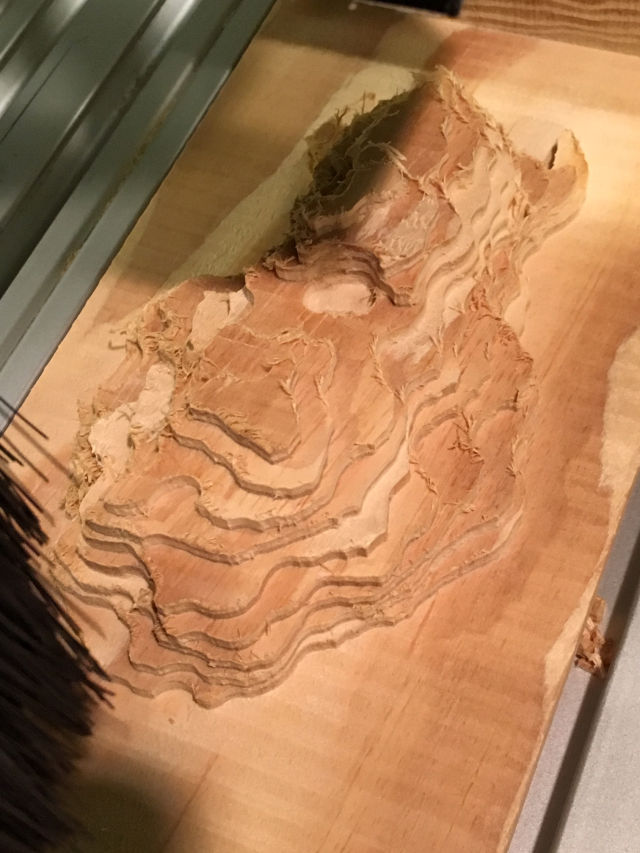
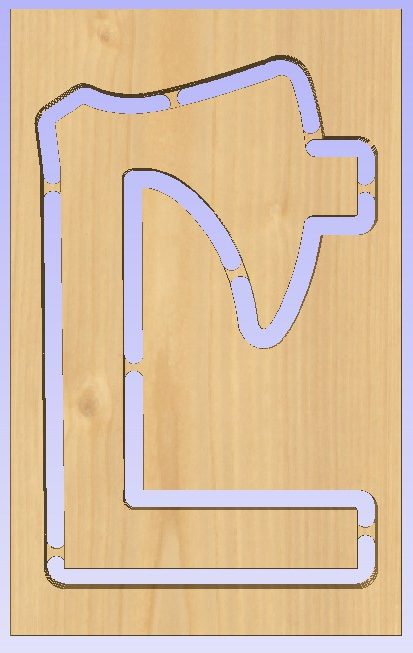
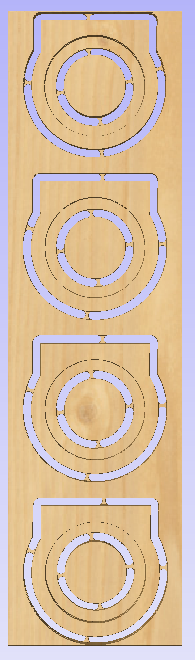
I cut the mug rings, guide peg holes, and axe handle using a 0.25 endmill, 12000 RPM, 100 IPM feed rate. The first pass on the Viking face was a roughing machine tool path using a .25 end mill ran at 12000 rpm, 100 IPM feed rate. The second pass on the Viking face is a finish machine tool path using a 6.2 tapered ball nose bit ran at 12000 RPM 40 IPM feed rate. It amazes me how much detail you can get using a ball nose bit. All in all, it takes the cutting/carving process about 7 hours to complete. If I am feeling energetic, I work on assembling the mug while the face is being carved.
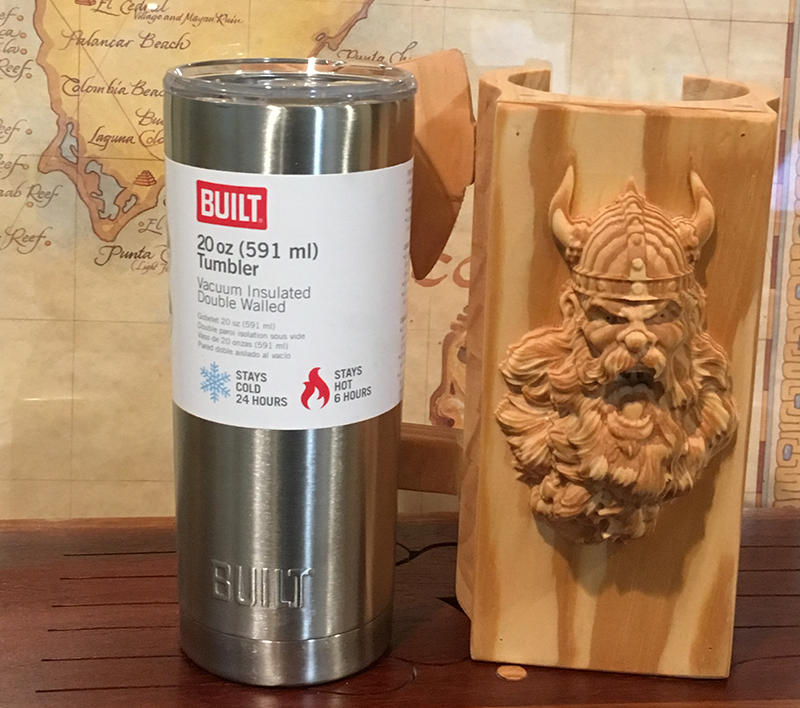
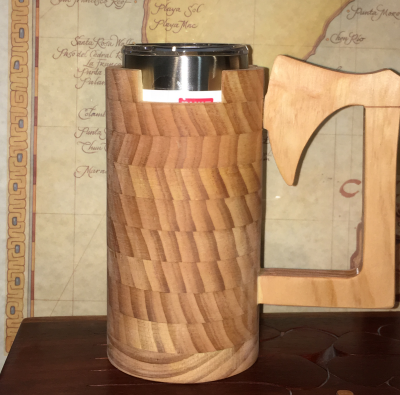
Due to the design of the mug it was quite easy to assemble and finish. Once the 10 rings were cut, I pinned them together using a ¼ dowel rod and glued them together to create the mug. The bottom ring has an inside lip to prevent the tumbler from sliding all the way through.
The mug handle is cut and then hand sanded to resemble an axe. The sides of mug rings number 2 & 8 (counted down from the top) are notched so that the axe handle can be glued into place. The back of the top ring is notched to allow easier access to the tumbler when drinking. Once the glue has set, the mug is roughly sanded using a drum sander and then finished by hand sanding. Sanding the project once it was one solid cylinder allowed me to get a smoother and more seamless finish. The Viking face is cut from a single piece of wood and glued to the front of the mug. I created a glue-up jig to apply pressure evenly around the face. (Other models of your liking can be easily substituted in place of the Viking face here.)
(Side note: I attempted to glue blocks of wood together to simulate continuous grain from the rings and cut the face into this, but in the end the backing around the face was too thin and cracked when attempting to glue the face to the mug.)
Finally, the mug was stained with Minwax Colonial Maple 223 and two coats of Minwax Clear Satin fast-drying Polyurethane. For the insert, because obviously I couldn’t put my beer into a pine bottomless cup so I used the tumbler (BUILT 20 oz / 591 ml) as an insert as it keeps your cold drinks cold and your hot drinks hot. I also like that it can be removed to be washed.
What worked well with the machining was slightly increasing the bit speed and slowing the feed rate to reduce the chipping on the rough pass of the Viking face. It is also important to use a sharp bit to avoid chipping. In the future, I would not drill the pin holes all the way through the top and bottom mug rings as it would provide a better finished product. Creating a 3D model of the axe head on the handle instead of hand sanding the form into the wood would be a welcome timesaver and I’m sure my sinuses would be happier with less dust.
The best tip I can give for this project is to not skip machining the pin holes on the rings. The addition of the pin holes helps keep the rings in place during the gluing process, as it prevents the rings from sliding when applying pressure. A fine finishing nail-gun works as well, with the only drawback being that nails must be precisely aligned to prevent them from coming through the sides of the rings.
He makes the process of creating this project seem so simple. I guess it helps when you have a mind that thinks methodically about how it is going to work and piece together. We would like to take this opportunity to thank Stephen for taking time out of his day to share his story and knowledge with us all. Not only that, Stephen has been kind enough to share his project files (not including the Viking model) with you all so you can have a go at making one of your own.
Before we let Stephen go we had to ask if he had anything planned for his future projects…
I have several automata projects in the works. Aspire is the prefect tool to cut gears, cams, levers, figures, etc. (For more on automata see https://cabaret.co.uk/ I am not affiliated with Cabaret Mechanical Theatre, it’s just a good source of information.

Vectric Ltd
Precision House
2 Arden Road
Alcester
B49 6HN
Registered in England Number 05382596
VAT Registration GB115123072
Privacy Policy |
Cookie Policy |
Terms and Conditions



