Here at Vectric HQ, we are always impressed by the projects made by our users. Doug Pinney’s Liberty Box project was one of his many projects that stood out to us on the Vectric Forum due to the impressive detailing and finish of the box. For this month’s case study, we caught up with Doug and asked him about his background and how he got in to CNC…
I retired in 2009 from my contracting business. I was a design/build general contractor, designing and building commercial buildings. I still design buildings for a couple of contractors.
May of 2009, I finished my last project and flue to Alaska for three weeks. On the return trip my wife asked what I was going to do when we get home. I had no work lined up and she suggested that I retire. I agreed to that because me body was already telling me it had, had enough.
She then asked what I would do and suggested that I finish my wood shop, so I jumped all over that idea.
After about four years of wood working, building furniture and other things, I started to look for a new challenge in woodworking. I started looking into CNC and talking to machine manufacturers.
I started with a Legacy Arty 58, then moved to a Legacy Maverick 3x5, I now have a Legacy Maverick 4x8 and a Legacy 2020 Maverick 4x8 with Auto Tool Change and Vacuum System coming.Empecé con Aspire V4.0, ¡qué programa tan genial!
Han pasado más de 7 años desde que Doug empezó con la versión 4 de Aspire. Con toda esta experiencia en CNC, es fácil ver de dónde sacó sus habilidades para crear proyectos tan increíbles.
Queríamos saber más sobre por qué decidió crear la Caja Liberty.…
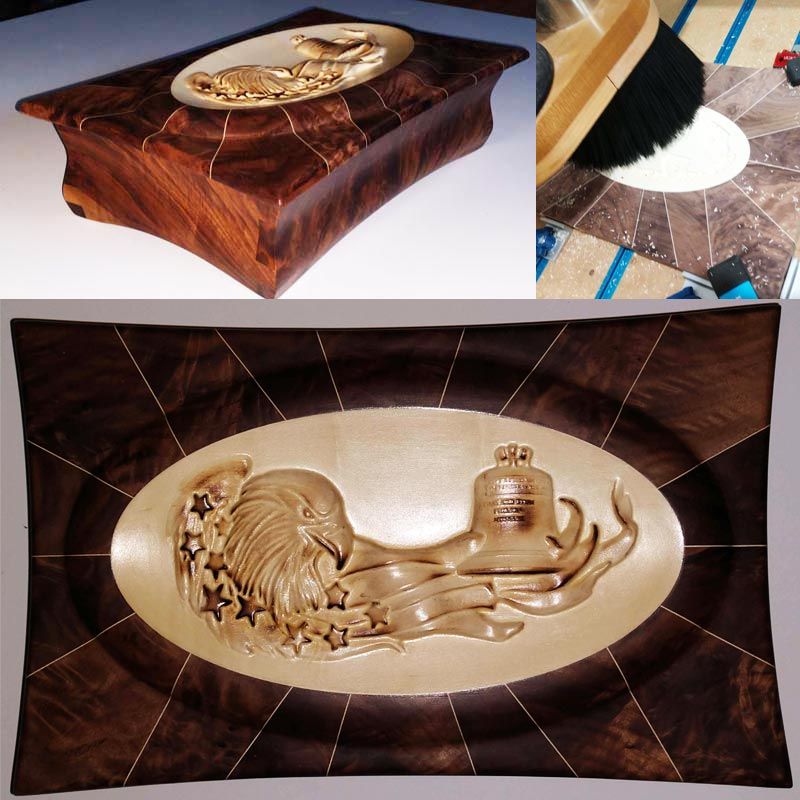
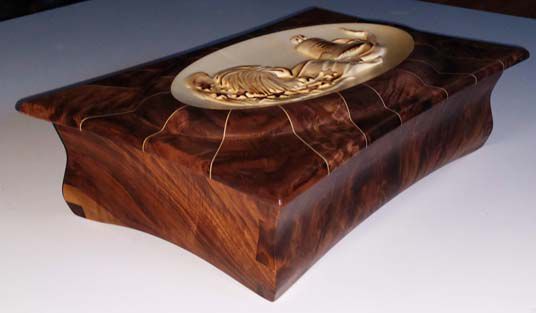
Hice la Caja Pelican en 2018; me gustó su forma. Un día recordé que tenía un par de cajas de madera de nogal negro nudoso. ¿Cómo puedo usar la madera? Hagamos una caja como la Caja Pelican usando madera de nogal negro nudoso.
Tras concebir la idea y reunir los materiales, Doug se puso manos a la obra planificando y diseñando el proyecto.…
Elegí madera de nogal negro nudoso y acebo. El nogal negro nudoso viene en trozos pequeños, así que tuve que diseñar la caja adaptándola a la madera que tenía. El acebo es blanco y crea un buen contraste con el nogal.I am capable of designing things in my head, which I did for several weeks trying to work out the details for the box top before I sat down with Aspire.
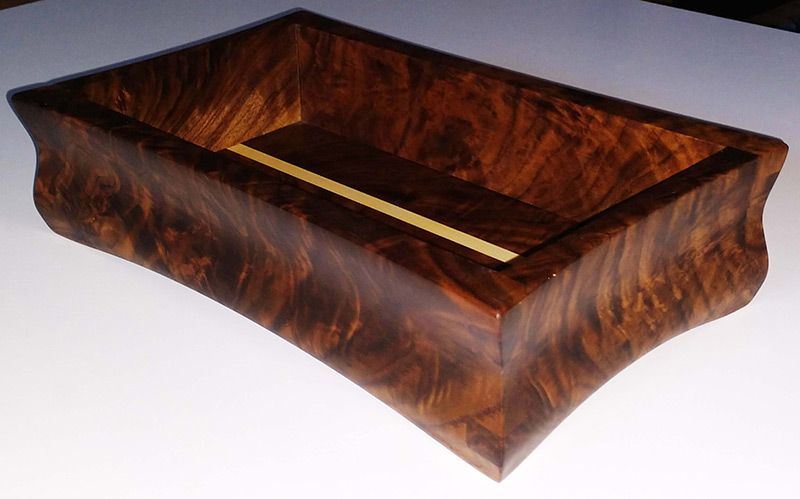
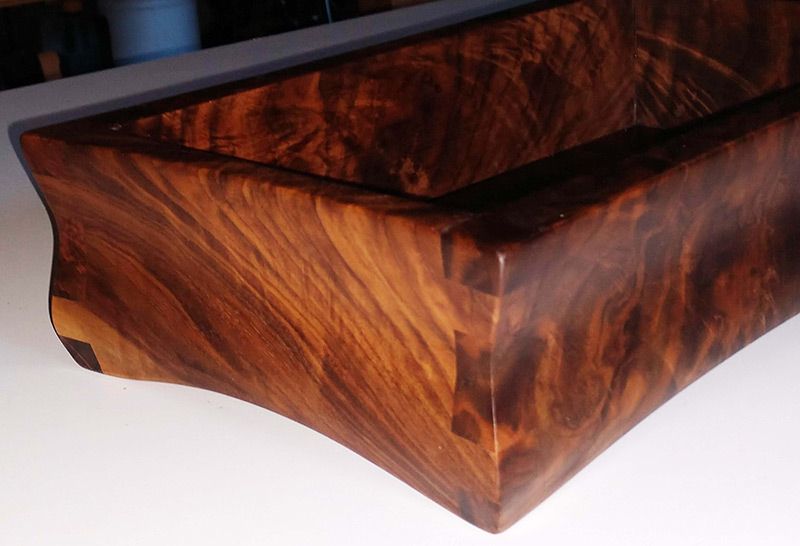
The big challenge was the wood and how to create the top and bottom with what I had available. You can’t go out and buy walnut burl off the shelf. The pieces I had ranged from 1” to 4” wide and 6” to 14” long. I looked out and found 4 pieces for the box sides and pieces for the bottom glue up. I did not have enough long walnut for the bottom; so I used some Holly racing strips when gluing up the bottom panel.
Now I have various pieces in different lengths and widths to make the top. I decided on segmenting the box top. I was able to create a design using 18 segments of 5 different shapes and sizes to make the top.Then I decided to place Holly veneer between each segment pieces. I knew that gluing up 18 different shapes plus 18 veneer strips was not going to be easy. They will move when gluing them together. This is when I decided to put a Holly oval in the middle to hide the miss-alignment of the segmented pieces. All of the segmented pieces were cut on the CNC.
I had the idea from the beginning of using the eagle flag clipart in a dish and name the box the ‘Liberty Box’. The eagle flag looks good, but it is out of balance in the oval on the right side. Let’s add the liberty bell clip art at the end of the flag. The liberty bell has the wooden cross arm above the bell that did not look right, so I removed the cross arm. The bell fit in under the flag and balanced the image.Ahora viene el gran problema: cortar una inserción ovalada dentro del óvalo en relieve, insertar el acebo y volver a cortar el plato ovalado con la bandera 3D y la campana de la libertad, asegurándose de que todo quede centrado. Esta operación requiere retirar la pieza de la máquina CNC, pegar la inserción de acebo en la madera de nogal y volver a ensamblar. Dado que la inserción es de acebo, el corte del plato debe quedar perfectamente centrado (solo tengo una oportunidad para hacerlo bien) o se formará un borde blanco en un lado y se dañará la veta de nogal en el otro. Al final, todo salió bien.
Las juntas de caja personalizadas deben cortarse en la mordaza vertical de la CNC. La caja debe ensamblarse (cuatro lados y fondo) antes de dar forma a los laterales. Los laterales de la caja, que tienen un doble perfil de dos rieles en ambas direcciones, también se cortan en la mordaza vertical de la CNC. Los laterales se contornean en ambas direcciones.
Doug explicó el acabado y la construcción del proyecto con algunas reflexiones…
Terminé la caja lijando a mano todas las piezas y luego la pulí y enceré.Planifiqué el proyecto de principio a fin. Había muchos detalles que resolver para la tapa de la caja (37 piezas para ensamblar y mecanizar). Solo tenía madera suficiente para un intento, así que tenía que hacerlo bien.
No cambiaría nada.
Luego le preguntamos a Doug si tenía algún consejo para otros creadores.…
No tengan miedo de probar cosas nuevas. Me encantan los proyectos difíciles con un reto; cuanto mayor sea el reto, mejor.
La dificultad de un proyecto no es más que un nuevo reto. Tómense su tiempo para completar el proceso. No se puede apresurar un proyecto como este.
El arduo trabajo de Doug claramente ha dado sus frutos, como se ve en este proyecto y, con suerte, en muchos más por venir. Antes de dejarlo ir, le preguntamos a Doug qué planes tenía para el futuro…
Estoy diseñando nuestra placa del 57 aniversario.Queremos agradecer enormemente a Doug por dedicar su tiempo a hablarnos de su proyecto, lo que nos ha permitido inspirar a nuestra comunidad a probar algo nuevo. Si tienes una historia que te gustaría que publicáramos, contáctanos escribiendo a online@vectric.com. Nos encantaría saber de ti.


Vectric Ltd
Precision House
2 Arden Road
Alcester
B49 6HN
Registrado en Inglaterra Número 05382596
Número de IVA GB115123072
Política de privacidad |
Política de cookies |
Términos y condiciones


