Für Tim ist die Holzbearbeitung seit seiner Kindheit ein Hobby und eine Leidenschaft, und die Entscheidung, CNC-Technologie in seine gut ausgestattete Werkstatt zu integrieren, war für ihn ein logischer Schritt.
Tim invested in his Shopbot CNC machine 8 years ago and soon required more sophisticated design software to tackle the projects he wanted to undertake. However, he became disillusioned with the lack of choice in the market, especially when it came to price as he explains;
“I could not justify spending more money for software than the entire machine cost to begin with”
Fortunately Tim did not have to wait too long as Vectric was soon to release its first product ‘VCarve Wizard’ (now VCarve Pro);
“Then Vectric appeared with their initial V-Carve Wizard software and everything turned around for me. Since then I have moved up through their products and currently use Aspire for everything.”
Since upgrading to Aspire Tim has been able to take more and more interesting projects, for work and for fun! This case study focuses on the latter and looks at how Tim used Aspire to machine 3D Shark models for his Grandkids.Inspired by another Vectric user who posted a 3D Christmas Camel project on the Vectric forum, Tim wanted to try something similar but new to him, as up until now all his work had been finished naturally. Although he could have designed and modeled the shark from scratch, he decided to check to see whether he had an interesting model to use in his 3D Clipart collection from VectorArt3D and found their 3D Great White Shark, knowing immediately that both grandkids would love to have one!
Tim’s aim was to create a big, impressive model that would pose problems if created out of wood, especially hanging from a wall, so he decided to try machining them in high density foam. I wanted it big and impressive, which in wood would have created something too heavy to hang on the wall as he explains:
“I needed to make two but decided to do one first and see how it went. Hoping to get both out of one sheet of 4' X 8' X 2" foam insulation sold at the local home improvement store”Teilelayout und Werkzeugwegerstellung in Aspire:
Für dieses Projekt nutzte Tim die 3D-Modell-Slicing-Funktion von Aspire, um den 1,20 m langen Hai in vier 5 cm dicke Z-Scheiben zu unterteilen. Das Bild rechts zeigt das anfängliche Layout und die Werkzeugwegvorschau für den ersten Hai.
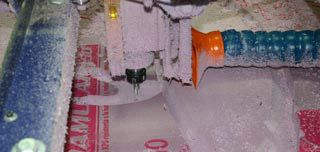
Um die Teile während der Bearbeitung zu fixieren, entschied sich Tim, Haltebohrungen in die Konstruktion einzubeziehen, um das Material auf dem CNC-Tisch zu befestigen. Diese Bohrungen wurden zuerst gefräst, daher wurde ein Bohrwerkzeugweg für eine Unterlegscheibe erstellt.
Im nächsten Schritt wurde der Schruppwerkzeugweg erstellt, der schnell große Mengen an überschüssigem Material abtrug. Nach dem Schruppen verlief der Schlichten schnell und reibungslos. Tim entschied sich für einen längeren Kugelfräser als üblich, um einen größeren Z-Freiraum zu erzielen.
Endbearbeitung und LackierungWith the machining completed, as well as a lot of vacuuming, it was time to assemble. Wanting to use supplies that he already had, Tim glued the layers together using Titebond 3 glue, however Tim has started using a different method after the first shark as he explains;
“The glue worked fine and the shark is still in one piece, but has since read that the glue may not set up on the interior surfaces. Therefore, for the subsequent sharks, I have used a 3M spray adhesive and that is working great”
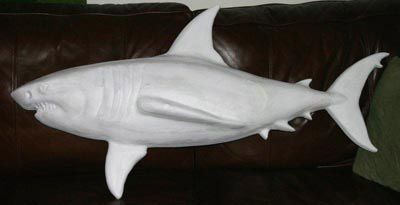
Here is a picture of the assembled shark after gluing the 4 layers together. Tim now needed to fill in and finish the rough edges and holes. Tim explains the method produced a great finish with cnc cut foam“I found sanding easiest with sponge sanding pads. The 60 and 80 grits worked the best, and with the soft sponge base, they were not as aggressive as the grit number would indicate. I used the 60 for some final shaping and smoothing followed by a heavy coat of Zinsser's water based primer. After letting the primer dry, I sanded all surfaces using the 80 grit sanding sponge.”
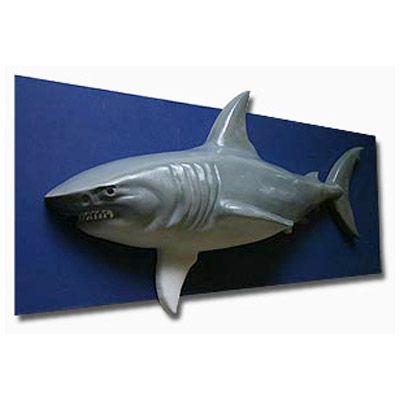
To fill in the small holes Tim mixed some light joint compound with a little water to achieve a pancake batter consistency and used a foam paintbrush to cover the entire surface (after the initial coat of primer).Nachdem Tim mit einem 80er-Schleifschwamm eine glatte und zufriedenstellende Oberfläche erzielt hatte, trug er eine letzte Schicht wasserbasierte Grundierung auf. Nach dem Trocknen wurde die gesamte Oberfläche mit einem 120er-Schleifschwamm ein letztes Mal geschliffen und schließlich mit glänzendem Rauchgrau lackiert, um Ober- und Unterseite fertigzustellen. Nach zwei Schichten Grau und Weiß verwendete Tim einen kleinen Pinsel, um mit preiswerter Acrylfarbe, die fast überall erhältlich ist, Augen und Zähne zu gestalten.
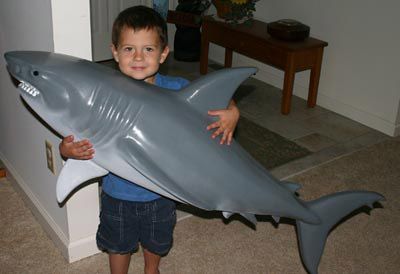
Tim erzählte uns, dass die Haie bei seinen Enkelkindern gut ankamen:
„Den ersten Hai bekamen meine beiden Enkelinnen. Sie waren begeistert, aber nicht annähernd so begeistert wie mein zweieinhalbjähriger Enkel. Es dauerte eine Weile, bis er ihn für das Foto festhielt, und er war nicht gerade begeistert davon, fotografiert zu werden, aber genau das macht die Mühe wert.“
Weitere Informationen zum Projekt finden Sie im vollständigen Thread im Vectric Forum.

Vectric Ltd
Precision House
2 Arden Road
Alcester
B49 6HN
Eingetragen in England unter der Nummer 05382596
Umsatzsteuer-Identifikationsnummer GB115123072
Datenschutzerklärung |
Cookie-Richtlinie |
Allgemeine Geschäftsbedingungen


