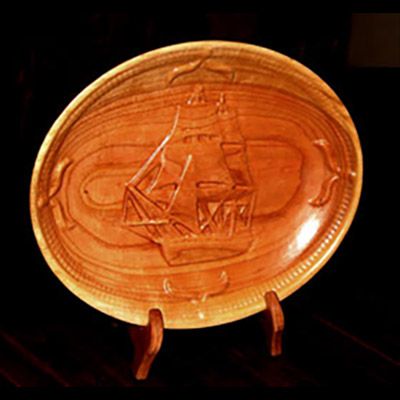
Tim Hornshaw – Propriétaire de Hornshaw Wood Works
Tim utilise tous les logiciels Vectric dans son atelier depuis environ deux ans. Il réalise des pièces de haute qualité, comme des meubles, des bols sculptés, des dévidoirs et accessoires pour la laine, des planches à découper et des panneaux sculptés, grâce à sa machine CNC eZ-Router.
Tim est récemment passé à la version Aspire et utilise les nouvelles fonctionnalités 3D pour élargir la gamme de produits sculptés qu'il propose sur son site web : www.hornshawwoodworks.com
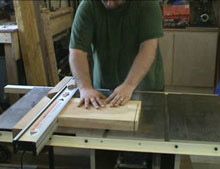
Pour ce projet, Tim s'est procuré un bloc de cerisier de 5 cm d'épaisseur auprès d'un fournisseur local et a utilisé la fraiseuse CNC pour usiner une face plane. Il a ensuite raboté et scié la pièce à la scie circulaire pour la mettre d'équerre. L'usinage précis du bois aux dimensions et à l'épaisseur requises est crucial pour ce projet, car le plateau est usiné des deux côtés du bloc, ce qui exige un alignement et un indexage précis.
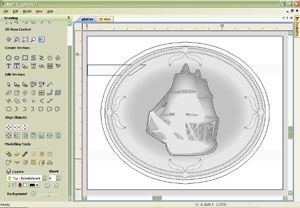
Une fois le matériau préparé, Tim explique comment il a utilisé Aspire pour concevoir les deux faces du plateau 3D et calculer les trajectoires d'outils d'ébauche et de finition.
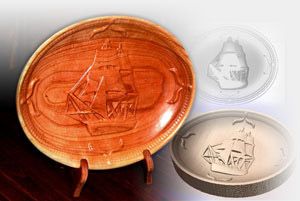
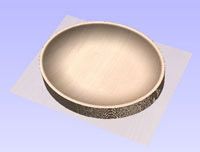
Un ovale a été dessiné pour représenter le bord extérieur du bol, décalé de 7,6 mm vers l'intérieur pour obtenir la forme incurvée intérieure. Le rebord du bol a ainsi une épaisseur de 6,35 mm et un dessus plat.La forme intérieure incurvée a été créée à l'aide de la fonction « Créer une forme à partir de vecteurs », et plus particulièrement du profil incurvé. Son angle a été fixé à 60 degrés et sa profondeur intérieure limitée à la valeur souhaitée, ce qui lui confère un fond plat. Ce modèle de base est ensuite enregistré en tant que composant et désactivé, facilitant ainsi la poursuite du projet. Le composant peut être sélectionné et modifié à tout moment. (Voir l'étape 1 ci-dessous)
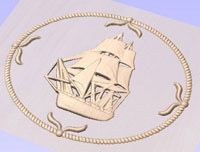
Le motif décoratif appliqué à la face intérieure du bol a ensuite été importé et positionné dans la vue de conception 2D. Pour ce projet, Tim utilise un modèle 3D de voilier acheté sur Internet. Il a également ajouté ses propres éléments 3D pour une bordure en corde et des nageoires caudales de baleine à l'aide de l'outil de création de formes 3D. (Voir l'étape 2 ci-dessous)Tim then used the same "Create shape" technique used on the top to create the underside of the bowl. Simply selecting the same outer oval vector at 60 degrees and limiting the height to the desired thickness for the platter. He then added the oval "foot" with the "Create shape" tool as well.
As this piece is being machined from 2 sides – the top and bottom faces of the 3D bowl – 2 simple boxes were merged into the design to act as 3D Tabs that hold the material in place when machining the back face. The bottom face of the bowl was then saved as a separate component so it can be switched on / off when required for machining.
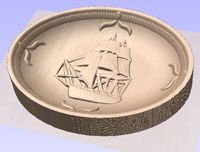
The decorative design elements were also saved as separate components ready for adding to the inside face of the bowl. Simply opening the Component Manager and Adding the components together produces the finished inside form for the bowl. (see step 3 above)The Hornshaw Wood Works brand name was added to the design – this is a standard vector clipart design that Tim applies to all of his products and can be imported and scaled ready for engraving at any size.
With the design complete, the next stage is to calculate roughing and finishing toolpaths for both sides of the bowl, plus the VCarved toolpath for the logo.
Tim commented;
" Calculating toolpaths really is the easiest part. All I have to do is open the Component Manager and switch-on each of the parts that I need to machine. So for example, to carve the inner bowl surface I turned on the recessed bowl plus the decoration, selected the 3D Roughing toolpath with a 1/2” End Mill leaving an allowance of 0.040” for the finishing tool to remove and Aspire instantly produced the required CNC code.I then selected the 3D Finishing toolpath option and used 1/4" Ball nose cutter for the smooth curved bowl and an 1/8” Ball Nose with a Raster cutting strategy to finish carve the detail of the ship. Aspire’s 3D Toolpath Preview then showed me exactly how the part will look when cut on my CNC router"
Going on to explain;
"I then switched on the components for the underside of the bowl, calculated and previewed roughing toolpath using the ½” end mill followed by a finishing toolpath using a 1/4” ball nose cutter for this outside of the bowl. The 3D Preview allowed me to see exactly how this project will look when carved and from my experience with the software – what I see on the computer is exactly what comes off the machine and this really does give me a lot of confidence."After completing the design in Aspire and saving the toolpaths ready to run on his router, Tim mounted the work piece onto the CNC table and held in place using four 2 1/2" long screws. One in each corner to hold the wood onto a jig that allows the material to be flipped over for cutting the backside of the bowl.
With the wood in place, the 1/2" end mill running at 100 ipm was used to rough out the inside of the bowl. Tim has found in other projects that it works best to run the roughing toolpath across the grain as this produces less tear out. The image below shows the result after rough machining. Note the screws in each corner.
Next the cutter was changed for a 1/8” Ball Nose and this was also run at 100 ipm to carve the detailed design onto the inside face of the bowl
With the inside of the bowl complete the material is unscrewed, flipped over and the top left corner located against the jig-stop to ensure correct alignment for cutting the outer surface.The 1/2" end mill roughing and 1/4” ball nose finishing toolpaths were then run to machine the underside of the bowl.
Finally the Hornshaw logo was engraved into the bottom face of the bowl using a 60 degree v-cutter
With the bowl finish machined on both sides a profile toolpath was calculated using the 1/2 “ end mill to cut around the outer perimeter, but leaving tabs in place to hold the job in the material. Tim commented "The new 'Project 2D Toolpath onto 3D Model' option ensured the tabs were at the correct depth in the material and this worked perfectly"
The tabs holding the bowl in place were cut using a hand-held rotary cutter and cleaned up to blend into the curved back face of the bowl. Tim then hand finishes the bowl and his tip for this stage is to use 150 grit sand paper to sand out the tool marks and follow the with a 3M sanding sponge to prepare the piece for finishing.After completing this project Tim said "The 3D toolpath preview functionality in Aspire made it very easy for me to see exactly how the bowl would look at each stage of carving. And the finished piece is exactly as I had designed it - and a wonderful new product for my business!"
Tim has documented the complete process for designing and cutting this project and a excellent video showing and explaining the machining process can be seen by clicking here >
To see more projects being made by Tim using the Vectric software products visit his web site - www.hornshawwoodworks.com

Vectric Ltd
Precision House
2 Arden Road
Alcester
B49 6HN
Immatriculée en Angleterre sous le numéro 05382596
Immatriculation à la TVA GB115123072
Politique de confidentialité |
Politique relative aux cookies |
Termes et conditions



