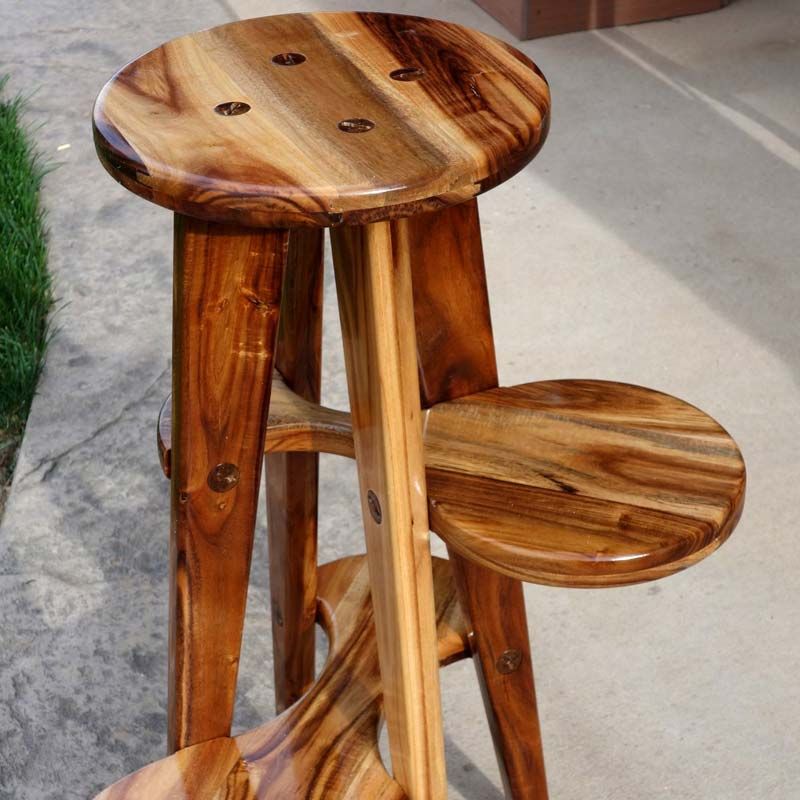
Here at Vectric HQ, we are always impressed by the projects made by our users. Gert Burkhardt’s Plant Stand project was one that stood out to us on the Vectric Forum due to the impressive use of the thread milling toolpath and the finish of the plant stand. For this month’s case study, we caught up with Gert and asked him about his background and how he got into CNC…
As an EE and ME by trade, I worked in electronics hardware development, engineering management, and operations management, finally retired in 2017 (yay!).
I have been a woodworker since childhood because my dad was a woodshop and arts teacher (a long time ago in Germany). However, for most of my life I did not have a shop and only minimal equipment, limiting my woodworking activities.
Only for the last 15 years I found the space and became interested in CNC woodworking. I purchased a small NextWave Shark (including VCarve Pro) in 2011 and learned the basics but sold it after a few months. However, this machine allowed me to cut the parts for my own home-made mid-size CNC router. The latter is made mostly of bamboo plywood, quite rigid and massive at 750 pounds, and has served me well for the last 9 years.Pour certains projets, j'ai développé mon propre logiciel de FAO dédié, permettant par exemple de réaliser des assemblages à tenons et mortaises usinés à plat, de calculer des motifs labyrinthiques, des trajectoires d'outils et des motifs guillochés. J'ai vendu ces applications en parallèle de mon activité principale pendant plusieurs années, mais j'ai arrêté l'année dernière, car assurer un service client en temps réel en tant qu'entrepreneur individuel peut s'avérer assez difficile.
Nous voulions en savoir plus sur les raisons qui l'ont poussé à créer ce support à plantes.…
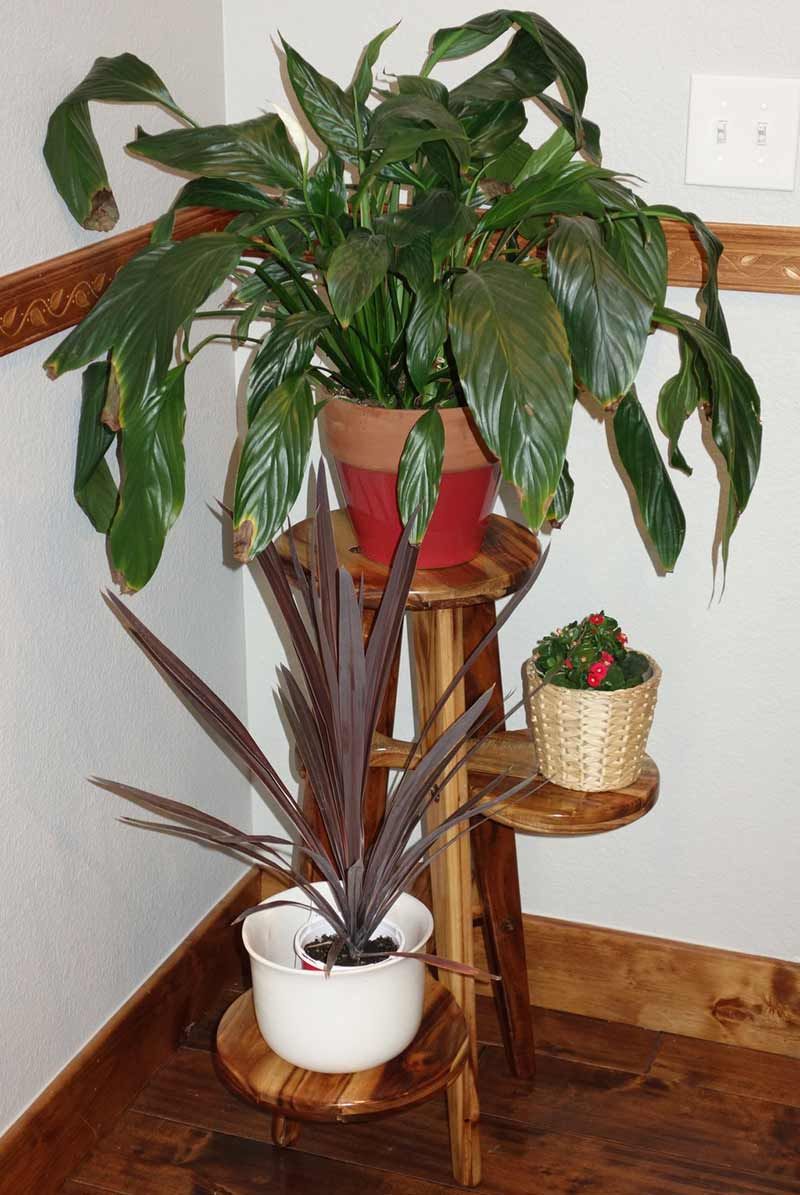
Nous avons déménagé au Colorado en début d'année (je me suis assuré que la maison dispose d'un atelier de 120 m² au sous-sol) et, pour la nouvelle salle à manger, nous avons acheté des meubles en acacia massif. Cependant, il restait un coin vide que nous souhaitions décorer avec des plantes. Après avoir consulté les sources habituelles, nous n'avons rien trouvé qui nous plaise ou qui s'accorde avec le style rustique des autres meubles. J'ai donc décidé de concevoir et de fabriquer mon propre support à plantes.
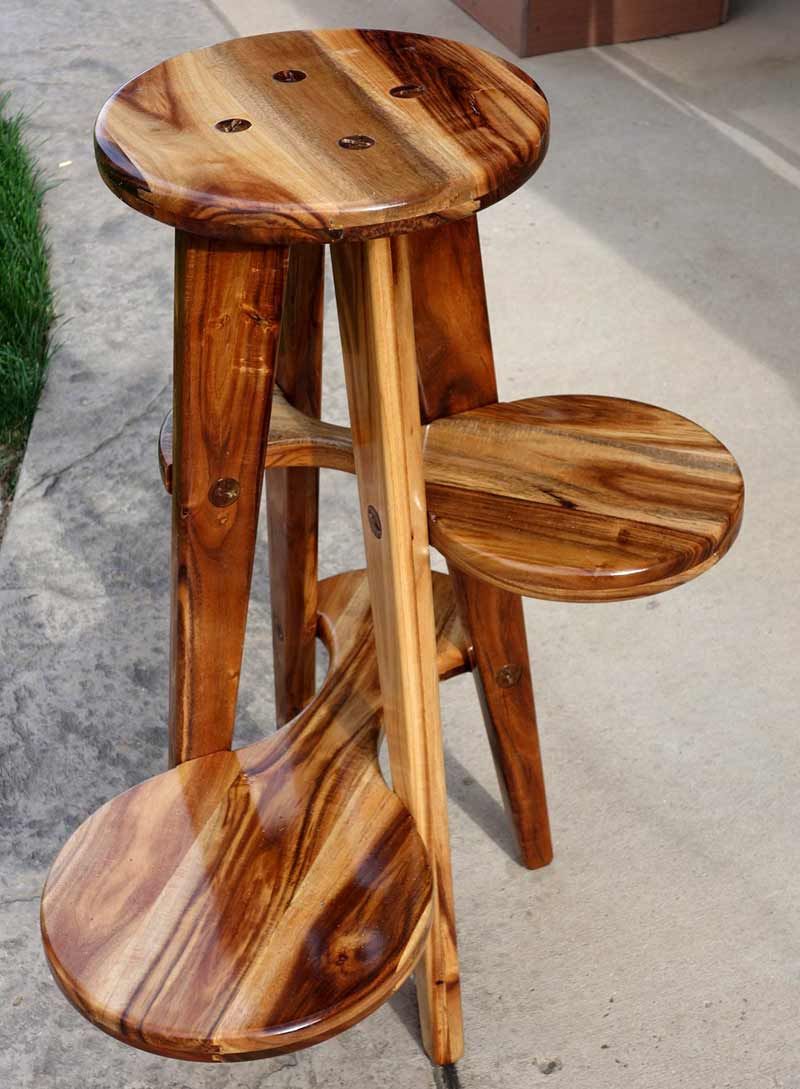
Après avoir eu l'idée et rassemblé les matériaux, Gert s'est mis au travail pour planifier et concevoir le projet…Il est fabriqué en bois d'acacia massif. J'adore ce matériau et son veinage si particulier. Il est très dur et dense, s'usine facilement sans peluches et se ponce très facilement. L'acacia n'est pas huileux comme beaucoup d'autres bois exotiques et n'encrasse pas les abrasifs. Il se colle très bien.
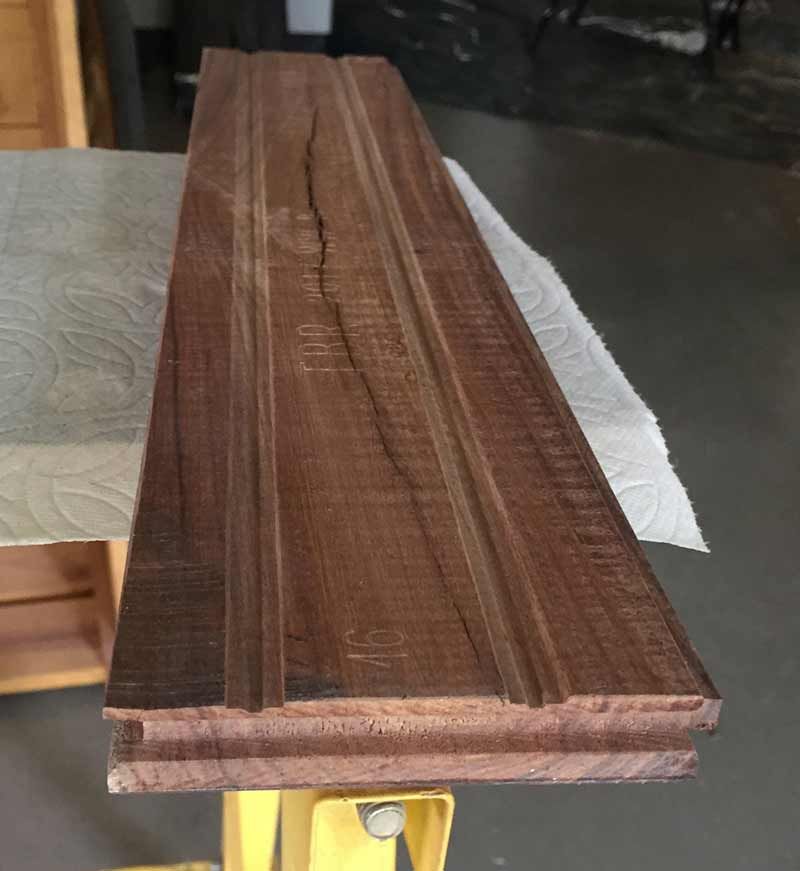
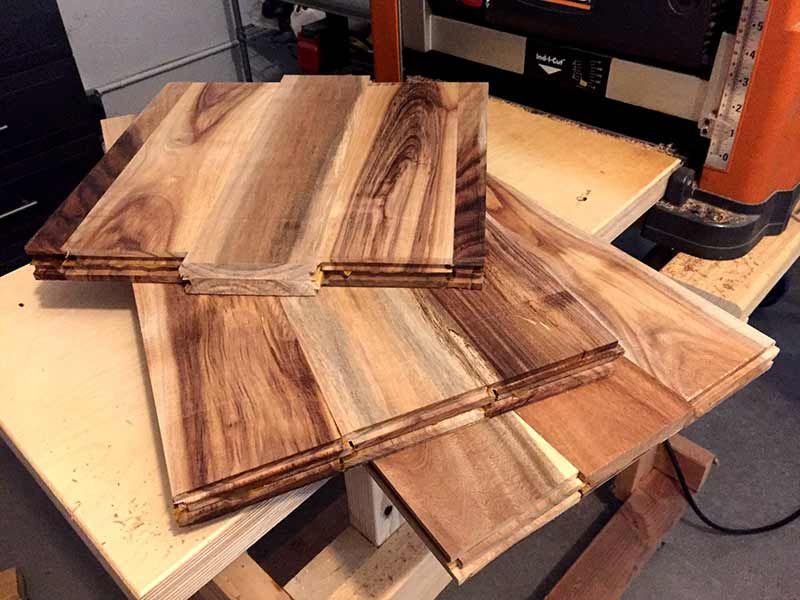
Cependant….il est presque impossible de trouver du bois de construction ici (à ma connaissance). J'ai donc fini par acheter une boîte de 2,4 m² de lames de parquet en acacia chez un fournisseur local. Elles faisaient 19 mm d'épaisseur, mais après avoir raboté les nervures au dos et poncé la surface au tambour, il ne restait plus que 14 mm. L'utilisation d'une fraise hélicoïdale en carbure pour la raboteuse s'est avérée très utile, car ce bois est extrêmement dur (dureté Janka 2200).
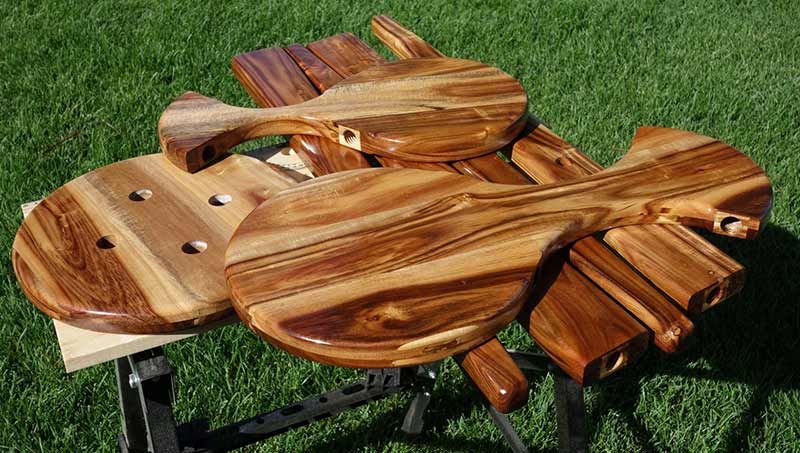
Avec les planches rabotées (la moitié de la boîte), j'ai collé les ébauches en double épaisseur (à 28 mm) pour usiner les composants sur la CNC.I hand sketched a few ideas of how to allow for 3 potted plants in a room corner and ruminated over that for a week. At some point, I focused on the barstool like design and how to attach the lower shelves to the legs.
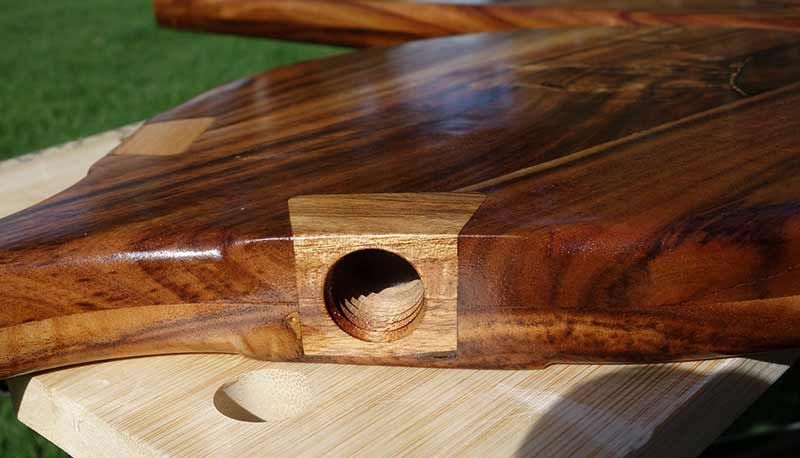
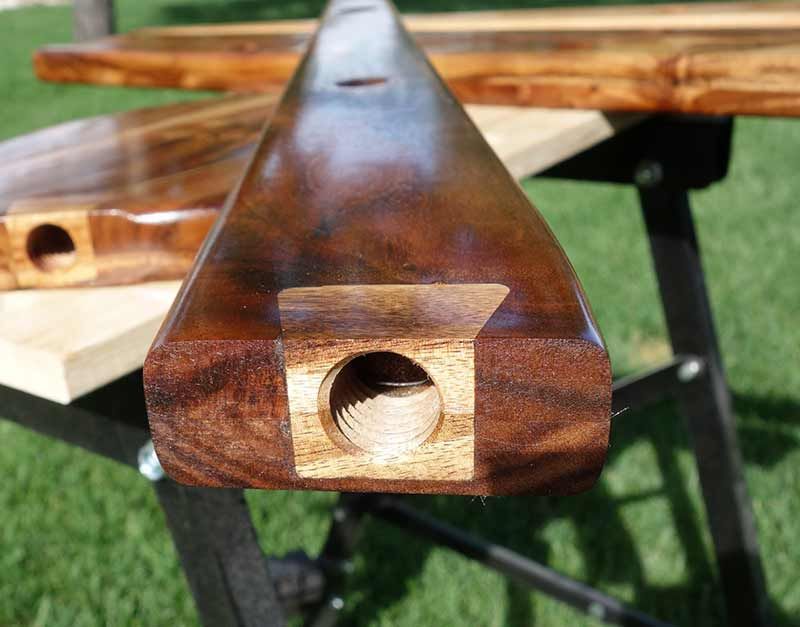
At first, I had planned on using a glued mortise/tenon attachment. But the new Aspire version with threading tool path came out just in time to change my mind and consider a bolted construction with wooden screws.
The detailed design was made using IRONCAD, a mechanical design package that I have been using for 20+ years. Not as well-known as e.g. Solidworks, it has similar capabilities (and price…). I did not need 3D models for this project and transferred only the 2d-drawings as .dwg to Aspire. There I completed the 2D work for the hole circles, threads, nut recesses, and rounded bevel guide vectors.I did not need special features of the CAD software. Once I had the idea, it was a very basic mechanical design. It could have been done as well in many different CAD software like Sketchup that allow for assemblies.
Gert then went onto talking about the toolpaths and cutting the project…
Obviously, the threaded tool paths were the key feature I wanted to try out. But otherwise, I used pocket and profile toolpaths as well as moulding and drilling toolpaths. The moulding toolpaths were strictly for radius bevelling of the shelf and leg edges. This could have been done faster by hand with a roundover bit but, well, I do not have a working handheld router anymore….
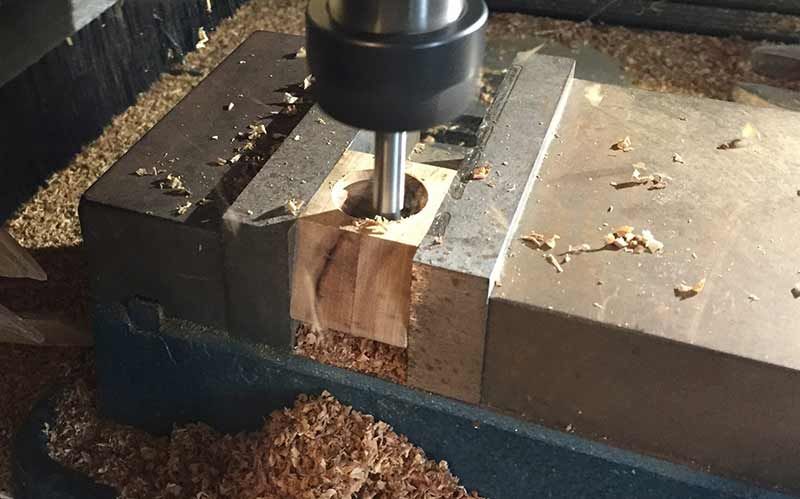
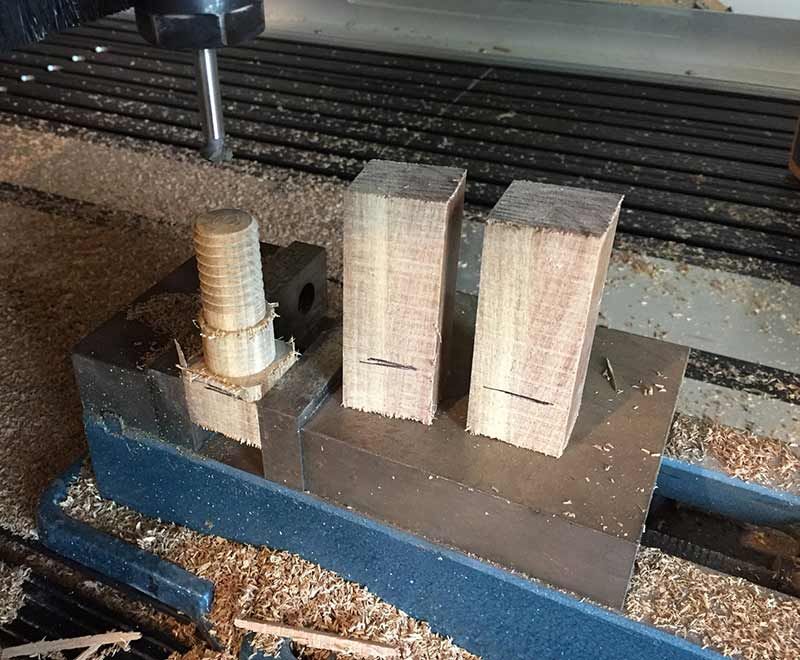
I did all the profile, pocket, and drill cuts with a ¼” upcut endmill (the simple Freud brand carbide bits from Home Depot) at a modest 0.15” depth, ~12k rpm, and varying feed rate 40ipm for drilling up to 150ipm for straight cuts. Being a one-off project in unknown material I was rather conservative.Le filetage a été réalisé avec un foret Magnate à 90 degrés similaire au n° 796 (je ne me souviens plus de la référence exacte) et le chanfrein avec une fraise à bout sphérique de 6,35 mm (¼") de provenance inconnue. Seules les fentes pour tournevis dans les têtes de vis ont été réalisées avec un foret de 3,175 mm (1/8").
Gert a expliqué la finition et la construction du projet avec quelques réflexions.…
Après l'usinage, toutes les pièces ont été poncées à la ponceuse orbitale (ROS) au grain 80 jusqu'à disparition complète des marques d'usinage, puis aux grains 120, 240 et enfin 400. Le ponçage a duré au total environ 2 à 3 heures. Après le grain 400, le bois a commencé à briller.
Une première couche de finition à l'huile danoise a été appliquée et laissée sécher toute la nuit. Le grain du bois est alors ressorti magnifiquement et je m'en serais normalement tenu là, avec peut-être une deuxième couche d'huile.Cependant, compte tenu de l'usage prévu et du risque d'infiltration d'eau, j'ai appliqué une généreuse couche de vernis polyuréthane semi-brillant (Varathane Triple-Thick) sur toutes les pièces. Le résultat est toujours esthétique, mais je n'apprécie pas vraiment l'aspect un peu plastique du polyuréthane.
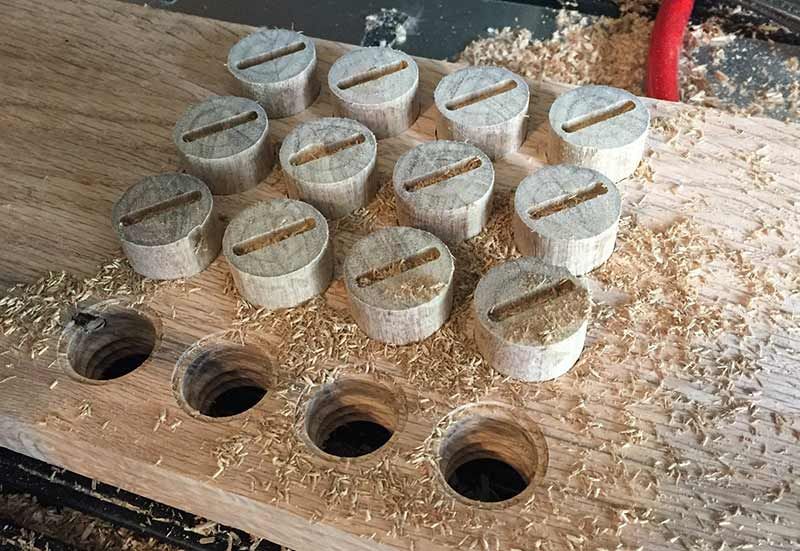
J'aimerais réaliser d'autres projets avec du bois d'acacia, mais cela se limite aux petites pièces que l'on peut fabriquer, par exemple, à partir de planches à découper en acacia bon marché. La méthode de collage utilisée pour ce projet est possible, mais le rabotage, le ponçage et le collage des ébauches ont pris presque autant de temps que le reste du projet. Je ne pense pas recommencer.Les vis en bois et les inserts filetés ont été coupés individuellement dans un étau. J'ai procédé ainsi principalement pour éviter de fabriquer un gabarit spécial pour plusieurs pièces. L'inconvénient était le nombre important de changements d'outils (fraise pour la forme de la vis et de la tête, et mèche à fileter) et d'échanges de pièces. Cela m'a agacé et j'ai cherché une méthode pour usiner en série toutes les vis et tous les écrous nécessaires (12 de chaque) en une seule fois.
Comme mentionné précédemment, sans le risque de dégâts d'eau, je n'utiliserais pas de vernis polyuréthane sur des meubles de valeur. L'huile danoise (ou huile de tung) donne un aspect beaucoup plus naturel.
Nous avons ensuite demandé à Gert s'il avait des conseils à donner aux autres artisans.…
Voici quelques avantages et inconvénients de l'utilisation des connecteurs filetés (comparativement aux assemblages à tenon et mortaise) pour la fabrication de meubles :
Avantages :
L'assemblage est très solide. Je pense qu'il est tout à fait comparable aux assemblages à tenon et mortaise.
Bien sûr, il peut être démonté pour le rangement, le transport ou l'expédition.If a joint becomes loose over time it can be just re-tightened, no disassembly and re-gluing.
All parts can be finished before assembly, saving a lot of time and much cleaner to do without tight corners and inaccessible spots
Depending on the design, such wooden screws can look unique.
Con’s:
It takes additional time to make the screws and inserts (although, if a CNC machine can do vertical clamping the boards could be threaded directly without inserts)
For solid wood screws, e.g ¾” diameter or more, a board thickness of 1” or more is required for the threaded inserts (nut). The method shown here would not work with ¾” boards. In that case, the position of screw and nut should be reversed (i.e. a threaded bolt insert glued into the board and fastened to the adjoining part with a loose nut).
Mortise/Tenon joints can be made completely blind. I have yet to figure out how to do this with threaded connectorsGert’s hard work has clearly paid off and shows in this project and hopefully many more to come. Before we let him go, we asked Gert what plans he had for the future…
Well…this project was a pleasant distraction from the sad reality that my shop is not yet fully set up. I still have some 40 moving boxes with tools, parts and materials that need to be unpacked and organized. I guess now I will go back and just get that done. After that, maybe new bathroom furniture but my interest changes daily. I am suffering from a serious case of project ADHD.
We wanted to say a huge thank you to Gert for taking the time to talk to us about his project so that we could inspire our community to try something new. If you have a story you would like us to feature, please get in touch, simply email online@vectric.com. We would love to hear from you.

Vectric Ltd
Precision House
2 Arden Road
Alcester
B49 6HN
Immatriculée en Angleterre sous le numéro 05382596
Immatriculation à la TVA GB115123072
Politique de confidentialité |
Politique relative aux cookies |
Termes et conditions



