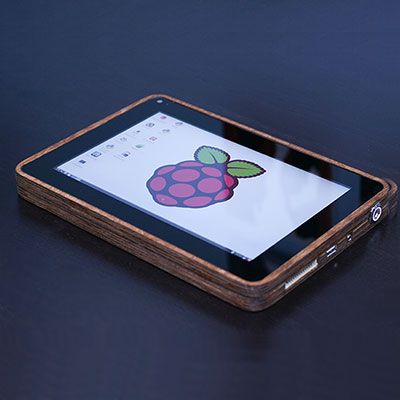
Michael Castor est responsable de l'innovation produit chez Maker Shed, la branche e-commerce de Make Magazine. Autrement dit, Michael a la chance de sélectionner et tester toutes sortes de gadgets, appareils et kits aussi originaux qu'ingénieux, vendus par Maker Shed à des personnes comme nous chez Vectric ! Comme vous vous en doutez, Michael est lui-même un passionné de création et ce mois-ci, il nous explique comment il a fabriqué sa propre tablette graphique à l'aide de deux fraiseuses CNC et d'une copie d'Aspire. Dans un prochain numéro de la newsletter, nous découvrirons un incroyable « quadricoptère » également créé par Michael. Avant d'aborder la fabrication de sa « Pi-Pad », Michael commence par nous expliquer comment est né son intérêt pour le potentiel des machines CNC.
Right after I graduated college I met a guy who engraved Corian counter top material with a computerized engraver. After I found out that it was possible for me to own a machine that could turn CAD files into actual parts, I decided I had to have one. I'm a maker at heart and love the precision and repeatability that CNC provides. Also, it's amazing to have the ability to turn your digital creations into reality.
I quickly became obsessed with personal fabrication and building my own CNC machine. Using 100Kgarages.com I got in touch with a guy who lived an hour away who had a ShopBot so I asked if I could come by and see his machine in action. He agreed and gave me an overview of the start-to-part software toolchain, bit selection, and hold-down methods.Il m'a aussi montré comment utiliser des goujons comme repères pour mes pièces et comment tracer les trous de vis pour éviter de les heurter pendant la découpe. Peu après, j'ai acheté ma machine et j'ai pu la mettre en marche. Ma machine principale est [maintenant] une CNC de 60 x 90 cm que j'ai construite moi-même, à partir de profilés en aluminium 8020 et de pièces de CNCRouterParts.com. Je possède également une ShapeOko2 d'Inventables et une imprimante 3D Ultimaker.
Mais Michael n'était pas satisfait des résultats obtenus avec son premier logiciel :
J'ai commencé à chercher d'autres solutions, gratuites et payantes, et j'ai découvert Cut2D de Vectric. Après avoir téléchargé la version d'essai et l'avoir testée, je l'ai achetée et j'en ai été ravi. C'était très intuitif, facile à utiliser et cela a complètement changé ma façon d'utiliser ma machine. J'ai ensuite opté pour V-Carve Pro pour ses fonctionnalités supplémentaires et je suis maintenant l'heureux propriétaire d'une Aspire.Michael a récemment attiré l'attention de nombreux internautes grâce à un boîtier innovant pour Raspberry Pi. Le Raspberry Pi est une initiative britannique visant à créer un ordinateur entièrement fonctionnel pour seulement 30 dollars. Comme on peut s'y attendre pour ce prix, on n'obtient guère plus qu'une simple carte électronique, mais la contribution de Michael va bien au-delà d'un simple boîtier.…
Mon objectif pour le PiPad était de le rendre simple, fonctionnel et suffisamment professionnel pour que la TSA l'autorise aux contrôles de sécurité des aéroports. La difficulté principale de ce projet a été d'intégrer tous les composants nécessaires dans un format aussi compact que possible. En plaçant tous les composants sur un scanner et en utilisant la fonction de vectorisation d'image, j'ai pu optimiser l'agencement interne et m'assurer que tout s'emboîte correctement. Ensuite, j'ai utilisé les décalages pour reproduire les bords arrondis de l'écran et donner au PiPad une apparence harmonieuse.
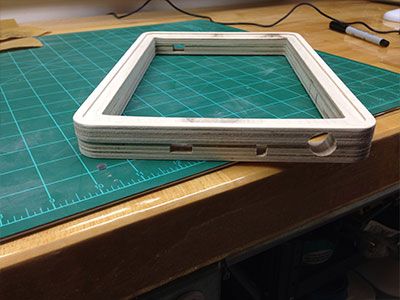
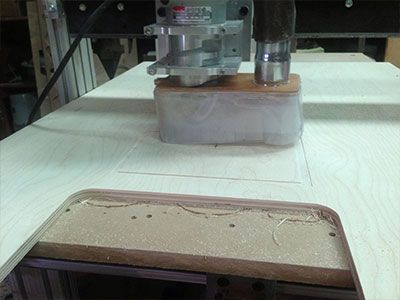
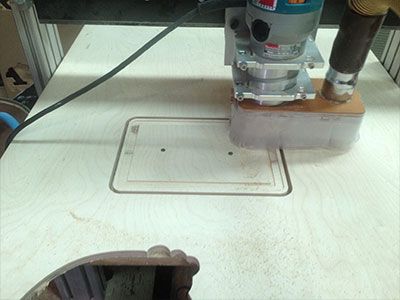
Originally I intended to machine the ports but since this would have been my first experience with multi-sided machining and since I was pressed for time, I ended up abandoning the idea. I machined the frame out of 1/2" Baltic Birch plywood using a1/4" down-spiral bit to help keep the thin plies from splintering. After machining, the frame was sanded with 120 grit sandpaper and the ports were cut in using an X-acto knife. After the hinges were installed I cleaned up the edges with a belt sander then wiped it clean using a damp paper towel.
After the frame was dried, I applied several coats of WatcoDanish Oil finish then applied clear lacquer for durability. The backing was made from carbon fibre which machines well but takes some precautions.Carbon fibre dust is extremely harmful if inhaled. Before machining, I used a spray bottle to apply a thin coat of water on top of the material and machined through that using 1/16" carbide grout removal bit (Dremel #569.) This effectively turns the fine carbon dust into a soot that can be wiped away with a paper towel and safely discarded (make sure to wear a respirator as well.)After machining, I used 220 grit sandpaper and sanded edges under running water to remove any possible splinters.
Once the frame was completed the components were mounted inside the case. Due to height restrictions, I had to remove the Ethernet port and one of the two USB ports for clearance. After that, it was a relatively simple matter of wiring everything upand mounting it into place using foam tape or double sided adhesive.
To download the design files for this amazing project please visit:
www.mkcastor.comNous tenons à remercier Michael d'avoir partagé son expérience avec Aspire sur ce projet innovant et nous vous invitons à consulter prochainement le récit de la construction de son quadricoptère dans la newsletter.

Vectric Ltd
Precision House
2 Arden Road
Alcester
B49 6HN
Immatriculée en Angleterre sous le numéro 05382596
Immatriculation à la TVA GB115123072
Politique de confidentialité |
Politique relative aux cookies |
Termes et conditions



